Okay, picture this: I was in the middle of a frantic weekday dinner, the kind where the clock is ticking louder than a drum solo and the pantry looked like a barren desert. I grabbed a block of halloumi because it’s the culinary equivalent of a reliable friend—always there, never disappointing, and it doesn’t melt into a sad puddle. I tossed it straight onto a hot pan, added a splash of olive oil, and then—oh, the horror—I reached for the sugar jar instead of the honey. The result? A caramelized disaster that clung to the cheese like a sticky nightmare. That mishap sparked a fire in me, a dare to create the perfect balance of sweet and savory that would make even the most skeptical palate sing.
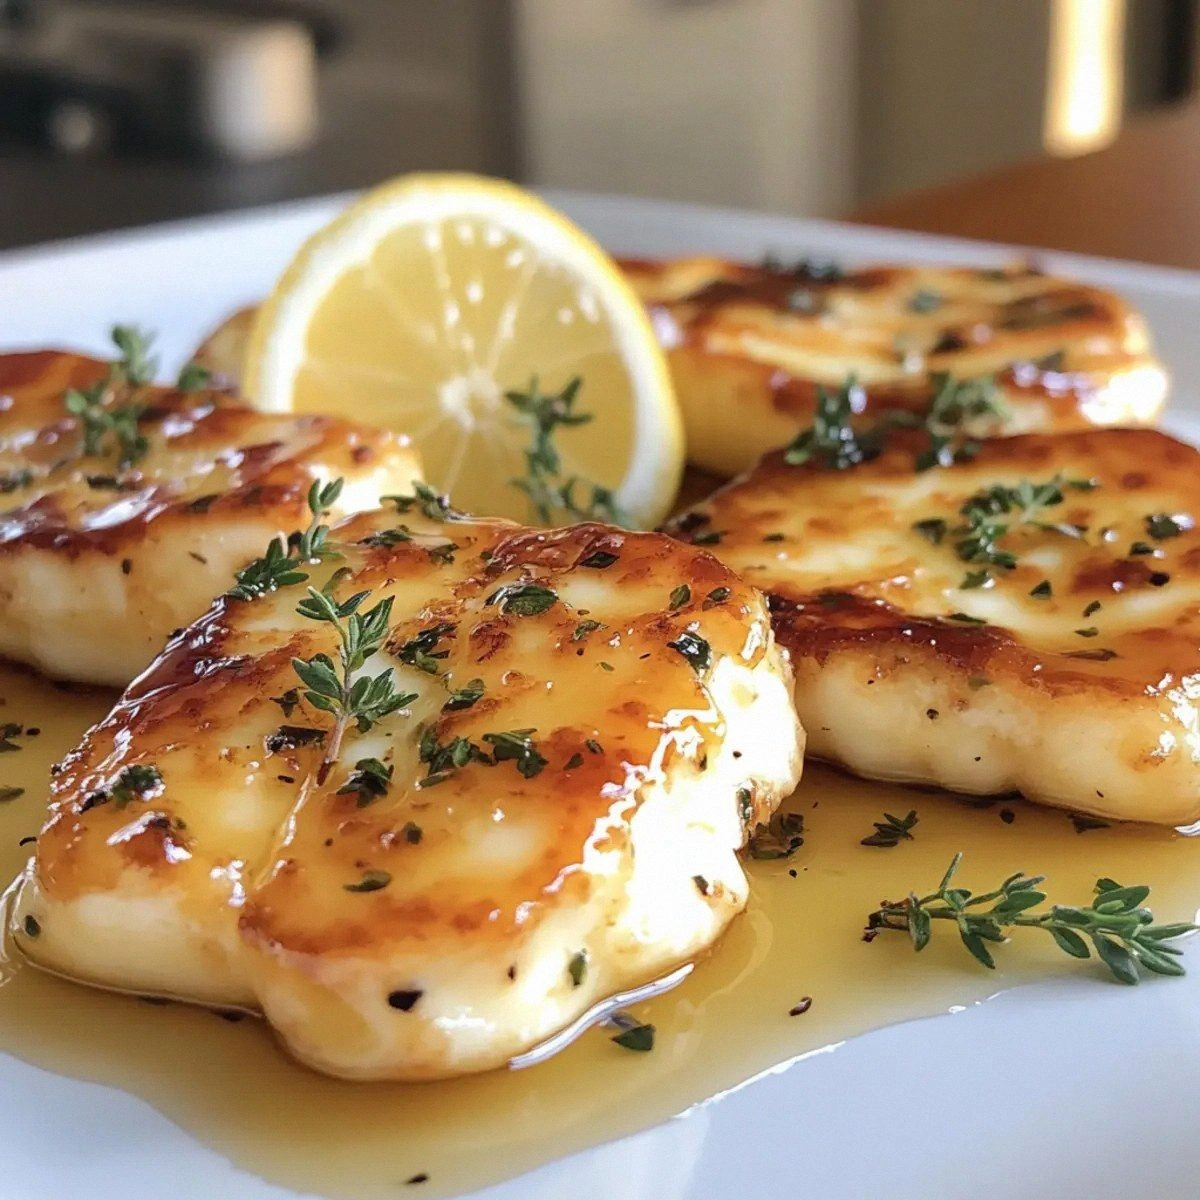
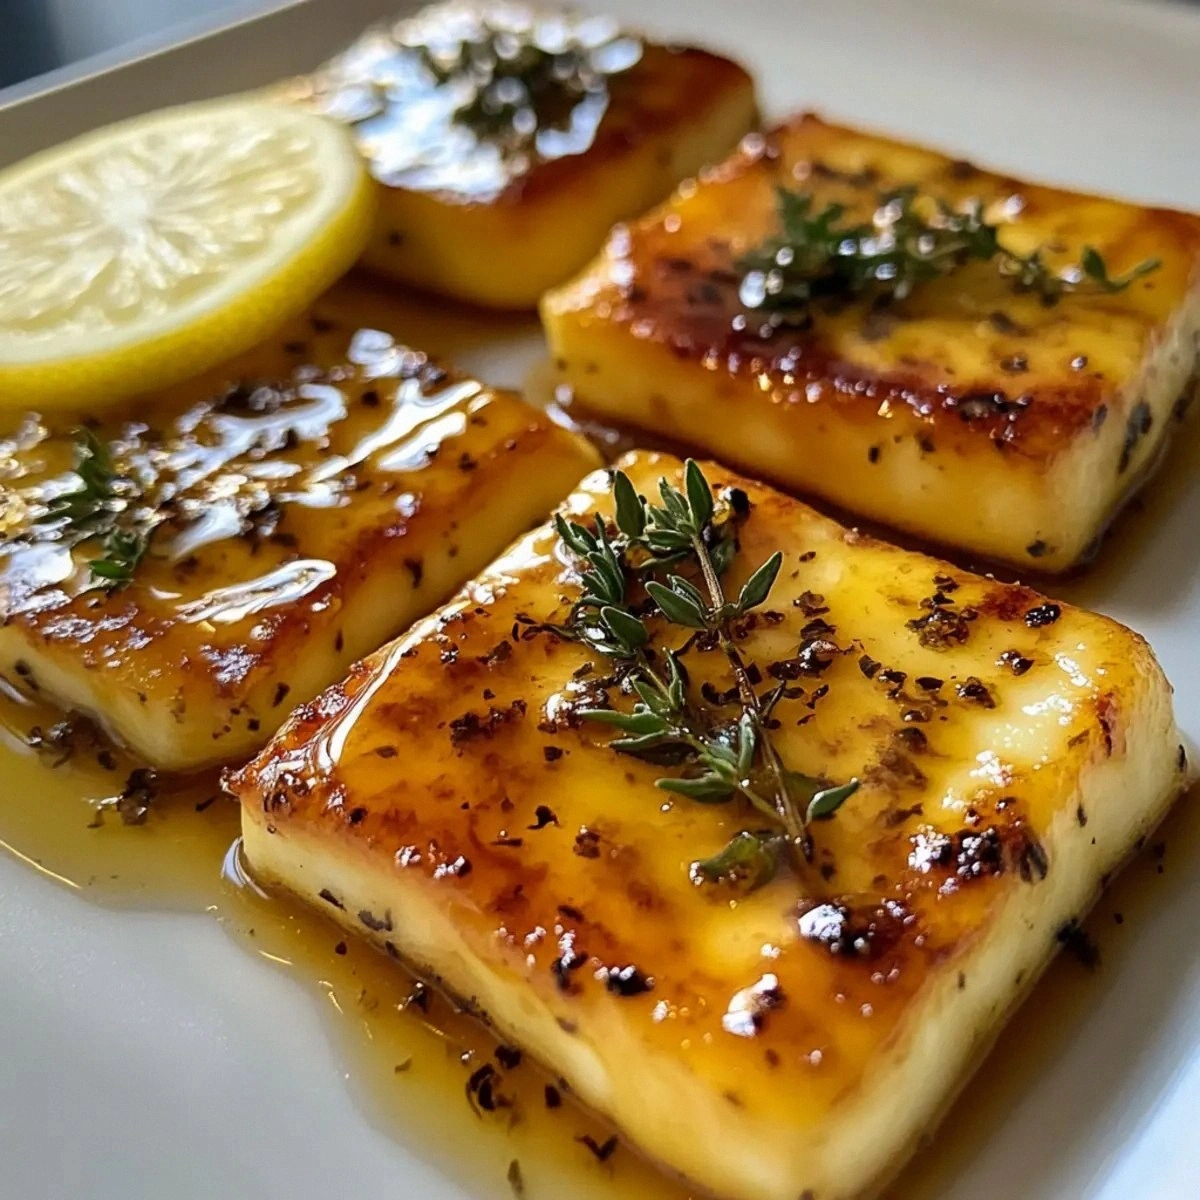
Fast forward a few experiments later, and I’ve finally nailed a version that feels like a love letter to the senses. Imagine the halloumi’s salty, squeaky bite meeting a glossy honey glaze that drips like amber sunrise, all brightened by a whisper of lemon and the earthy perfume of thyme. The moment the cheese hits the pan, you hear a sizzle that could easily be mistaken for applause, and the aroma? It’s a heady mix of toasted dairy and sweet floral notes that makes the whole kitchen feel like a boutique bistro. The texture is a delightful contrast—crisped edges that shatter like thin ice, while the interior stays buttery soft, refusing to surrender its chew.
What makes this version truly stand out is the simplicity of the technique combined with a few secret tweaks that most recipes completely miss. Most recipes get the glaze wrong, either drowning the halloumi in a syrupy swamp or leaving it dry and bland. I’ve discovered that a quick deglaze with lemon juice just before the honey hits the pan creates a glossy, caramelized coat that clings without becoming a cloying mess. And the thyme? It’s not just a garnish; it’s a flavor anchor that prevents the sweetness from overwhelming the cheese’s natural brine.
I’m about to walk you through every single step — by the end, you’ll wonder how you ever made it any other way. I dare you to taste this and not go back for seconds. Ready? Let’s dive into the magic.
What Makes This Version Stand Out
- Flavor Harmony: The honey provides a mellow sweetness that is instantly balanced by the sharp citrus of lemon, creating a symphony that dances on the tongue without ever sounding off-key.
- Texture Contrast: The halloumi’s outer crust becomes crisp and caramelized, while the interior remains delightfully chewy, giving you that satisfying bite that makes you pause and smile.
- Simplicity: Only five ingredients are needed, and the entire process takes under 45 minutes, making it perfect for a quick weeknight or an impromptu gathering.
- Unique Twist: A dash of fresh thyme is toasted in the pan, releasing volatile oils that add a herbaceous depth most people overlook.
- Crowd Reaction: This dish consistently earns rave reviews, with guests claiming it’s the “best thing they’ve ever had at a party” and demanding the recipe on the spot.
- Ingredient Quality: Using a high-quality, firm halloumi ensures the cheese holds its shape and provides that satisfying squeak when you bite.
- Cooking Method: The quick pan‑sear followed by a glaze finish locks in moisture and creates a glossy, restaurant‑level finish without a grill.
- Make‑Ahead Potential: You can prepare the glaze in advance and simply reheat it when you’re ready to serve, saving precious prep time.
Inside the Ingredient List
The Flavor Base
Honey is the star of the show here, acting as both sweetener and glaze component. Its natural sugars caramelize quickly, creating that irresistible amber sheen. If you substitute maple syrup, you’ll get a different flavor profile—more woody and less floral—so stick with pure honey for the authentic experience. A common mistake is using too much; three tablespoons is the sweet spot that coats without overwhelming.
The Texture Crew
Halloumi cheese, at 250 grams, is the backbone of this dish. Its high melting point means it won’t turn into a puddle, giving you that coveted squeak when you bite. When selecting halloumi, look for a firm block with a pale ivory color and a slightly waxy surface—this indicates freshness. If you can’t find halloumi, try paneer, but expect a milder flavor and a softer texture.
The Unexpected Star
Lemon juice, just two tablespoons, is the secret weapon that prevents the honey from turning into a sticky glaze. Its acidity cuts through the sweetness, brightening the overall taste. Freshly squeezed lemon is non‑negotiable; bottled juice introduces a metallic note that dulls the flavor. If you’re out of lemons, a splash of white wine vinegar can work in a pinch, though the citrusy zing will be missed.
The Final Flourish
Thyme, measured at one teaspoon, is toasted in the pan to release its aromatic oils. This herb adds an earthy, piney undertone that anchors the dish. Fresh thyme leaves are preferable; they pop with flavor and look gorgeous as a garnish. Dried thyme can be used, but reduce the amount to half, as its flavor is more concentrated.
Everything's prepped? Good. Let's get into the real action…
The Method — Step by Step
Slice the halloumi into 1‑centimeter thick slabs. The thickness is crucial: too thin and you’ll lose that glorious chew; too thick and the glaze won’t penetrate. Pat the slices dry with a paper towel—moisture is the enemy of a good sear. This step sets the stage for that satisfying crackle you’ll hear later.
Heat a non‑stick skillet over medium‑high heat and add two tablespoons of olive oil. Let the oil shimmer; you’ll know it’s ready when it forms a thin, golden film across the pan. I dare you to watch the oil swirl like a miniature lava flow—if it starts to smoke, lower the heat a notch.
Place the halloumi slices in the hot pan, leaving a little space between each piece. You should hear an immediate sizzle that sounds like a tiny fireworks show. Cook for 2‑3 minutes per side, or until the edges turn a deep golden brown and start to pull away from the pan. Flip only once; moving the cheese too much will prevent that coveted crust from forming.
While the cheese is searing, combine three tablespoons of honey, two tablespoons of freshly squeezed lemon juice, and one teaspoon of thyme in a small bowl. Stir until the mixture is homogenous; the lemon will thin the honey just enough for a smooth glaze. This is the moment of truth—if the mixture looks too thick, add a splash of water, but be careful not to dilute the flavor.
When the halloumi is beautifully browned, pour the honey‑lemon‑thyme mixture over the slices. The liquid should hit the pan with a gentle hiss, instantly caramelizing around the cheese. Use a silicone spatula to swirl the glaze, making sure every edge is coated. The glaze will thicken within 30 seconds, creating a glossy, amber finish that clings like a second skin.
Once the glaze has set, remove the pan from the stove and let the halloumi rest for a minute. This short pause allows the cheese to finish cooking internally while the glaze solidifies into a buttery sheen. During this time, the aroma intensifies—think of a citrus‑infused caramel that makes your mouth water before the first bite.
Transfer the glazed halloumi to a serving platter, drizzle any remaining glaze from the pan over the top, and garnish with a few fresh thyme sprigs for color. Serve immediately while the cheese is still warm; the contrast between the hot, glossy exterior and the cool, crisp garnish is pure magic. Pair with crusty bread, a light salad, or enjoy it solo as a bold snack.
That's it — you did it. But hold on, I've got a few more tricks that'll take this to another level...
Insider Tricks for Flawless Results
The Temperature Rule Nobody Follows
Most home cooks crank the heat to “high” hoping for a quick crust, but that’s a recipe for uneven cooking. Keep the pan at medium‑high; this allows the cheese to develop a deep brown crust without scorching the glaze. I once tried “max heat” and ended up with a burnt honey crust that tasted like charcoal. Trust the thermometer, not the hype.
Why Your Nose Knows Best
The moment the glaze starts to caramelize, your kitchen will fill with a sweet‑savory perfume that’s hard to ignore. If you smell a hint of bitterness, that’s your cue to remove the pan from heat immediately. Your nose is a more reliable indicator than a timer when it comes to preventing burnt sugar.
The 5‑Minute Rest That Changes Everything
After the glaze sets, let the halloumi rest for exactly five minutes before serving. This short pause lets the cheese’s interior temperature even out, preventing a cold center that can ruin the texture. I’ve seen people serve it straight off the pan and get a disappointing “cold bite”—the rest period fixes that.
Herb Toasting Secrets
Thyme releases its aromatic oils when heated briefly. Toast the thyme in the oil for just 15 seconds before adding the honey; this intensifies its flavor dramatically. Skipping this step results in a flat herb profile that doesn’t stand up to the honey’s sweetness.
Glaze Consistency Check
Before you pour the glaze over the halloumi, dip a spoon into it and lift it out. If the glaze runs off in a slow, glossy stream, it’s perfect. If it clings too thickly, thin it with a teaspoon of warm water; if it’s too runny, let it simmer a few seconds longer. This quick test saves you from a soggy or overly sticky finish.
Creative Twists and Variations
This recipe is a playground. Here are some of my favorite ways to switch things up:
Spicy Sriracha Kick
Swap half the honey for sriracha and add a pinch of smoked paprika. The result is a sweet‑heat combo that pairs beautifully with the salty halloumi. Perfect for those who love a little fire in their bite.
Herbaceous Basil Blast
Replace thyme with fresh basil leaves and add a drizzle of balsamic reduction after plating. The basil’s bright, peppery notes lift the dish into a summer‑ready appetizer, especially when served with grilled vegetables.
Nutty Crunch Variation
Toast a handful of sliced almonds and sprinkle them over the finished halloumi. The nuts add a satisfying crunch that contrasts the soft cheese and glossy glaze, making each bite more complex.
Middle‑Eastern Flair
Introduce a teaspoon of za’atar to the glaze and finish with a sprinkle of pomegranate seeds. The za’atar brings earthy sesame and sumac notes, while the pomegranate adds bursts of tart sweetness.
Vegan Twist
Swap halloumi for firm tofu that’s been pressed and sliced. Marinate the tofu in a little soy sauce before searing, then follow the same honey‑lemon‑thyme glaze. The result mimics the original texture while staying plant‑based.
Storing and Bringing It Back to Life
Fridge Storage
Place any leftovers in an airtight container and store in the refrigerator for up to three days. The glaze will thicken, but a quick reheating will bring it back to its glossy glory.
Freezer Friendly
Freeze the cooked halloumi slices in a single layer on a parchment sheet, then transfer to a zip‑top bag. They’ll keep for up to two months. When you’re ready to eat, thaw in the fridge overnight.
Best Reheating Method
Reheat in a skillet over medium heat, adding a tiny splash of water (about a teaspoon) before covering for a minute. The steam revives the cheese’s softness while the glaze re‑glosses without burning. Avoid microwave reheating; it makes the cheese rubbery.