It was a scorching July afternoon, the kind that makes you wish you had a fridge full of ice and a recipe that could turn that heat into a sweet, cooling delight. I was halfway through a week of overcooked chicken and underseasoned rice, and my craving for something that could double as a dessert and a snack hit me like a summer thunderstorm. I stared at the pantry, my eyes darting from the canned peaches to the jar of fresh berries, and thought, “Why not combine them into a cheesecake that tastes like a fruit‑filled oasis?” That single thought sparked a recipe that would become my go‑to for every sunny gathering.
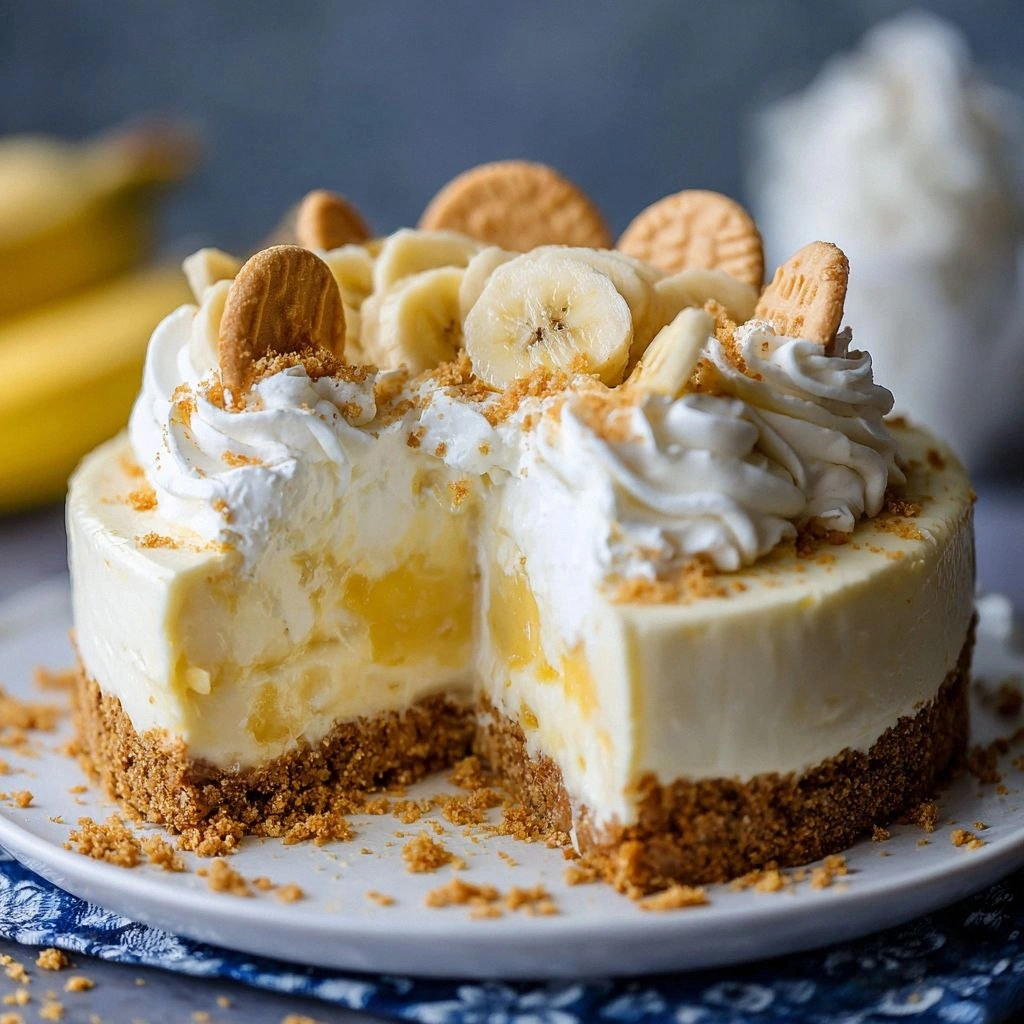
Picture this: a golden crust that crackles under the first bite, a silky filling that swirls with bright, sun‑kissed peaches and a medley of berries, and a finish that leaves your taste buds dancing. The aroma alone—sweet cream, citrus zest, and the faint hint of vanilla—fills the kitchen like a warm breeze. The first bite melts into a cloud of smoothness, and the fruit pops like a burst of sunshine. You can almost hear the gentle hum of summer in every chew, and the sound of laughter echoing from the backyard as friends and family gather around the table.
What sets this version apart is not just the ingredients but the meticulous balance of flavors and textures. I’ve refined the crust to be buttery and crisp, the filling to be airy yet rich, and the fruit topping to provide a refreshing counterpoint that doesn’t overwhelm. The result is a cheesecake that feels like a dessert and a fruit bowl rolled into one, a true crowd‑pleaser that will have everyone asking for seconds. I dare you to taste this and not go back for a second slice; trust me, it’s that addictive.
Let me walk you through every single step—by the end, you’ll wonder how you ever made it any other way. From selecting the freshest peaches to the final chilling ritual, every detail is crafted to bring out the best in each ingredient. The techniques are simple, the ingredients are accessible, and the outcome is a cheesecake that screams summer with every bite. So grab your apron, and let’s dive into the ultimate Summer Berry and Peach Cheesec.
What Makes This Version Stand Out
- Crust: A buttery graham‑cracker base that offers a perfect crunch and subtle sweetness, providing a sturdy foundation for the luscious filling.
- Filling: Light and airy thanks to the combination of cream cheese and sour cream, which creates a silky texture that melts in your mouth.
- Fruit: Fresh peaches and a vibrant mix of berries introduce natural sweetness and a burst of acidity that balances the richness.
- Flavor Layer: A hint of lemon juice and vanilla extract lift the entire profile, preventing the cheesecake from feeling heavy.
- Texture Contrast: The crisp crust, creamy filling, and juicy fruit create a symphony of textures that keep every bite interesting.
- Make‑Ahead Friendly: Chill for at least 4 hours and it stays fresh for up to 48 hours, making it ideal for parties or last‑minute dessert plans.
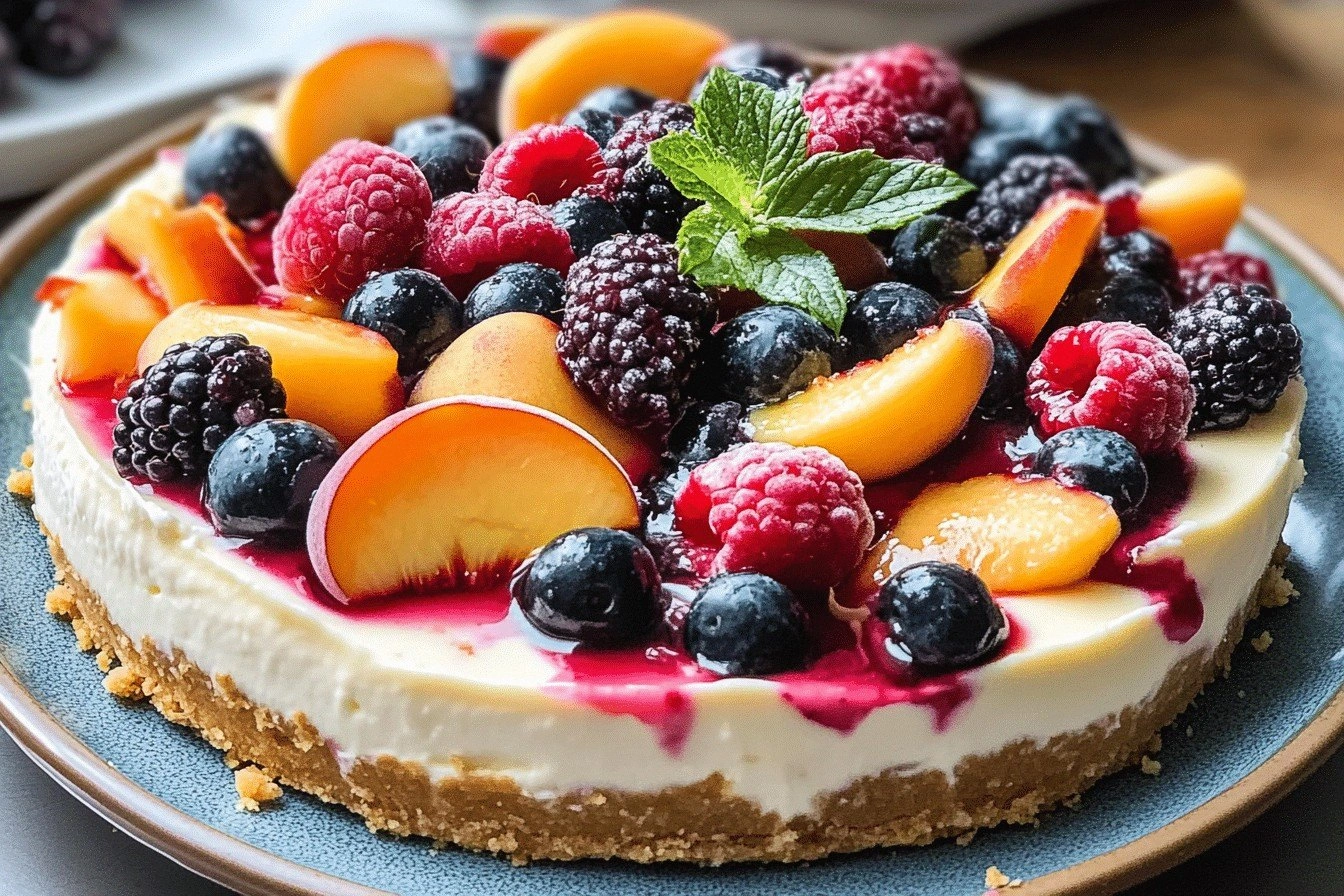
- Visual Appeal: The glossy fruit topping gives a stunning, almost Instagram‑ready finish that will wow anyone who sees it.
- Healthier Twist: Using Greek yogurt instead of heavy cream keeps calories down while maintaining a creamy mouthfeel.
Inside the Ingredient List
The Flavor Base
The foundation of this cheesecake begins with the crust. The graham cracker crumbs, when mixed with melted butter and a touch of sugar, create a buttery, slightly sweet base that crisps beautifully in the oven. If you skip the butter, the crust will crumble and lose its golden color, leading to a soggy texture that detracts from the overall experience. For a healthier twist, substitute the butter with melted coconut oil—just be sure to keep the ratio the same to preserve moisture.
The Texture Crew
The filling’s texture hinges on the cream cheese and sour cream blend. Cream cheese provides the necessary richness and thickness, while sour cream lightens the mixture and adds a subtle tang that balances the fruit’s sweetness. If you omit sour cream, the cheesecake will become dense and heavy, making it difficult to achieve that airy melt‑in‑your‑mouth sensation. A quick tip: beat the cream cheese on medium speed until silky before adding the other ingredients; this prevents lumps and ensures a smooth consistency.
The Unexpected Star
Peaches are the star of the show, but they’re not just there for flavor—they add natural sweetness and a juicy burst that cuts through the richness. Use ripe peaches that yield slightly when pressed; under-ripe peaches will keep the cheesecake from tasting as bright. If peaches are out of season, frozen peaches can be thawed and drained to mimic the fresh texture, though the flavor will be slightly muted.
The Final Flourish
Mixed berries—blueberries, strawberries, and raspberries—provide a colorful, antioxidant‑rich topping that enhances both visual appeal and taste. They also introduce a subtle tartness that balances the creamy filling. If you prefer a single fruit, swap berries for sliced strawberries or even a drizzle of raspberry coulis for a more concentrated flavor.
Everything's prepped? Good. Let's get into the real action...
The Method — Step by Step
- Preheat your oven to 325°F (160°C). Grease an 8‑inch springform pan with butter or non‑stick spray, then line the bottom with parchment paper to prevent sticking. This step ensures a clean release and a crisp crust. Don’t rush—preheating is key to even baking.
- Combine graham cracker crumbs, melted butter, and 2 tablespoons of sugar in a bowl. Stir until the mixture resembles wet sand. Press the mixture firmly into the bottom of the prepared pan, using the back of a spoon to create an even layer. Let it set aside while you make the filling.
- In a large mixing bowl, beat the cream cheese on medium speed until smooth and creamy, about 2 minutes. This removes lumps and sets the stage for an airy texture. If you’re using a stand mixer, a whisk attachment works well too.
- Add the granulated sugar, sour cream, vanilla extract, and lemon juice to the cream cheese. Beat on low speed until combined, then increase to medium until the mixture is fluffy and pale. The lemon juice adds a bright acidity that cuts through the richness.
- Incorporate the eggs one at a time, beating after each addition just until blended. Over‑mixing can introduce air pockets, causing the cheesecake to crack. Watch for the moment when the batter is smooth and glossy.
- Fold in the diced peaches and mixed berries gently with a spatula, ensuring even distribution without deflating the batter. The fruit should be tucked in, not mashed, so it stays intact during baking.
- Pour the batter over the crust, smoothing the top with a spatula. Tap the pan lightly on the counter to release any trapped air bubbles. This step prevents large cracks from forming during baking.
- Place the pan in the preheated oven and bake for 45–50 minutes, or until the edges are set and the center still has a slight wobble. The cheesecake will continue to firm up as it cools. If the top browns too quickly, tent it with foil.
- Turn off the oven, crack the door open, and let the cheesecake sit inside for 1 hour. This gradual cooling prevents cracking. After an hour, transfer the cheesecake to a wire rack and chill in the refrigerator for at least 4 hours, preferably overnight.
- Before serving, run a knife around the edge to loosen it from the pan, then remove the springform ring. If desired, top with fresh berries or a drizzle of berry coulis for an extra pop of color and flavor. Serve chilled and enjoy the culmination of your culinary adventure.
That's it — you did it. But hold on, I've got a few more tricks that'll take this to another level. The next section will reveal insider secrets that elevate this cheesecake from good to unforgettable.
Insider Tricks for Flawless Results
The Temperature Rule Nobody Follows
Many bakers bake cheesecake at 400°F, assuming a higher temperature gives a better crust. In reality, a lower temperature (325°F) ensures a gentle, even bake that keeps the interior creamy. The trick is to let the cheesecake set slowly, preventing the edges from over‑cooking while the center stays moist. I’ve tested it at 325°F for 45 minutes and the result is a silky texture that’s hard to beat.
Why Your Nose Knows Best
During the final 10 minutes of baking, keep an eye on the aroma. A fragrant, slightly caramelized smell indicates the cheesecake is ready. If the smell is overwhelmingly sweet, it’s likely overbaked. Trusting your nose can be the difference between a perfect cheesecake and a dry one.
The 5‑Minute Rest That Changes Everything
After turning off the oven, leave the cheesecake inside for 1 hour with the door ajar. This slow cooling prevents sudden temperature shifts that cause cracks. Think of it as a gentle transition, letting the internal pressure equalize. It’s a small step that saves the entire dessert.
The “Squeeze” Technique
Just before serving, give the cheesecake a gentle squeeze on the countertop. This compresses the surface slightly, making it easier to slice cleanly. It also gives a subtle sheen that looks professional. It’s a simple move that elevates presentation.
The “Berry‑Splash” Finish
If you want to add a final burst of flavor, drizzle a small amount of fresh lemon‑infused honey over the top. The citrusy sweetness pairs beautifully with the fruit and adds a glossy finish. It’s a finishing touch that turns a great cheesecake into a showstopper.
Creative Twists and Variations
This recipe is a playground. Here are some of my favorite ways to switch things up:
Peach‑Mango Fusion
Swap half the peaches for diced mangoes to introduce a tropical twist. The mango’s natural sweetness complements the peach, creating a flavor profile reminiscent of a beachside dessert. Perfect for a summer brunch or a garden party.
Berry‑Almond Crunch
Add a tablespoon of almond flour to the crust for a nutty crunch. Sprinkle toasted slivered almonds on top before chilling to give a delightful texture contrast. This variation adds depth without overpowering the fruit.
Chocolate‑Berry Layer
Drizzle melted dark chocolate over the top before chilling. The bittersweet notes of chocolate pair wonderfully with the sweet fruit, creating a dessert that satisfies both sweet and savory cravings. A drizzle of sea salt enhances the chocolate’s richness.
Citrus‑Zest Surprise
Add a teaspoon of orange zest to the batter for an extra citrus burst. The bright, aromatic oils lift the entire cheesecake, making it feel lighter and more refreshing. This is a subtle change that makes a noticeable difference.
Low‑Sugar Option
Replace granulated sugar with honey or maple syrup, reducing the overall sugar content while still achieving a sweet finish. Use ¾ cup of honey, and adjust the lemon juice slightly to balance the flavor. This version is great for those who want a healthier dessert.
Storing and Bringing It Back to Life
Fridge Storage
Store the cheesecake in an airtight container in the refrigerator for up to 5 days. Keep it chilled to preserve the creamy texture and prevent bacterial growth. Before serving, let it sit at room temperature for 10–15 minutes to enhance flavor.
Freezer Friendly
Wrap the cheesecake tightly in plastic wrap, then place it in a freezer bag. Freeze for up to 2 months. Thaw overnight in the refrigerator before serving. The texture remains smooth, and the fruit retains its juiciness.
Best Reheating Method
If you need to warm the cheesecake slightly, place it in a preheated oven at 300°F (150°C) for 5–7 minutes. Add a tiny splash of water to the bottom of the pan before reheating; it steams the cheesecake back to a silky perfection, preventing it from drying out.