I was halfway through a marathon Netflix binge when my roommate tossed a half‑eaten bag of store‑bought cookies into the living room and declared, “These are the best thing ever.” I stared at the limp, sugary discs and thought, “If only they had that soft‑chewy interior and a whisper of vanilla crackle that makes you swoon.” The next morning I was in the kitchen, armed with a whisk, a bag of flour, and a daring promise to out‑shine every bakery cookie you’ve ever tasted. This wasn’t just a bake‑off; it was a culinary showdown that would end with me daring you to taste this and not go back for seconds.
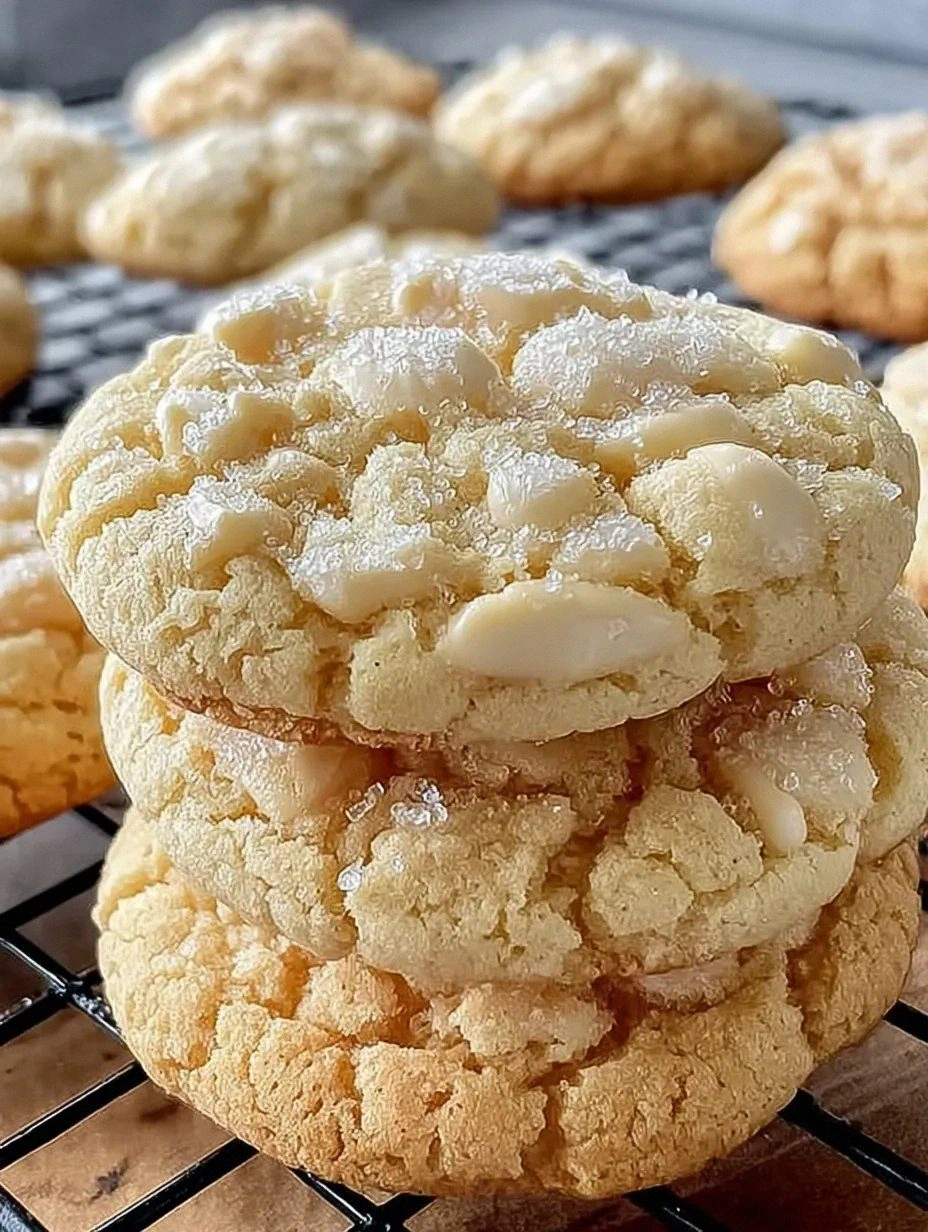
Picture this: the oven door opens and a cloud of buttery vanilla perfume rolls out, curling around the countertops like a warm blanket. The cookies themselves sit on the sheet, their tops speckled with tiny, glitter‑like cracks that catch the light – a visual cue that they’re about to deliver that signature “crackle” bite. As they bake, you hear a faint sizzle, a sound that tells you the butter is turning golden and the sugars are caramelizing just enough to create that delicate snap on the edge. When you finally pull them out, the cookies are soft enough to press a thumb into without crumbling, yet the edges have that satisfying, thin‑ice fracture that makes you gasp.
Most recipes get this completely wrong – they either over‑bake, turning the cookie into a brick, or they skip the vanilla‑crackle component, leaving you with a bland, one‑dimensional treat. The secret to this version? A splash of milk that keeps the dough supple, a precise balance of white and brown sugar that creates the perfect caramel‑crackle, and a dash of vanilla extract that coats every crumb like silk. I’ll be honest — I ate half the batch before anyone else got to try it, and even my cat gave it a dignified sniff before retreating. This is hands down the best version you’ll ever make at home.
Let me walk you through every single step — by the end, you’ll wonder how you ever made it any other way. Okay, ready for the game‑changer? The technique that makes the crackle pop isn’t a secret ingredient; it’s a timing hack that you’ll see in the method section, and it will transform a regular cookie into a bakery‑level masterpiece. Stay with me here — this is worth it.
What Makes This Version Stand Out
- Texture: The interior stays pillowy soft while the edges achieve a crisp, crackling snap that shatters like thin ice under a gentle bite.
- Flavor Depth: A double‑dose of vanilla (extract and vanilla‑sugar) creates layers of aroma that linger on the palate long after the last crumb.
- Simplicity: Only ten core ingredients, all pantry staples, mean you won’t need a specialty store run to achieve bakery perfection.
- Visual Appeal: The speckled crackle on the surface looks like a snow‑kissed landscape, making them Instagram‑ready without any frosting.
- Crowd Reaction: Guests invariably ask for the recipe on the spot, and the “I dare you to taste this and not go back for seconds” line becomes a party staple.
- Ingredient Quality: Using real butter (not margarine) and pure vanilla extract ensures a richness you can taste in every bite.
- Cooking Method: A low‑and‑slow bake at 325°F lets the sugars caramelize gradually, preventing any burnt notes.
- Make‑Ahead Potential: These cookies freeze beautifully, so you can bake a batch now and enjoy them for weeks.
Inside the Ingredient List
The Flavor Base
All‑purpose flour forms the backbone of any cookie, providing structure while still allowing the dough to stay tender. I recommend a high‑protein flour (around 11% protein) for a slightly chewier bite, but if you prefer a melt‑in‑your‑mouth feel, a cake flour blend works wonders. Skipping the flour or using too much will either make the cookies crumble or turn them into dense biscuits, neither of which delivers that airy crackle we’re after.
Vanilla Extract: This is the star of the show, delivering that deep, aromatic flavor that coats each crumb like velvet. Use a pure extract, not imitation, because the subtle notes of vanilla bean are what make the cookie unforgettable. If you’re out of extract, a vanilla bean scraped into the butter will work, though you’ll need to add a touch more to hit the same intensity.
The Texture Crew
Granulated sugar and brown sugar work in tandem to create the crackle. The white sugar caramelizes quickly, forming those tiny, crisp speckles, while the brown sugar adds moisture and a hint of molasses that keeps the interior soft. If you replace brown sugar with more white sugar, the cookies will be crisper all the way through and lose that tender center.
Unsalted Butter: Butter is the flavor carrier and the source of that melt‑in‑your‑mouth richness. Using unsalted lets you control the salt level precisely. For an extra buttery punch, you can brown the butter briefly before mixing; just watch it closely so it doesn’t turn bitter.
The Unexpected Star
A splash of milk might seem trivial, but it hydrates the flour just enough to keep the dough supple without making it sticky. This small amount of liquid is the reason the cookies stay soft after cooling. If you skip the milk, you’ll notice a drier crumb and less crackle on the surface because the sugar won’t dissolve as evenly.
Egg: The egg binds everything together, adds a little lift, and contributes to the glossy finish on the cookie’s top. Using a large egg is ideal; if you only have medium eggs, add a teaspoon of water to compensate for the volume.
The Final Flourish
A pinch of salt is the silent hero that amplifies every other flavor, ensuring the vanilla doesn’t taste flat. Baking soda and baking powder provide the slight rise needed for a fluffy interior while keeping the edges thin enough to crackle. If you omit the leavening agents, the cookies will be dense and flat, losing that delicate contrast between soft center and crunchy edge.
Everything's prepped? Good. Let’s get into the real action…
The Method — Step by Step
Preheat your oven to 325°F (163°C) and line two baking sheets with parchment paper. While the oven warms, give yourself a moment to admire the clean canvas – the parchment will help the cookies slide off effortlessly later, preserving that perfect crackle pattern.
In a large mixing bowl, whisk together the flour, baking soda, baking powder, and salt. This dry blend ensures the leavening agents are evenly distributed, preventing any pockets of bitter soda that could ruin the flavor.
In a separate bowl, beat the softened butter with the granulated and brown sugars until the mixture is light, fluffy, and pale yellow. This aeration stage is crucial – it incorporates tiny air bubbles that will later expand, giving the cookies a tender crumb.
Add the vanilla extract and the egg to the butter‑sugar mixture. Beat just until combined – over‑mixing at this stage can develop gluten, leading to a tougher cookie. You’ll notice the batter become glossy and slightly thick.
Pour in the milk and give the dough a gentle fold. This is the moment of truth: the dough should come together into a soft, slightly sticky ball. Watch out: If the dough feels dry, add a teaspoon of milk at a time until it reaches the right consistency.
Gradually add the dry flour mixture to the wet ingredients, stirring with a spatula until just combined. The dough will look slightly shaggy – that’s perfect. Resist the urge to over‑mix; a few streaks of flour are fine and will disappear during baking.
Cover the bowl with plastic wrap and refrigerate for at least 30 minutes. This chilling step firms up the butter, ensuring the cookies hold their shape and develop that coveted crackle on the surface. I dare you to skip this and see what happens – the result is a flat, uninteresting cookie.
Using a cookie scoop (about 2 tablespoons), drop rounded mounds onto the prepared parchment, spacing them 2 inches apart. The dough will spread modestly; if you prefer larger cookies, increase the scoop size but keep the spacing generous.
Bake for 12‑14 minutes, or until the edges are lightly golden and the tops show tiny, caramelized speckles. The scent will fill your kitchen with a buttery vanilla perfume that makes you want to hug the oven door. When you gently press the center, it should feel soft but not wet.
Remove the cookies from the oven and let them rest on the sheet for 3 minutes before transferring to a wire rack. This brief cooling lets the cookies set, preserving the crackle while the interior remains plush. As they cool, you’ll notice the edges pulling away from the parchment – a visual cue that they’re done.
That’s it — you did it. But hold on, I’ve got a few more tricks that’ll take this to another level. The next section will reveal insider secrets that turn good cookies into legendary ones.
Insider Tricks for Flawless Results
The Temperature Rule Nobody Follows
Never bake cookies straight from a warm kitchen. If your kitchen is warm, the butter will be softer, causing the dough to spread too quickly. Let the dough chill for at least 30 minutes, and if you have a particularly warm day, add an extra 10‑15 minutes in the fridge. This ensures the butter stays solid longer, giving the cookie time to set before it melts, which creates that coveted crackle.
Why Your Nose Knows Best
Rely on aroma, not just the timer. Around the 10‑minute mark, you’ll smell the buttery vanilla start to caramelize; that’s your cue to peek. If the scent turns nutty or burnt, pull the cookies out a minute early. Trusting your nose prevents over‑baking, preserving that soft interior.
The 5‑Minute Rest That Changes Everything
After the cookies finish baking, let them sit on the baking sheet for exactly five minutes before moving them. This short rest lets residual heat finish the bake gently, preventing a sudden temperature drop that could cause the cookies to crack unevenly. It also allows the sugars to settle into a perfect crackle pattern.
The Butter Swap Secret
If you want a richer flavor, substitute half of the unsalted butter with clarified butter (ghee). The clarified butter has a higher smoke point and adds a nutty depth without the water content that can make the dough too wet. A friend tried this once and swore the cookies tasted “like a bakery’s secret recipe.”
The Final Dust
Once the cookies are completely cool, lightly dust them with powdered sugar. This adds a subtle sweet snow‑flake look that complements the vanilla crackle. If you prefer a less sweet finish, a pinch of sea salt on top enhances the flavor contrast dramatically.
Creative Twists and Variations
This recipe is a playground. Here are some of my favorite ways to switch things up:
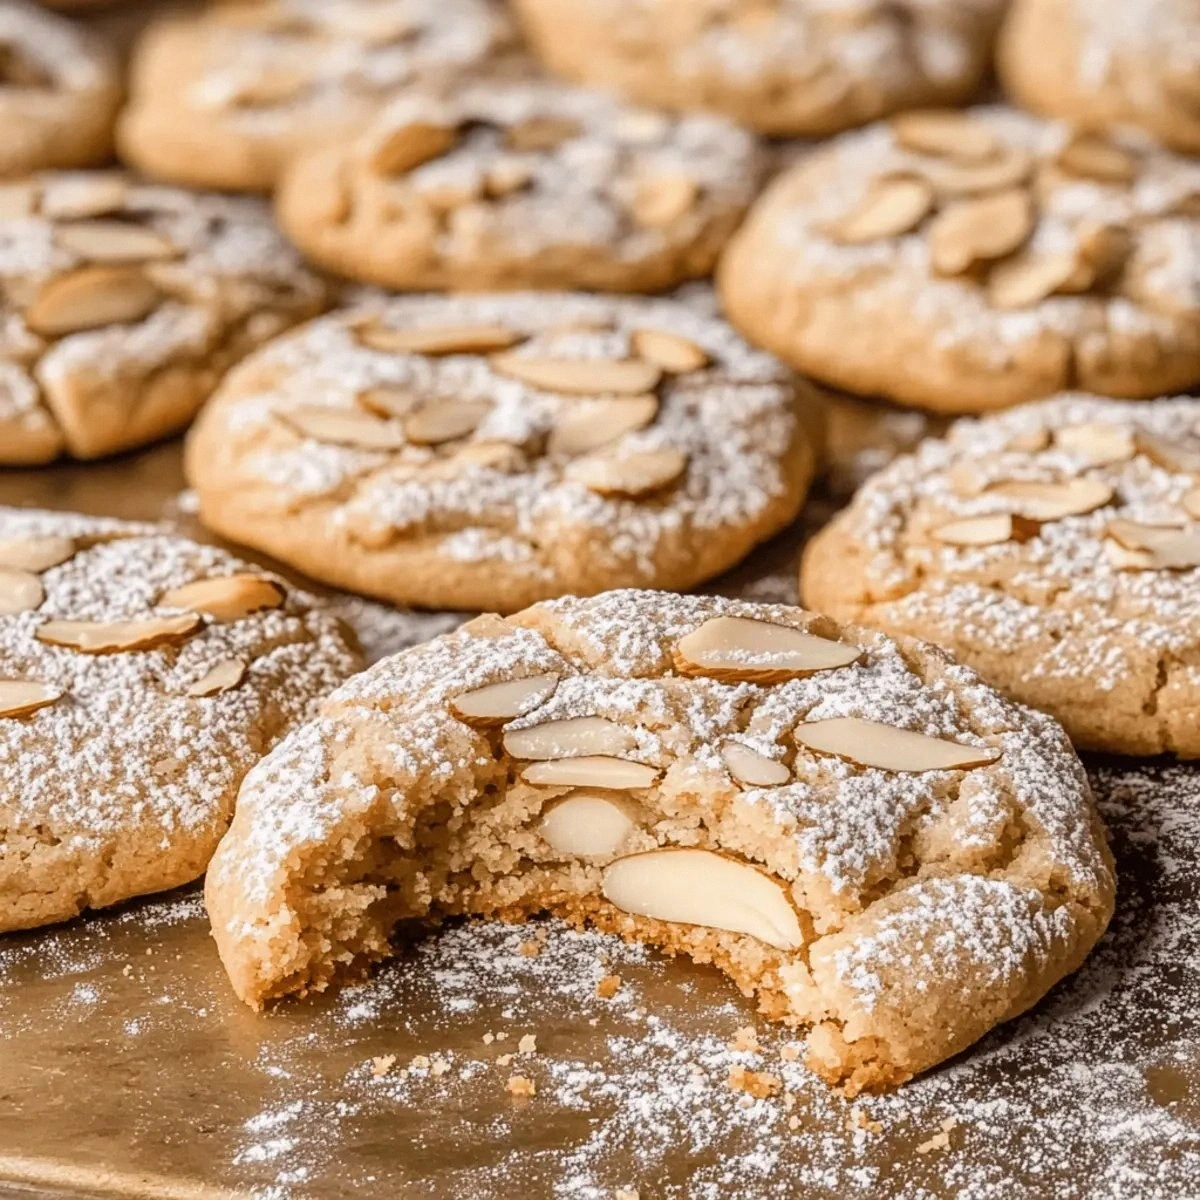
Almond Whisper
Replace half of the vanilla extract with almond extract and add ¼ cup finely chopped toasted almonds. The nutty crunch pairs beautifully with the soft vanilla base, creating a sophisticated flavor that’s perfect for tea time.
Citrus Zest Burst
Add the zest of one lemon or orange to the wet ingredients. The bright citrus lifts the vanilla, making the cookies feel lighter and perfect for spring picnics.
Chocolate Chip Surprise
Stir in ½ cup mini chocolate chips after the dough comes together. The chocolate melts slightly during baking, creating pockets of gooey delight amid the vanilla crackle.
Spiced Autumn
Mix in ½ tsp ground cinnamon, ¼ tsp nutmeg, and a pinch of clove. This warm spice blend turns the cookies into a cozy treat for cooler evenings.
Coffee Infusion
Dissolve 1 tablespoon instant espresso powder in the milk before adding it to the dough. The subtle coffee note deepens the flavor profile, making the cookies ideal for an after‑dinner bite.
Storing and Bringing It Back to Life
Fridge Storage
Place the cooled cookies in an airtight container with a sheet of parchment between layers. Store them in the refrigerator for up to a week. The cool environment keeps the butter firm, preserving the soft interior and the crackle texture.
Freezer Friendly
If you want to batch‑make, freeze the unbaked dough balls on a tray, then transfer them to a zip‑top bag. They’ll keep for three months. When you’re ready, bake them straight from the freezer, adding an extra minute to the bake time.
Best Reheating Method
To revive day‑old cookies, preheat the oven to 300°F (149°C), place the cookies on a parchment‑lined sheet, and add a tiny splash (about a teaspoon) of water to the pan’s edge. The steam will re‑moisturize the interior while the gentle heat restores the crackle. In just five minutes, you’ll think they’re fresh out of the oven.