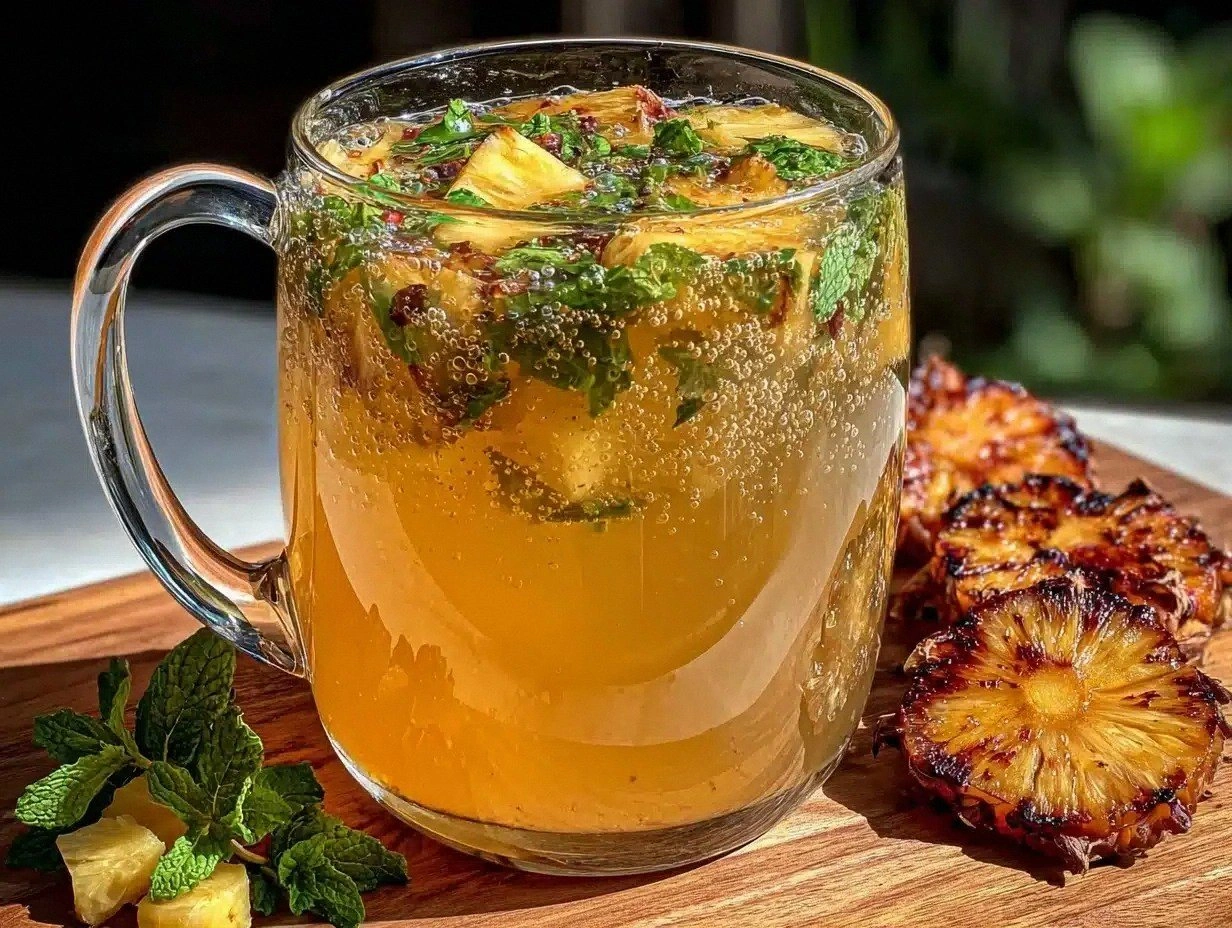
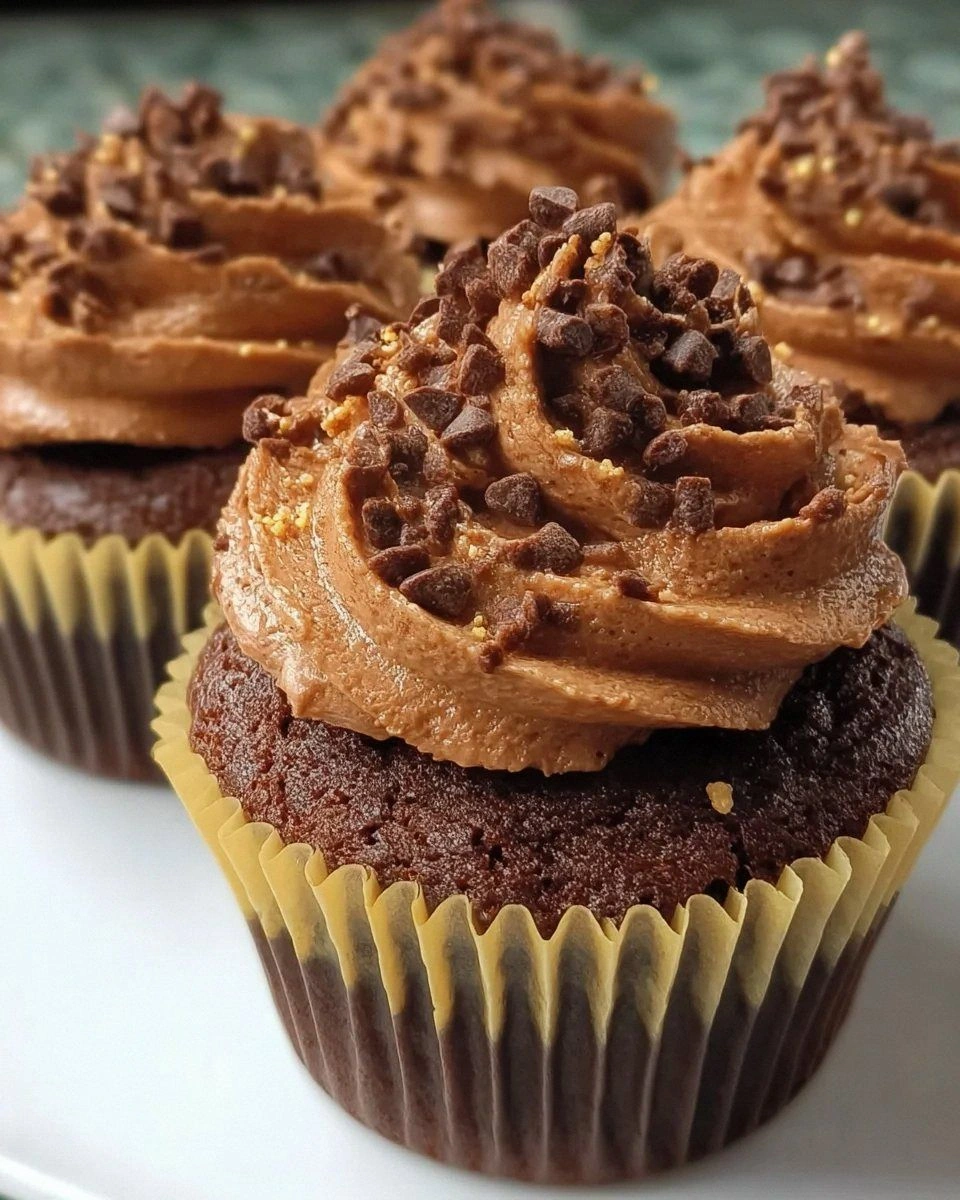
Okay, picture this: it’s 2 a.m., the house is quiet, the fridge light is the only illumination, and a sudden craving for something so chocolatey you could practically hear it humming “I’m the boss of your taste buds.” I was half‑asleep, half‑mad, and half‑determined to prove that the best dessert doesn’t have to be a complicated, multi‑day project. I grabbed the nearest brownie mix, a handful of pantry staples, and a wild idea—what if I turned those brownies into cupcakes, then crowned them with a buttercream that could make a grown‑up weep with joy? The result? A batch of brownie cupcakes that are so moist, so fudgy, and so decadently topped with chocolate buttercream that they’ve officially earned a spot on my “never‑let‑go” list.
The moment those cupcakes hit the oven, the kitchen turned into a chocolate‑scented dreamscape. The air filled with a deep, earthy aroma that reminded me of a coffee shop on a rainy day, but with a richer, darker edge—like the kind of scent that makes you close your eyes and instantly think of the first bite of a perfectly baked brownie. When the timer chimed, the tops were lightly cracked, the edges had just the right amount of pull‑away, and the centers looked like they were holding a secret, waiting to be revealed. I pulled them out, let them cool just enough to handle, and then swirled a cloud of chocolate buttercream on top that spread like silk, glossy and inviting.
Now, I’ll be honest — I ate half the batch before anyone else could even get a fork. That’s the truth, and if you’ve ever found yourself in that exact situation, you’re not alone. The reason this version stands out is that it doesn’t rely on a dozen obscure ingredients or a kitchen full of gadgets; it’s simple, it’s fast, and it delivers a texture that’s simultaneously cake‑like on the outside and brownie‑rich on the inside. Most recipes get the balance wrong, ending up either too crumbly or too dense, but this one nails that sweet spot every single time. I dare you to taste this and not go back for seconds.
There’s a little secret I’m about to reveal that will take this from “awesome” to “hands down the best version you’ll ever make at home.” It’s a tiny splash of hot coffee (or water) that intensifies the chocolate flavor without adding any bitterness—think of it as the culinary equivalent of turning up the bass on your favorite song. Okay, ready for the game‑changer? Let me walk you through every single step — by the end, you’ll wonder how you ever made it any other way.
What Makes This Version Stand Out
- Fudgy Core: The brownie mix provides a dense, chocolatey heart that stays moist even after cooling, creating that coveted fudgy bite you crave.
- Light Lift: A modest amount of baking powder adds just enough rise to give each cupcake a tender crumb without sacrificing the brownie density.
- Double Chocolate Boost: Unsweetened cocoa powder in both the batter and the buttercream multiplies the chocolate intensity, making every forkful feel like a mini‑indulgence.
- Silky Buttercream: Using softened butter instead of melted ensures a frosting that spreads like velvet and holds its shape for piping or dolloping.
- One‑Pan Simplicity: All the magic happens in a single mixing bowl and a standard muffin tin—no need for separate pans or fancy equipment.
- Speedy Prep: From opening the box to pulling the cupcakes out of the oven takes under an hour, perfect for last‑minute gatherings.
- Make‑Ahead Friendly: The cupcakes freeze beautifully, and the buttercream can be whipped up ahead of time, giving you flexibility for any occasion.
- Crowd‑Pleaser: Whether it’s a birthday, a potluck, or a midnight snack, these cupcakes get rave reviews and often disappear before you can say “more.”
Inside the Ingredient List
The Flavor Base
The star of the show is the Brownie Mix. It’s the shortcut that brings that instant fudgy flavor, but don’t underestimate it—choose a high‑quality mix with real cocoa for the best results. If you skip it, you’ll lose the deep chocolate foundation and end up with a plain vanilla cupcake. A great tip: look for a mix that contains a hint of espresso or coffee; it amplifies the chocolate without tasting like coffee.
Unsweetened Cocoa Powder appears twice: once in the batter and once in the frosting. This double dose guarantees a chocolate punch that’s richer than any store‑bought frosting. If you’re out of cocoa, you can substitute with melted dark chocolate, but you’ll need to adjust the sugar slightly to keep the balance.
The Texture Crew
All‑Purpose Flour adds structure, preventing the cupcakes from turning into a liquid puddle. Too much flour makes them cakey; too little leaves them soggy. I recommend sifting the flour with the cocoa and baking powder to ensure an even distribution and a lighter texture.
Granulated Sugar not only sweetens but also contributes to the chewy, slightly crisp edges that make each bite exciting. If you prefer a less sweet profile, you can reduce the sugar by a tablespoon without compromising texture.
Baking Powder is the subtle lift that keeps the cupcakes from sinking in the middle. A common mistake is using baking soda instead, which would give a metallic aftertaste. Stick with the powder for that perfect rise.
The Moisture Makers
Unsalted Butter (melted) brings richness and helps the batter achieve that glossy sheen. Using unsalted butter gives you control over the overall salt level, especially important when you add a pinch of salt later.
Sour Cream is the secret weapon for moisture and a slight tang that cuts through the chocolate intensity. Full‑fat sour cream yields the creamiest crumb; low‑fat versions can make the cupcakes dry.
Hot Coffee or Hot Water is the “liquid gold” that intensifies chocolate flavor. The heat unlocks the cocoa’s aromatic compounds, turning a good cupcake into a great one. If you’re caffeine‑sensitive, hot water works just as well.
The Final Flourish
Unsalted Butter (softened for frosting) is the foundation of the buttercream. Softened, not melted, it traps air when creamed, resulting in a light, fluffy frosting that holds its shape. Melted butter would make the frosting greasy and runny.
Powdered Sugar gives the frosting its sweetness and silky texture. Sift it before adding to avoid lumps—nothing ruins a perfect frosting like a grainy bite.
Milk is the liquid that brings the frosting to the perfect spreading consistency. A splash is all you need; add more only if the buttercream looks too stiff.
Vanilla Extract adds depth, turning the chocolate flavor from flat to multidimensional. Use pure vanilla for the best aroma; imitation can taste harsh.
Salt is the balancing act that makes the sweetness sing. A pinch of sea salt in the frosting brightens the chocolate and prevents it from feeling cloying.
Everything's prepped? Good. Let’s get into the real action…
The Method — Step by Step
- Preheat and Prep: Set your oven to 350°F (175°C) and line a 12‑cup muffin tin with paper liners. While the oven warms, gather all your ingredients and give the brownie mix a quick stir to break up any clumps. This step is crucial because a smooth batter ensures even baking, and the paper liners prevent sticking—no one wants a cupcake that refuses to release.
- Combine Dry Ingredients: In a large bowl, whisk together the brownie mix, all‑purpose flour, granulated sugar, baking powder, and ¼ cup unsweetened cocoa powder. The mixture should look uniformly dark and slightly powdery. Kitchen Hack: Add a pinch of salt to the dry mix now; it will enhance the chocolate flavor throughout the batter.
- Mix Wet Ingredients: In a separate bowl, melt ½ cup unsalted butter and let it cool slightly. Then whisk in the sour cream, hot coffee (or water), and eggs until the mixture is glossy and slightly frothy. The heat from the coffee will melt the butter fully and help the cocoa bloom, giving you that deep chocolate perfume.
- Unite the Two Worlds: Pour the wet mixture into the dry ingredients and fold gently with a rubber spatula. Stop mixing as soon as you see no dry streaks; over‑mixing will develop gluten and make the cupcakes tough. You’ll notice the batter become thick, glossy, and just a tad sticky—that’s the perfect consistency.
- Optional Fudge Boost: If you’re using a fudge packet, crumble it into the batter now and give a quick stir. This adds an extra layer of chocolate decadence that makes the interior almost brownie‑like in texture. Watch Out: Adding too much fudge can make the batter overly dense; stick to one packet for a balanced result.
- Fill the Cups: Spoon the batter into the prepared liners, filling each about three‑quarters full. The batter will spread a little as it bakes, so don’t overfill. The tops should look smooth, with a few peaks—those peaks will become the little “crusts” that crack just right.
- Bake to Perfection: Slide the tin into the preheated oven and bake for 18‑22 minutes. Start checking at the 18‑minute mark; insert a toothpick into the center of a cupcake—if it comes out with a few moist crumbs but no wet batter, you’re golden. The edges will start pulling away from the liner, and the tops will have a faint crackle that whispers “I’m ready.”
- Cool Before Frosting: Let the cupcakes cool in the tin for 5 minutes, then transfer them to a wire rack. This short rest lets the steam escape, preventing soggy bottoms. While they’re cooling, you can start the buttercream—timing is everything.
- Whip Up the Buttercream: In a large mixing bowl, beat softened butter on medium speed until pale and fluffy, about 2 minutes. Gradually add powdered sugar, a cup at a time, beating on low to avoid a sugar cloud. Once incorporated, sift in ¼ cup unsweetened cocoa powder, then pour in milk, vanilla, and a pinch of salt. Increase speed to high and whip for another 2‑3 minutes until the frosting is light, glossy, and holds soft peaks.
- Pipe or Dollop: Using a spatula or piping bag, spread or pipe the chocolate buttercream onto each cooled cupcake. The frosting should melt slightly on contact, creating a glossy sheen that looks as good as it tastes. Finish with a light dusting of cocoa powder or a few chocolate shavings if you’re feeling fancy.
That’s it — you did it. But hold on, I’ve got a few more tricks that’ll take this to another level, ensuring every bite is a crescendo of flavor and texture. Trust me, the next section is pure magic.
Insider Tricks for Flawless Results
The Temperature Rule Nobody Follows
Never bake cupcakes straight from the fridge. Let the batter sit at room temperature for 10 minutes before you pour it into the liners. This small pause equalizes the temperature of the batter, leading to a more even rise and preventing the dreaded “dome” that can happen when cold batter hits a hot oven. One friend once tried to skip this step, and the cupcakes emerged with a sunken center that looked like a crater—definitely not the look we’re after.
Why Your Nose Knows Best
Instead of relying solely on a timer, trust your nose. When the cupcakes are about 2 minutes away from the end of the bake, you’ll start to smell a deep, roasted chocolate aroma with a hint of caramelized sugar. If that scent hits you early, pull them out; if it’s still faint, give them a minute or two more. The nose is a reliable sous‑chef that never lies.
The 5‑Minute Rest That Changes Everything
After frosting, let the cupcakes sit for exactly five minutes before serving. This short rest lets the buttercream set just enough to hold its shape while still being soft enough to melt on your tongue. Skipping this step can lead to frosting that slides off the cupcake or, worse, a frosting that’s too stiff to spread.
The Double‑Whip Technique
When you’re creaming the butter for the frosting, pause halfway through and scrape the sides of the bowl, then continue whipping. This ensures every butter particle is fully aerated, giving you a frosting that’s light enough to float on the cupcake without sinking.
The “Cold Butter” Secret for Frosting
If you live in a warm kitchen, chill the butter for 10 minutes before softening it. This prevents the butter from becoming too oily when you beat it, which can cause the frosting to separate. I once made frosting on a sweltering July day and ended up with a soupy mess—lesson learned.
Creative Twists and Variations
This recipe is a playground. Here are some of my favorite ways to switch things up:
Salted Caramel Swirl
After filling the cupcake liners, drop a teaspoon of caramel sauce in the center and swirl it with a toothpick before baking. The caramel caramelizes slightly, creating a gooey core that pairs perfectly with the chocolate buttercream.
Espresso Explosion
Replace the hot coffee with freshly brewed espresso and add a pinch of instant coffee granules to the frosting. The result is a mocha‑infused cupcake that’s perfect for brunch or an afternoon pick‑me‑up.
Mint Chocolate Dream
Add a drop of peppermint extract to the buttercream and garnish with crushed mint chocolate candies. The refreshing mint cuts through the richness, making it a hit at holiday parties.
Nutty Crunch
Stir chopped toasted walnuts or hazelnuts into the batter for added texture. The nuts give a satisfying crunch that contrasts with the soft interior, and they toast up beautifully during baking.
White Chocolate Raspberry
Swap half of the cocoa powder in the frosting for white chocolate chips, and fold in fresh raspberry puree. The tartness of the raspberry brightens the sweet, creamy frosting, creating a sophisticated flavor duo.
Storing and Bringing It Back to Life
Fridge Storage
Place the cupcakes in an airtight container and store them in the refrigerator for up to 4 days. The buttercream may firm up a bit; simply let them sit at room temperature for 15 minutes before serving, or give a quick microwave zap (10 seconds) to soften.
Freezer Friendly
Freeze the cupcakes un‑frosted on a parchment‑lined tray, then transfer them to a zip‑top bag. They’ll keep for up to 3 months. When you’re ready to serve, thaw overnight in the fridge, then frost and let sit at room temperature for an hour.
Best Reheating Method
To revive a refrigerated cupcake, pop it in a preheated oven at 300°F (150°C) for 5‑7 minutes. Add a tiny splash of water (about a teaspoon) to the pan before reheating; the steam will bring back that fresh‑baked moisture without making the cupcake soggy.