I was standing in my kitchen, staring at a sad, over‑ripe banana pile that looked like a yellow crime scene, when my roommate dared me: “Make something that actually hugs the taste buds, not just a sad loaf.” I accepted, and what followed was a series of frantic mash‑ups, a few burnt edges, and a whole lot of banana‑scented smoke that made the whole apartment smell like a tropical bakery. I’ll be honest — I ate half the batch before anyone else got a chance to try it, and that’s why I’m writing this with a guilty grin and a promise that the rest will be worth the wait.
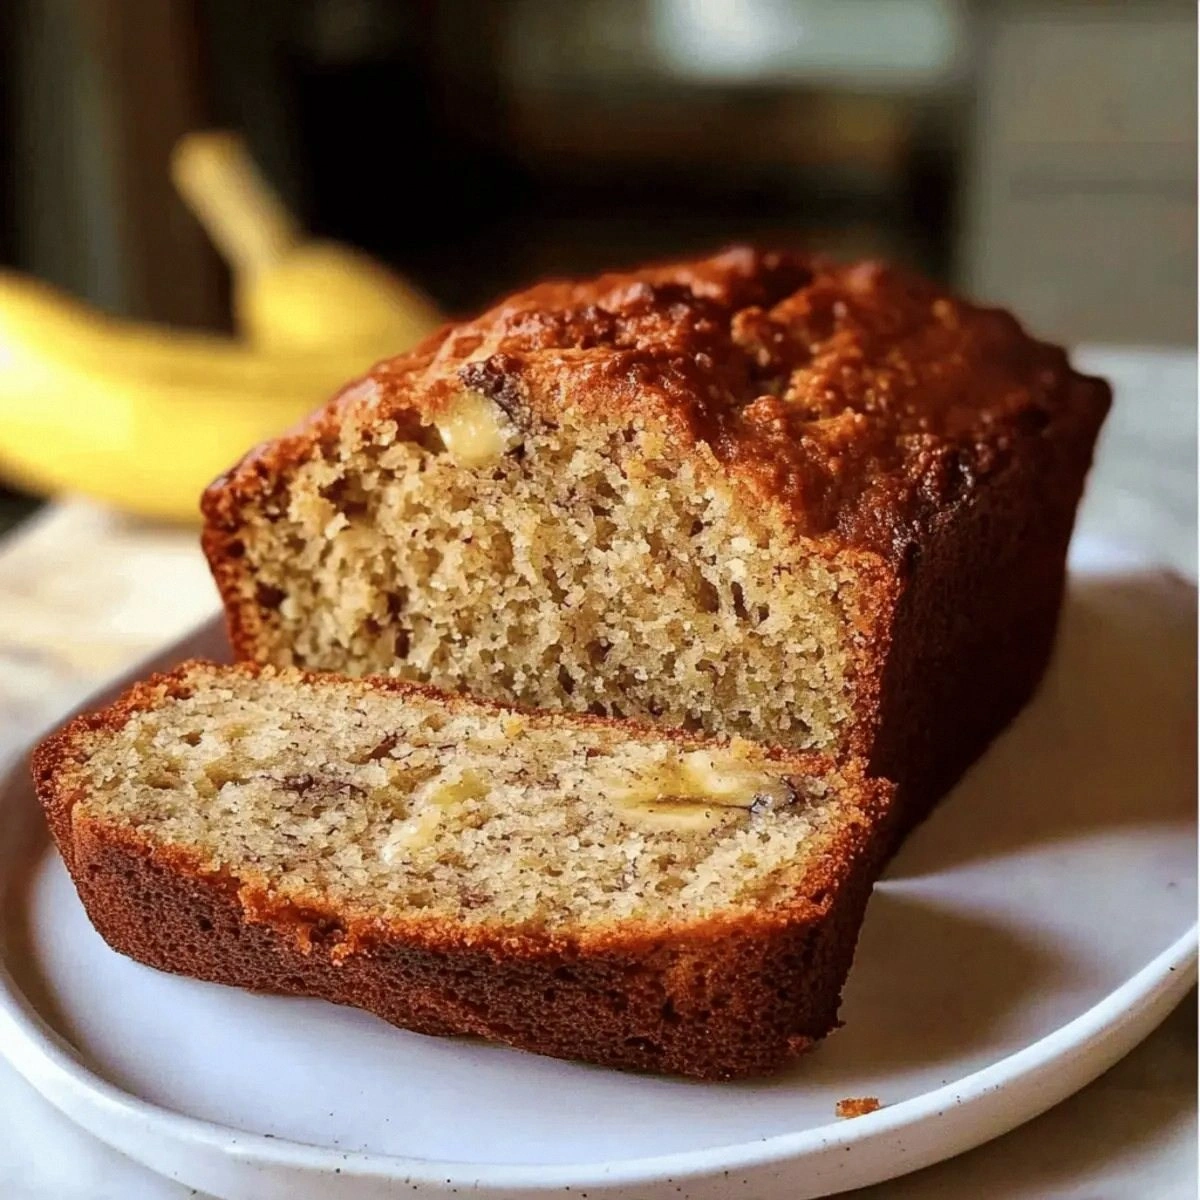
Picture this: the oven door swings open, a golden‑brown crown peeks out, and a steam‑filled cloud of caramelized banana wafts through the kitchen, hugging every corner like a warm blanket. You hear the faint crackle of the crust as it pulls away from the pan, and the first bite delivers a buttery melt that slides across your tongue, followed by the sweet, earthy depth of perfectly ripe bananas. The texture? Imagine a cloud that’s been lightly brushed with a hint of crunch from walnuts and chocolate chips that melt like tiny fireworks inside.
Most banana‑bread recipes get this completely wrong. They either end up dry as a desert or soggy like a puddle. The secret here is a balance of moisture, the right amount of leavening, and a dash of cinnamon that adds a whisper of spice without overpowering the fruit. I’m daring you to taste this and not go back for seconds — because once you’ve experienced this hug, you’ll never settle for a bland slice again.
There’s a little twist that most bakers overlook: a splash of melted butter folded into the mashed bananas before they meet the flour. This creates a silk‑like batter that traps air pockets, giving the bread that airy interior while keeping the crust delightfully crisp. Let me walk you through every single step — by the end, you’ll wonder how you ever made it any other way.
What Makes This Version Stand Out
- Moisture: The combination of butter and ripe bananas creates a batter that stays soft for days, not just hours. It’s like a hug that lingers long after the first bite.
- Texture: A crisp, caramelized crust meets a tender, almost cake‑like crumb, with crunchy walnuts and melty chocolate chips adding surprise bursts.
- Simplicity: Only eleven ingredients, all pantry‑friendly, and no fancy equipment. If you can mash a banana, you can master this.
- Uniqueness: The subtle hint of cinnamon and the buttery‑banana mash technique set this apart from the “meh” versions you’ve tried before.
- Crowd Reaction: I’ve served this at brunches and potlucks, and it consistently disappears faster than you can say “one more slice.”
- Ingredient Quality: Using truly ripe bananas (the ones with brown spots) maximizes natural sweetness, cutting down on added sugar.
- Cooking Method: Baking in a pre‑heated oven on the middle rack ensures even heat distribution, preventing the dreaded soggy bottom.
- Make‑Ahead Potential: This loaf freezes beautifully, so you can have a ready‑to‑go snack anytime you crave comfort.
Alright, let's break down exactly what goes into this masterpiece…
Inside the Ingredient List
The Flavor Base
The star of this loaf is, of course, the bananas. Using 2‑3 very ripe bananas (the ones that have turned almost black) gives you natural sweetness and moisture. If you skip them, you’ll end up with a bland, dry texture that no amount of sugar can fix. A good tip: give them a quick zap in the microwave for 15 seconds to boost their softness before mashing.
Sugar at 3/4 cup adds just enough sweetness to complement the banana’s own sugars without making it cloying. You can substitute half of it with brown sugar for a deeper caramel note, but keep the total volume the same.
The Texture Crew
Unsalted butter (1/3 cup) melted and folded into the mash creates that buttery silk you’ll feel on your palate. If you’re dairy‑free, coconut oil works, but expect a faint coconut aftertaste that might clash with the chocolate chips.
Eggs act as the binder, giving structure while keeping the crumb tender. Using large eggs ensures enough liquid; if you only have medium eggs, add an extra tablespoon of milk to compensate.
The Unexpected Star
Cinnamon (½ tsp) and a pinch of salt amplify the banana flavor, turning a simple loaf into a nuanced dessert. The salt is crucial; without it, the sweetness would be flat. If you love spice, add a dash of nutmeg or cardamom for an exotic twist.
Walnuts or pecans (½ cup) give a crunchy contrast that prevents the bread from feeling too soft. Toast them lightly for an extra layer of nuttiness — just a minute in a dry skillet, and you’ll hear a satisfying sizzle.
The Final Flourish
All‑purpose flour (1.5 cups) provides the backbone, while baking soda (1 tsp) creates lift by reacting with the banana’s natural acidity. If you prefer a denser crumb, reduce the soda to ¾ tsp, but don’t eliminate it entirely or the loaf will be heavy.
Chocolate chips (½ cup) melt into pockets of gooey goodness, making each bite feel like a mini indulgence. For a healthier version, swap half the chips for dried cranberries or apricots.
Everything's prepped? Good. Let's get into the real action…

The Method — Step by Step
Preheat your oven to 350°F (175°C). While the oven warms up, grease a 9×5‑inch loaf pan with butter or line it with parchment. The pan’s preparation is crucial; a well‑greased pan ensures the bread releases cleanly, preventing that dreaded “stuck‑to‑the‑pan” drama.
In a medium bowl, mash the ripe bananas until they’re almost pureed, leaving a few small chunks for texture. Add the melted butter (still warm from the microwave hack) and stir until fully incorporated. This is the moment where the batter starts smelling like a tropical vacation.
In a separate large bowl, whisk together the sugar, eggs, and vanilla extract until the mixture lightens in color and becomes slightly frothy. This step is where the sugar dissolves, ensuring no grainy pockets remain.
Combine the wet banana‑butter mixture with the egg‑sugar blend, folding gently with a rubber spatula. You’ll hear a faint “whoosh” as the batter becomes glossy and smooth. Watch Out: Do not over‑mix at this stage, or the gluten in the flour will develop, leading to a tough loaf.
Sift together the flour, baking soda, salt, and cinnamon into a separate bowl. This aerates the dry ingredients and ensures a uniform rise. Gently fold the dry mixture into the wet batter, stopping as soon as you see no streaks of flour. The batter should look thick but pourable.
Stir in the chopped walnuts (or pecans) and chocolate chips, reserving a tablespoon of each for sprinkling on top. The chips should stay in little islands, not dissolve into the batter.
Pour the batter into the prepared loaf pan, smoothing the top with a spatula. Tap the pan gently on the counter three times to release any large air bubbles. This is the moment of truth — you’ll see the batter settle into a smooth, even layer.
Slide the pan into the pre‑heated oven and bake for 30‑35 minutes. Around the 20‑minute mark, rotate the pan 180° to ensure even browning. The loaf is done when a toothpick inserted in the center comes out clean, and the edges start pulling away from the pan.
Remove the bread from the oven and let it rest in the pan for 10 minutes. This short rest lets the steam finish the cooking process, keeping the crumb moist. Then, transfer the loaf to a wire rack to cool completely — the scent will fill your kitchen, and you’ll hear the faint crackle of the crust cooling, a sound that signals perfection.
That's it — you did it. But hold on, I've got a few more tricks that'll take this to another level…
Insider Tricks for Flawless Results
The Temperature Rule Nobody Follows
Never bake banana bread at a temperature higher than 350°F. Higher heat creates a crust too fast, trapping moisture inside and leading to a gummy center. Keep the oven at a steady 350°F, and if your oven runs hot, set it to 325°F and add a few extra minutes. A friend once cranked it to 400°F and ended up with a burnt exterior and raw middle — a lesson learned the hard way.
Why Your Nose Knows Best
Around the 25‑minute mark, start sniffing the kitchen. If you catch a sweet, toasty aroma with a hint of caramel, you’re almost there. The scent is a reliable indicator that the interior is set. Trust your nose more than the clock; ovens can vary by up to 15 degrees.
The 5‑Minute Rest That Changes Everything
After removing the loaf from the oven, let it sit in the pan for exactly five minutes before turning it out. This brief pause lets the crumb finish setting, preventing it from falling apart when you slice it. I once skipped this step, and the first slice fell apart like a crumbling sandcastle.
Mix‑Then‑Fold, Not Stir‑Vigorously
When incorporating the dry ingredients, use a folding motion rather than a vigorous stir. Over‑mixing develops gluten, which can make the bread dense. Think of it as coaxing the flour to join the party, not forcing it.
Cool on a Wire Rack, Not the Pan
Transferring the loaf to a wire rack allows air to circulate all around, preventing the bottom from getting soggy. If you leave it in the pan, steam gets trapped, and the slice you serve later might be a bit mushy.
Creative Twists and Variations
This recipe is a playground. Here are some of my favorite ways to switch things up:
Tropical Coconut Breeze
Replace half the butter with coconut oil and stir in ¼ cup shredded coconut. The subtle coconut aroma pairs beautifully with banana, turning the loaf into a vacation in a bite.
Berry‑Burst Surprise
Fold in ½ cup fresh or frozen blueberries after mixing the dry ingredients. The berries burst during baking, adding juicy pockets that contrast the chocolate chips.
Nutty Espresso Kick
Add 1 tablespoon instant espresso powder to the flour mixture and swap walnuts for toasted hazelnuts. The coffee note deepens the chocolate flavor, making it a perfect brunch treat.
Spiced Apple Fusion
Dice a small apple and toss it with a pinch of nutmeg and ginger before folding into the batter. The apple adds moisture and a gentle tartness that balances the banana sweetness.
Gluten‑Free Goodness
Swap the all‑purpose flour for a 1‑to‑1 gluten‑free blend and add 1 tablespoon xanthan gum. The texture remains tender, and the loaf stays true to its moist character.
Storing and Bringing It Back to Life
Fridge Storage
Wrap the cooled loaf tightly in plastic wrap or store it in an airtight container. It stays fresh for up to five days in the refrigerator. For an extra moisture boost, place a slice of fresh bread on top of the wrap; it will keep the banana bread from drying out.
Freezer Friendly
Slice the loaf before freezing and wrap each slice individually in parchment, then foil, and finally a zip‑top bag. Frozen slices retain flavor for up to three months. When you’re ready, pop a slice in the toaster or microwave for a quick treat.
Best Reheating Method
To revive a refrigerated slice, sprinkle a tiny splash of water (about a teaspoon) on the surface, cover with foil, and warm in a 300°F oven for 8‑10 minutes. The steam created restores that original melt‑in‑your‑mouth softness.