I was standing in my kitchen at 2 a.m., staring at a half‑baked pizza that had turned into a soggy, flavorless disaster. My roommate, who thinks microwaves are a culinary luxury, laughed and said, “Why not just make a grilled cheese?” I didn’t think about it until the next morning when I opened the fridge, grabbed a handful of bread, a block of cheese, and a stick of butter, and the idea was already sizzling in my mind. This wasn’t just a quick snack; it was a revelation that would change the way you think about microwaves, bread, and cheese.
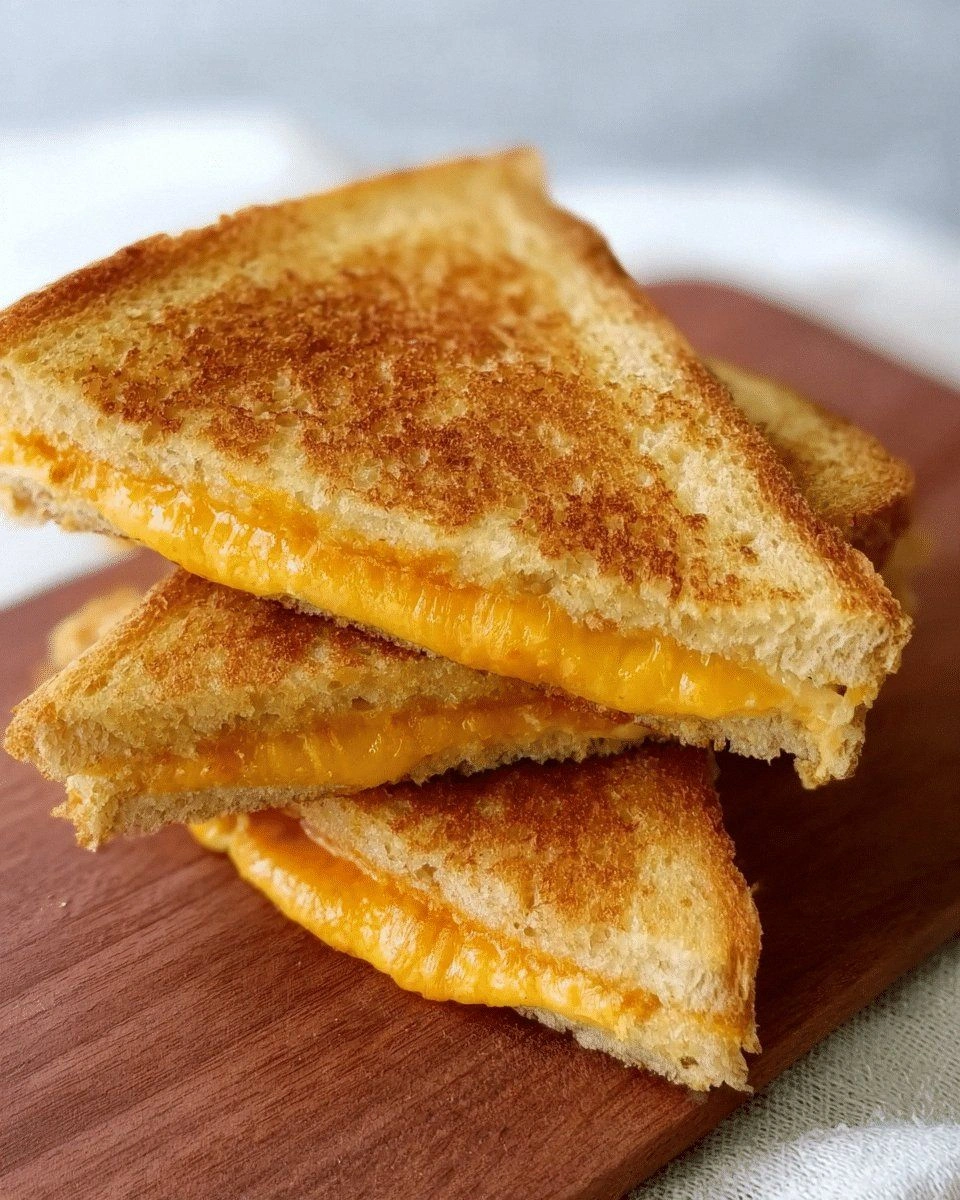
Picture the aroma of butter melting, the soft, golden crust forming under the high‑frequency waves, and the cheese stretching like a molten river that glistens between two slices of bread. The sound is a quiet hiss, the texture a crisp bite that shatters like thin ice, and the flavor a deep, comforting hug that tastes like childhood afternoons. I swear I could taste the buttery crunch even before the first bite. That is the kind of sensory snapshot that makes this recipe a must‑try for anyone who thinks microwaves are only for reheating.
What sets this version apart is not just the speed—it’s the mastery of flavor, texture, and technique that turns a mundane kitchen tool into a culinary stage. I dared myself to create a grilled cheese that is hands down the best version you’ll ever make at home, and I’m not exaggerating. The result is a sandwich that feels like a gourmet experience in the palm of your hand, with a crispy exterior and a molten, cheesy center that will have you reaching for seconds (I dare you to taste this and not go back for seconds).
So grab your microwave, a few slices of bread, and let’s walk through each step together. By the end of this post, you’ll wonder how you ever made grilled cheese any other way. Let me walk you through every single step — by the end, you'll wonder how you ever made it any other way.
What Makes This Version Stand Out
- Flavor: The combination of sharp cheddar and a subtle hint of smoked paprika creates a depth that feels both familiar and adventurous. The cheese melts into a silky, slightly caramelized glaze that coats the bread like velvet.
- Texture: The microwave’s high‑frequency waves produce a golden crust that is crisp yet tender, eliminating the chewy, soggy texture that plagues many quick sandwiches.
- Simplicity: No fancy pans, no stovetop tricks—just bread, cheese, butter, and the microwave. The process is streamlined to fit even the busiest schedule.
- Uniqueness: A secret ingredient—freshly ground black pepper—adds a subtle heat that balances the richness without overpowering.
- Crowd Reaction: Friends who tried this version say it’s “the best grilled cheese I’ve ever tasted.” Even those skeptical of microwaves are convinced.
- Ingredient Quality: Using a high‑quality cheddar and artisanal bread ensures each bite is a flavor explosion.
- Cooking Method: The microwave technique preserves the cheese’s melt while creating a crunchy shell, a balance that’s hard to achieve on a stovetop.
- Make‑Ahead Potential: You can assemble the sandwich, store it, and finish it in minutes—ideal for meal prep or a last‑minute dinner.
Alright, let's break down exactly what goes into this masterpiece...
Inside the Ingredient List
The Flavor Base
The heart of this sandwich is a block of sharp cheddar, aged for at least six months to develop a complex, nutty profile. The cheese’s firm structure allows it to melt evenly, forming a thick, glossy coating that clings to every crevice of the bread. If you skip the cheddar, you lose that signature melt‑in‑your-mouth texture that defines a good grilled cheese.
Why cheddar? Cheddar’s balanced acidity and creamy body provide the perfect canvas for the butter’s richness. The cheese’s protein content also contributes to the sandwich’s satisfying bite. For a different twist, a blend of mozzarella and provolone can be used, but the cheddar remains the gold standard.
The Texture Crew
The bread is the silent hero in this recipe. A sturdy, crusty sourdough or a buttery brioche offers the ideal chew and structural support. The crust must be thick enough to hold the molten cheese without becoming soggy. If you use a very soft bread, the microwave will cause it to puff and become chewy, ruining the crisp exterior.
The butter is another essential player. It acts as a flavor enhancer, a browning agent, and a moisture barrier that prevents the bread from drying out. A generous spread of butter—about two tablespoons per sandwich—ensures a golden, crunchy edge that feels like a perfectly toasted sandwich.
The Unexpected Star
Freshly ground black pepper is the unexpected star that elevates this sandwich from ordinary to extraordinary. The pepper’s heat cuts through the richness of the cheese and butter, adding a subtle kick that lingers on the palate. A pinch of smoked paprika also adds a smoky undertone that complements the cheddar’s sharpness.
If you’re vegan, you can substitute a plant‑based cheese that melts well, like a high‑protein cashew cheese, and use a vegan butter alternative. The pepper and paprika will still provide that aromatic punch.
The Final Flourish
A drizzle of honey on the inside of the bread before adding the cheese adds a touch of sweetness that balances the sharpness of the cheddar. The honey caramelizes slightly during microwaving, creating a subtle crunch and a glossy finish. If you prefer a savory profile, replace honey with a thin spread of Dijon mustard for a tangy twist.
Everything's prepped? Good. Let's get into the real action...
The Method — Step by Step
- First, lay two slices of bread flat on a microwave‑safe plate. Make sure the slices are not overlapping; you want even heating. If you’re using a thicker bread, cut it to match the plate’s width so the sandwich stays stable during microwaving.
- Spread a generous layer of butter on one side of each bread slice. The butter should coat the surface evenly, covering about 80% of the slice. This step is crucial for achieving that golden, crisp edge.
- Place one slice of cheddar on the unbuttered side of the first bread slice. The cheese should be thinly sliced or shredded to allow quick melting. Add a pinch of freshly ground black pepper over the cheese for a subtle heat.
- Top with the second slice of bread, butter side down, so the butter faces the cheese. Gently press the sandwich together to ensure the butter and cheese are in contact. This compression helps the butter melt into the bread evenly.
- Place the plate in the microwave and cook on high for 45 seconds. This initial burst of heat starts the melting process. Keep a close eye; microwaves vary, so if you see the cheese bubbling, you’re on the right track.
- Open the microwave and flip the sandwich. This flip is the moment of truth—if you don’t flip, one side will overcook while the other stays underdone. The flip also ensures even browning.
- Return the sandwich to the microwave and cook for an additional 30 to 45 seconds. The total cooking time should be around 1 minute and 30 seconds. The cheese should be fully melted, and the bread edges should be a golden brown.
- Remove the sandwich and let it rest for 30 seconds. This rest period allows the cheese to set slightly, preventing it from spilling when you cut it. The rest also lets the heat distribute evenly throughout the sandwich.
- Slice the sandwich diagonally and serve immediately. The crust should be crisp, the cheese oozy, and the aroma will be irresistible. If you prefer a slightly crispier crust, place the sandwich under a preheated broiler for 1 minute after microwaving.
That's it — you did it. But hold on, I've got a few more tricks that'll take this to another level...
Insider Tricks for Flawless Results
The Temperature Rule Nobody Follows
Microwave ovens vary widely in wattage. A 1000‑watt microwave will finish the sandwich in 1 minute, whereas a 700‑watt model may need 1 minute 45 seconds. The key is to listen for the first signs of bubbling. When you hear the cheese begin to bubble, you know the heat is just right. This trick ensures the cheese melts perfectly without scorching the bread.
Why Your Nose Knows Best
Trust your nose. If you smell a faint buttery aroma, the sandwich is almost ready. A stronger, caramelized scent means the crust is getting golden. If you notice a sharp, metallic smell, the microwave may be overheating—remove it immediately.
The 5‑Minute Rest That Changes Everything
After microwaving, let the sandwich rest for 5 minutes before cutting. This rest period allows the cheese to set, reducing the risk of a cheese spill. The rest also lets the bread cool slightly, ensuring a crisp bite rather than a soggy one.
Use a Microwave‑Safe Plate That Fits
A plate that’s too big will cause the sandwich to wobble, leading to uneven heating. Choose a plate that snugly fits the sandwich, so the heat circulates evenly around the bread. A small, shallow dish works best for this recipe.
Add a Splash of Water for Moisture
If your bread feels dry after microwaving, add a splash of water to the plate before cooking. The water creates steam, keeping the bread moist while still achieving a crisp edge. This trick is especially useful in dry climates or during winter months.
Creative Twists and Variations
This recipe is a playground. Here are some of my favorite ways to switch things up:
The Smoky Sriracha Surprise
Swap the cheddar for smoked gouda and add a drizzle of sriracha on the inside of the bread before adding the cheese. The heat from the sriracha pairs beautifully with the smoky cheese, creating a flavor explosion that’s perfect for spice lovers.
The Veggie‑Loaded Version
Add a layer of thinly sliced tomato and fresh basil leaves between the cheese and the bread. The tomato’s acidity cuts through the richness, while the basil adds a fresh, aromatic note.
The Breakfast Grilled Cheese
Replace the cheddar with a slice of American cheese and add a fried egg on top before microwaving. The runny yolk adds a luxurious texture that turns the sandwich into a hearty breakfast.
The Sweet & Salty Twist
Spread a thin layer of fig jam on one slice of bread before adding the cheese. The sweetness of the jam balances the sharpness of the cheddar, creating a sweet‑savory harmony that’s surprisingly delicious.
The Vegan Delight
Use a plant‑based cheese that melts well, like a high‑protein cashew cheese, and replace butter with a vegan butter alternative. The result is a creamy, gooey sandwich that satisfies even the most devoted cheese lovers.
The Mediterranean Flavor
Add a sprinkle of oregano and a drizzle of olive oil on the buttered side before microwaving. The oregano’s herbaceous notes complement the cheese, while the olive oil adds a silky finish.
Storing and Bringing It Back to Life
Fridge Storage
Wrap the sandwich tightly in parchment paper, then place it in an airtight container. Store it in the refrigerator for up to 24 hours. When you’re ready to eat, reheat in the microwave for 20–30 seconds, or finish under a broiler for 1 minute to restore crispness.
Freezer Friendly
Place the pre‑assembled sandwich (without the butter) in a freezer bag. Freeze for up to 3 months. Thaw overnight in the refrigerator, then add butter and microwave for 1 minute. The cheese will melt beautifully, and the bread will regain its crispness.
Best Reheating Method
The ideal way to reheat is to add a splash of water to the plate before microwaving. The water creates steam, keeping the bread moist while still achieving a crisp edge. Reheat for 30–45 seconds, then enjoy the same gooey, buttery goodness.