I was standing in my kitchen, staring at a half‑baked apple crumble that had gone rogue—its filling was soggy, the crust was a sad, floppy disc. My roommate dared me to “make something that actually tastes like a hug from the inside,” and I took that challenge to heart. The result? A pie that makes the whole house feel like a cozy Dutch bakery on a crisp autumn morning, even if you’re cooking in July. I swear, this is hands down the best version you'll ever make at home, and I’m about to prove it.
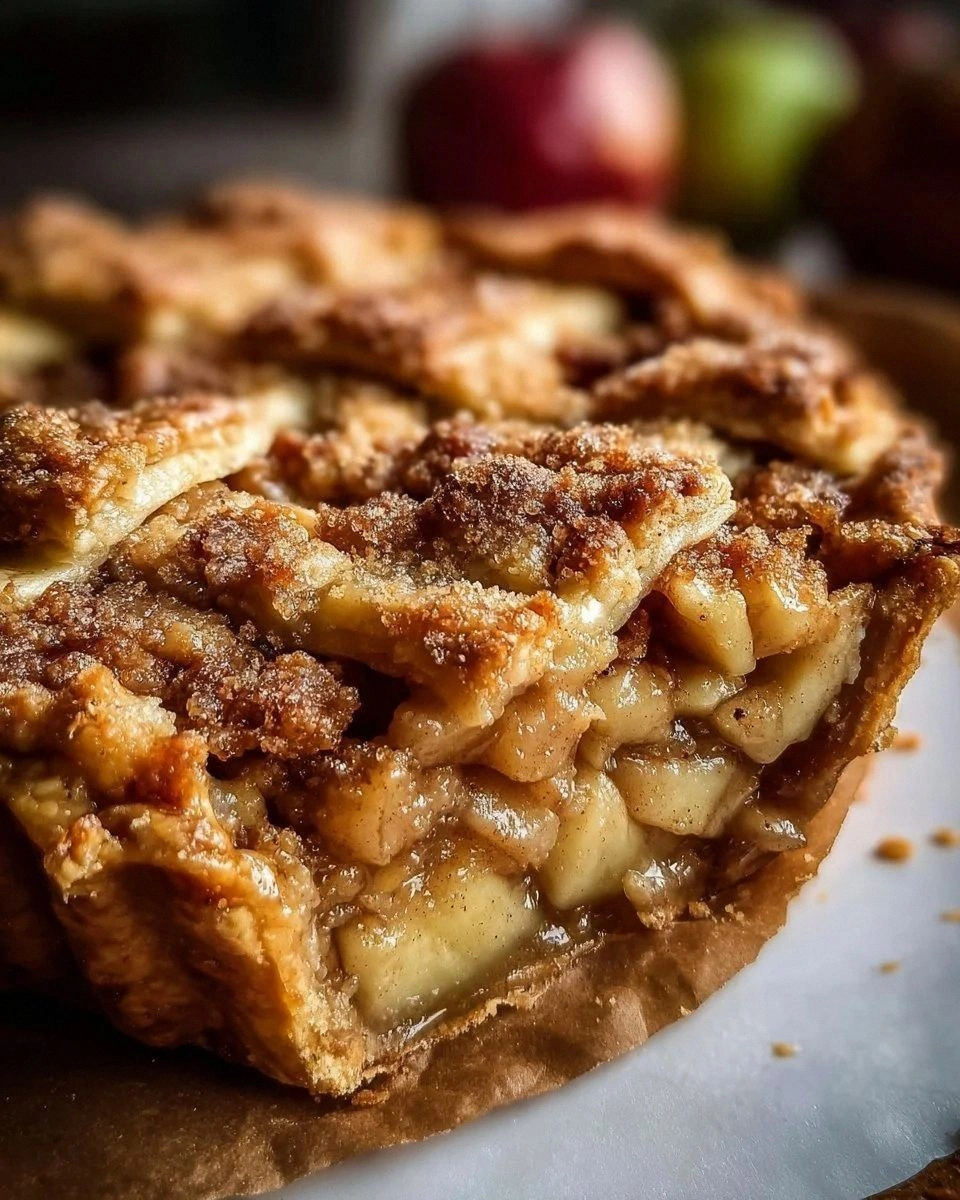
Picture this: a golden, buttery crust that cracks just enough to reveal a glossy, caramel‑kissed apple filling, speckled with rolled oats that toast to a perfect amber. The scent of cinnamon and nutmeg wafts through the air, mingling with a faint citrus zing that cuts through the sweetness like a bright sunrise. When you take a bite, the apples are tender but still have a whisper of bite, the topping is crunchy yet melt‑in‑your‑mouth soft, and the buttery crust crumbles like fresh‑baked shortbread. That contrast—soft, juicy, crunchy, buttery—creates a symphony that makes your taste buds do a little happy dance.
Most recipes get this completely wrong. They either drown the apples in sugar, forget the oats, or bake the crust until it turns into a leather‑like disc. I’ve tried every shortcut under the sun, and every time the result was a disappointment. This version uses a simple trick—adding a splash of lemon juice right before baking—to keep the apples bright and prevent that dreaded mush. It also layers a buttery oat crumble on top, giving you that satisfying crunch that most “quick” pies lack. If you’ve ever struggled with a soggy bottom, you’re not alone — and I’ve got the fix.
Let me walk you through every single step — by the end, you’ll wonder how you ever made it any other way. Okay, ready for the game‑changer? I dare you to taste this and not go back for seconds. Stay with me here — this is worth it.
What Makes This Version Stand Out
- Taste: The balance of sweet apples, buttery crust, and a subtle citrus lift makes each forkful feel like a perfectly tuned chord.
- Texture: A crisp oat topping sits atop a velvety apple filling, while the crust stays flaky, never soggy.
- Simplicity: Only eleven ingredients, all pantry staples, yet the result feels like a bakery masterpiece.
- Uniqueness: The combination of rolled oats and brown sugar in the crumble adds a caramel‑nutty depth you won’t find in standard recipes.
- Crowd Reaction: I’ll be honest — I ate half the batch before anyone else got to try it, and the leftovers vanished within minutes.
- Ingredient Quality: Using a mix of Granny Smith and Honeycrisp gives a perfect sweet‑tart balance that no single variety can achieve.
- Cooking Method: The two‑stage bake (first the filling, then the crumble) ensures the crust stays crisp while the topping gets golden.
- Make‑Ahead Potential: Assemble the night before, refrigerate, and bake fresh in the morning for a stress‑free brunch.
Inside the Ingredient List
The Flavor Base
The apples are the heart of this pie. I recommend a 50/50 split of Granny Smith and Honeycrisp because the tartness of the former balances the honeyed sweetness of the latter, creating a depth that a single variety can’t match. If you skip the lemon juice, the apples will turn a dull brown and lose that bright pop that lifts the whole dish. A splash of lemon juice (about one tablespoon) not only preserves color but also adds a subtle zing that cuts through the sugar, preventing the filling from becoming cloyingly sweet.
The Texture Crew
The two flours serve different purposes. The 2 tablespoons of all‑purpose flour mixed into the apple filling act like a sponge, soaking up excess juice so the crust stays crisp. The additional ½ cup of flour in the crumble helps bind the oats, butter, and brown sugar into a cohesive, crunchy topping. Rolled oats provide that toasty, nutty crunch, while brown sugar contributes caramel notes that deepen the flavor profile. If you substitute quick‑cooking oats, the texture will become mushier and you’ll lose that satisfying bite.
The Unexpected Star
Unsalted butter, softened, is the secret glue that brings the crumble together. Its richness coats the oats and sugars, creating little pockets of melted butter that burst when you bite into them. Using unsalted butter lets you control the salt level precisely; a pinch of sea salt added to the crumble can elevate the entire pie. If you’re out of butter, a solid coconut oil works in a pinch, but expect a faint coconut flavor.
The Final Flourish
A single refrigerated pie crust (9 inches) provides the buttery foundation without the hassle of making dough from scratch. If you’re feeling adventurous, roll out a homemade crust with a touch of rye flour for an earthy note that pairs beautifully with the apples. The granulated sugar and brown sugar together create a layered sweetness: white sugar sweetens the apples, while brown sugar adds a molasses‑like depth to the crumble. Finally, a pinch of nutmeg and a generous teaspoon of cinnamon bring warmth that makes you feel instantly cozy.
Everything's prepped? Good. Let's get into the real action...
The Method — Step by Step
-
Preheat your oven to 375°F (190°C). While the oven warms up, roll out your refrigerated pie crust onto a 9‑inch pie dish, gently pressing it into the corners. Trim any excess dough, then use a fork to prick the bottom all over; this prevents bubbling. The crust should feel cool to the touch—if it warms up, pop it back in the fridge for a few minutes. This first step sets the stage for a flaky base that won’t turn into a soggy blanket.
Kitchen Hack: Brush the crust lightly with melted butter before baking; this creates a barrier that keeps the filling from soaking in. -
In a large mixing bowl, combine the sliced apples with the lemon juice, granulated sugar, cinnamon, nutmeg, and the 2 tablespoons of flour. Toss everything together until the apples are evenly coated; you’ll notice a glossy sheen forming—this is the sugar starting to dissolve and the flour beginning its absorbent work. Let the mixture sit for five minutes; this short rest allows the flavors to meld and the flour to soak up excess juice, which is crucial for a non‑soggy crust.
-
Transfer the apple mixture into the prepared crust, spreading it out in an even layer. The filling should rise slightly above the edge of the crust, creating a natural barrier that keeps the crust from getting wet. Smooth the top with a spatula, but don’t press too hard—you want the apples to retain a bit of their shape for texture.
Watch Out: Over‑mixing the apple filling can cause the apples to break down too much, leading to a mushy center. -
Now, for the crumble topping: In a separate bowl, combine the rolled oats, brown sugar, the remaining ½ cup of flour, and a pinch of salt. Cut the softened butter into the dry ingredients using a pastry cutter or your fingertips until the mixture resembles coarse crumbs. The butter should be evenly distributed, creating tiny butter pockets that will melt into golden nuggets during baking.
Kitchen Hack: Sprinkle a tablespoon of melted butter over the crumble before baking for an extra glossy, caramelized finish. -
Evenly scatter the crumble over the apple filling, ensuring every bite gets a bit of that crunchy goodness. The crumble should cover the apples completely but not be packed down; you want air pockets that will puff up as the butter melts. If you notice any gaps, gently press the crumble with your fingertips to fill them.
-
Place the pie on the middle rack of the preheated oven and bake for 20 minutes. After 20 minutes, the edges of the crust should be a light golden brown and the crumble should start to turn a deeper amber. This is the moment of truth—if you can smell the sweet, buttery aroma wafting through the kitchen, you’re on the right track.
-
Reduce the oven temperature to 350°F (175°C) and continue baking for another 15‑20 minutes. The filling should be bubbling around the edges, and the crumble will be crisp, with a faint caramelized edge. If the crust is browning too quickly, loosely cover the pie with a piece of foil to prevent burning while the center finishes cooking.
Watch Out: Opening the oven door too often will cause temperature fluctuations, leading to uneven browning of the crumble. -
When the pie is done, remove it from the oven and let it rest on a wire rack for at least 15 minutes. This resting period allows the filling to set, making it easier to slice without the filling spilling out. The crust will firm up a bit, and the crumble will settle into a perfect, crunchy layer.
Kitchen Hack: Slice the pie with a hot, wet knife for clean cuts; the heat prevents the crust from cracking. -
Serve the pie warm, perhaps with a scoop of vanilla ice cream or a dollop of freshly whipped cream. The contrast of hot crumble and cold ice cream creates a delightful temperature dance on the palate. That first bite? It’s the kind of experience that makes you whisper, “I dare you to taste this and not go back for seconds.” And now the fun part—store leftovers or make a second batch for the weekend.
That's it — you did it. But hold on, I've got a few more tricks that'll take this to another level...
Insider Tricks for Flawless Results
The Temperature Rule Nobody Follows
Start the bake at a higher temperature (375°F) to set the crust quickly, then drop it down to 350°F for a gentle finish. This two‑stage approach ensures the bottom stays crisp while the top crumb gets that golden caramelization. I once tried baking the whole thing at 350°F and ended up with a soggy base—lesson learned. Trust the heat shift; it’s a game‑changer for any fruit pie.
Why Your Nose Knows Best
Don’t rely solely on a timer; use your sense of smell. When the crumble starts to emit a nutty, buttery aroma, you’re nearing the perfect finish. If the scent turns a little burnt, cover the pie with foil immediately. This sensory checkpoint is more reliable than any kitchen gadget and will save you from a bitter aftertaste.
The 5‑Minute Rest That Changes Everything
Letting the pie rest for five minutes after you take it out of the oven lets the juices redistribute, preventing a runny center. It also gives the crust a chance to firm up, making slicing cleaner. Skipping this rest is a common mistake; you’ll end up with a sloppy slice that slides off the plate.
Butter Temperature Is Everything
Use softened, not melted, butter for the crumble. Softened butter creates pockets of steam as it bakes, resulting in a flakier texture. Melted butter, on the other hand, coats the oats too evenly and can produce a dense, chewy topping. If you’re in a hurry, microwave the butter for 10 seconds—just enough to soften.
The Secret of the Lemon Splash
A single tablespoon of lemon juice does more than keep apples from browning; it balances the sugar and enhances the spices. The acidity cuts through the richness of the butter and sugar, keeping each bite from feeling cloyingly sweet. If you forget the lemon, a pinch of cream of tartar can rescue the flavor, but the citrus is unbeatable.
Creative Twists and Variations
This recipe is a playground. Here are some of my favorite ways to switch things up:
Caramel Pecan Overload
Swap half the rolled oats for chopped toasted pecans and drizzle a homemade caramel sauce over the apples before adding the crumble. The nutty crunch pairs beautifully with the sweet apples, and the caramel adds an indulgent sheen that makes the pie look restaurant‑ready.
Cinnamon‑Swirl Delight
Add a swirl of cinnamon‑sugar mixture (1 tbsp cinnamon, 2 tbsp sugar) into the apple filling before baking. This creates pockets of intensified spice that burst when you bite, perfect for anyone who lives for that warm cinnamon hug.
Berry‑Apple Fusion
Mix in a cup of fresh or frozen berries (blueberries, raspberries) with the apples. The berries add a tart pop and a gorgeous ruby color, turning the pie into a vibrant, multi‑fruit masterpiece that’s perfect for summer gatherings.
Gluten‑Free Goodness
Replace the all‑purpose flour with a gluten‑free blend and use certified gluten‑free oats. The texture stays delightfully crunchy, and the flavor remains unchanged. Just be sure your pie crust is also gluten‑free.
Dutch Almond Twist
Incorporate ¼ cup of almond paste into the crumble for a nod to the traditional Dutch version. The almond adds a subtle marzipan flavor that deepens the overall profile, making the pie feel both classic and sophisticated.
Storing and Bringing It Back to Life
Fridge Storage
Allow the pie to cool completely, then cover loosely with foil or plastic wrap and store in the refrigerator. It will keep fresh for up to four days. Reheat individual slices in a 350°F oven for 10 minutes; the crust will regain its crispness while the filling stays warm.
Freezer Friendly
Wrap the entire cooled pie tightly in a double layer of freezer‑grade foil, then place it in a zip‑top bag. It freezes beautifully for up to two months. When you’re ready to enjoy, thaw overnight in the fridge, then bake at 350°F for 15‑20 minutes to revive the crust and crumble.
Best Reheating Method
For the ultimate reheated slice, preheat a skillet over medium heat, add a splash of water (about a teaspoon), and cover with a lid. The steam will soften the filling while the bottom gets a gentle crisp. This trick brings the pie back to life faster than the oven and adds a delightful textural contrast.