I was standing in my kitchen on a chilly October evening, the kind where the wind howls outside and the house smells like damp leaves. I had just burned the bottom of a batch of store‑bought caramel sauce, and the smoke alarm decided to join the party. In that moment of culinary chaos, I swore I would never trust a pre‑made caramel again. I grabbed a bottle of fresh apple cider from the pantry, a stick of butter, and a daring idea sparked: what if I turned that fiery, sweet cider into a silky, caramel‑laden ice cream that could hug you from the inside out?
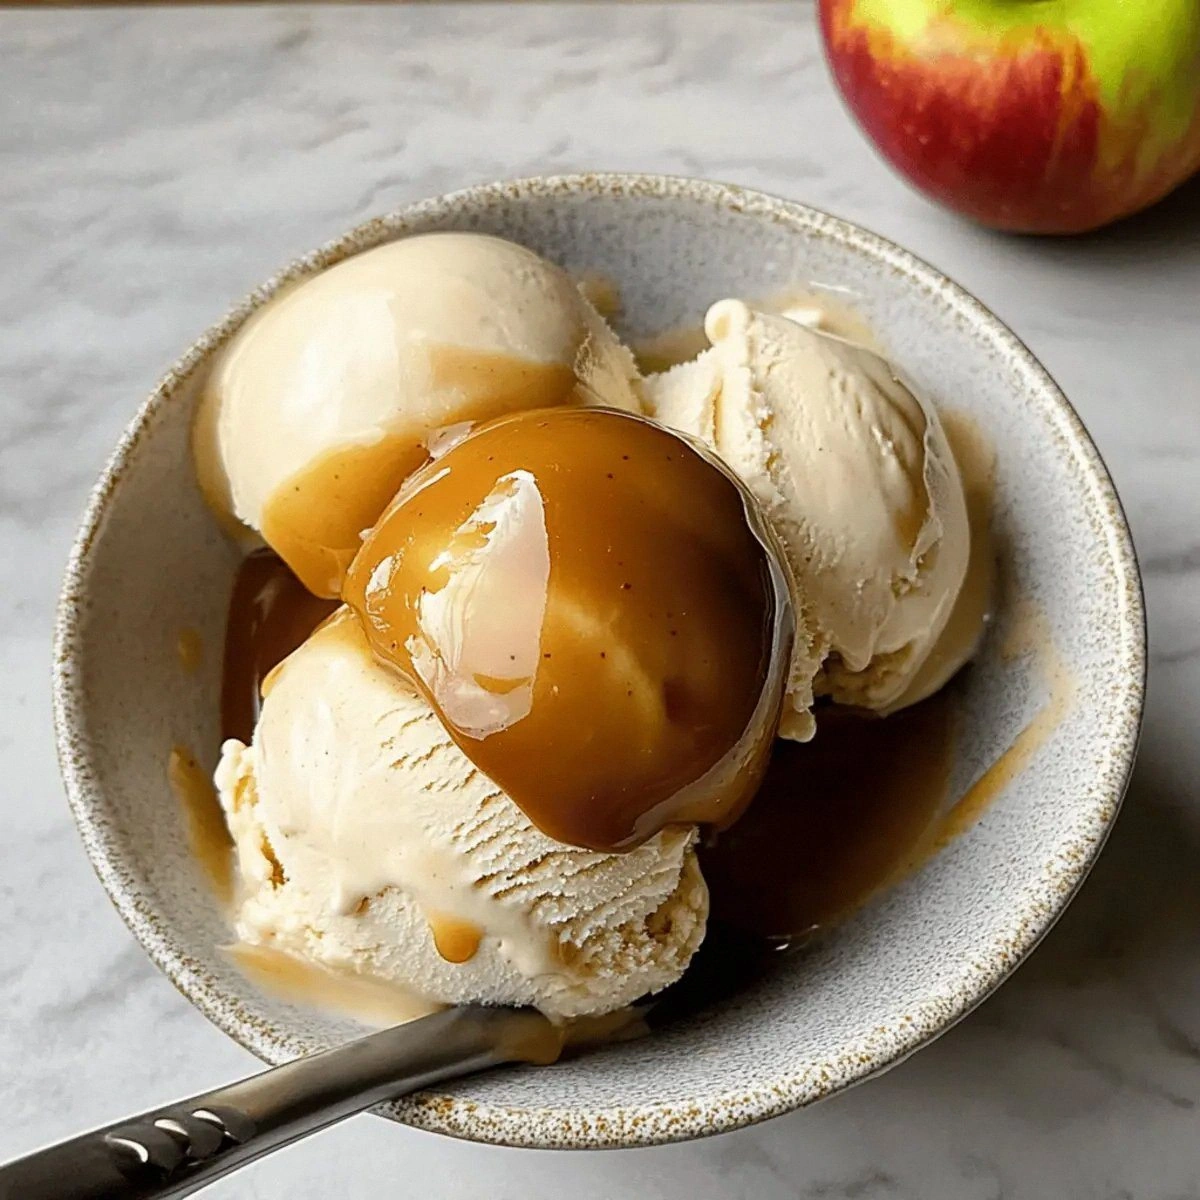
Picture this: a spoonful of ice cream that shimmers like amber, the aroma of cinnamon and butter swirling together, and a taste that dances between the crisp bite of a fresh apple and the deep, buttery richness of caramel. The first lick is a gentle sigh of warm spices, then the cool cream rushes in, coating your palate like a soft cashmere blanket. You can hear the faint crackle of the caramel as it meets the cold, a sound that promises indulgence with every bite. The texture? Imagine a cloud that’s been folded into a velvet rope—smooth, dense, yet somehow airy enough to melt on your tongue without a fight.
Most recipes out there try to shortcut this experience with powdered mixes or cheap syrups, and they end up tasting like a candy store after a power outage—overly sweet, flat, and missing the depth that only real apple cider can bring. This version, however, uses a reduction technique that concentrates the cider’s natural sugars and spices, turning it into a caramel that’s both buttery and subtly tart. The secret weapon is a quick butter‑infused caramel base that never burns because you’ll be watching it like a hawk, and the final churn in heavy cream locks in that luxurious mouthfeel.
I’m going to let you in on a little secret that most home cooks overlook: the moment you add the vanilla extract, the entire mixture lifts, releasing aromatic notes that make the kitchen feel like a boutique bakery. I dare you to taste this and not go back for seconds. Okay, ready for the game‑changer? Let me walk you through every single step — by the end, you’ll wonder how you ever made it any other way.
What Makes This Version Stand Out
- Flavor Depth: The cider reduction brings a natural apple‑sweetness that no artificial syrup can match, layered with caramel butter for a buttery finish.
- Texture Perfection: By tempering the caramel with heavy cream, the ice cream stays silky and resists icy crystals, even after a night in the freezer.
- Simplicity: Only eight pantry staples are needed; no exotic spices, no fancy equipment beyond an ice cream maker.
- Unique Twist: The addition of fine sea salt at the end creates a sweet‑salty contrast that makes each bite pop like fireworks.
- Crowd Reaction: Guests will claim it’s “the best thing they’ve ever tasted on a fall night,” and you’ll earn instant bragging rights.
- Ingredient Quality: Fresh apple cider, not concentrate, gives a bright, authentic flavor that anchors the caramel.
- Method Mastery: The slow reduction technique prevents scorching, ensuring a glossy caramel that coats the ice cream like satin.
- Make‑Ahead Potential: This ice cream actually improves after a few hours in the freezer, letting the flavors meld into a harmonious whole.
Inside the Ingredient List
The Flavor Base
Fresh apple cider is the heart of this recipe. Its natural sugars caramelize beautifully, and the subtle acidity balances the richness of butter. If you substitute a store‑bought concentrate, you’ll lose that bright, crisp apple note and end up with a syrupy mess. Look for a cider that’s unfiltered and has a hint of spice already in it—this cuts down on the amount of added cinnamon you’ll need.
The Texture Crew
Unsalted butter and heavy cream are the dynamic duo that give this ice cream its luxurious mouthfeel. Butter adds a glossy sheen to the caramel, while heavy cream slows down ice crystal formation during churn. If you’re dairy‑intolerant, you can swap the butter for a high‑quality coconut oil, but expect a faint coconut undertone that will change the flavor profile.
The Unexpected Star
Fine sea salt might seem like a tiny detail, but it’s the secret that makes the caramel sing. A pinch of salt amplifies the sweetness and adds depth, preventing the dessert from feeling cloyingly sweet. If you’re on a low‑sodium diet, use a pinch less, but don’t skip it entirely—your taste buds will thank you.
The Final Flourish
Brown sugar, cinnamon, and vanilla extract round out the flavor profile. Brown sugar contributes molasses notes that deepen the caramel, while cinnamon adds that quintessential fall warmth. Vanilla is the finishing brushstroke, releasing aromatic compounds that make the entire mixture feel cozy and inviting. If you’re adventurous, a splash of bourbon can replace half the vanilla for an adult‑only twist.
Everything's prepped? Good. Let's get into the real action...
The Method — Step by Step
Start by pouring the 2 cups of fresh apple cider into a wide, shallow saucepan. Turn the heat to medium‑high and watch the liquid bubble like a small storm. As the cider simmers, it will release a fragrant steam that smells like a walk through an orchard after a light rain. Let it reduce until it’s about half its original volume—roughly 10‑12 minutes—so the flavors concentrate without turning bitter. Tip: Stir occasionally to prevent scorching at the edges.
When the cider has thickened to a syrupy consistency, lower the heat and whisk in ½ cup of unsalted butter, one piece at a time. The butter will melt into a glossy pool, creating a silky caramel base. That sizzle when it hits the pan? Absolute perfection. Keep whisking until the mixture is smooth and no butter lumps remain. This is the moment of truth—if the caramel looks grainy, you’ve either reduced too far or the heat is too high.
Now sprinkle in 1 cup of brown sugar, 1 teaspoon of ground cinnamon, and ½ teaspoon of fine sea salt. Stir vigorously; the sugar will dissolve, and the cinnamon will perfume the caramel like a warm blanket. You’ll notice the mixture thickening further, coating the back of a spoon in a glossy sheen. Let it simmer for another 2‑3 minutes, then remove from heat and stir in 1 teaspoon of vanilla extract. The vanilla will rise like a fragrant plume, signaling that the base is ready for the next stage.
In a separate saucepan, gently heat 2 cups of heavy cream and 1 cup of whole milk over low heat. You’re not trying to boil them—just warm them until they’re steaming, about 5 minutes. This step is crucial because a warm dairy mixture integrates more seamlessly with the hot caramel, preventing curdling.
Slowly pour the warm cream‑milk mixture into the caramel, whisking constantly. The caramel will loosen, turning into a luscious sauce that swirls like molten amber. Keep whisking for about a minute until the blend is uniform and glossy. At this point, you can taste a spoonful—if it’s too sweet, a pinch more sea salt will bring balance.
Cover the bowl with plastic wrap, pressing the wrap directly onto the surface of the custard to stop a skin from forming. Chill the mixture in the refrigerator for at least 2 hours, or overnight if you have the patience. The colder the base, the quicker it will churn into a smooth ice cream.
When you’re ready to churn, give the custard a quick stir, then pour it into your ice cream maker. Follow the manufacturer’s instructions—usually 20‑25 minutes for a soft‑serve consistency. You’ll hear the motor whirring and see the mixture thicken, turning from a glossy sauce into a fluffy, cloud‑like texture.
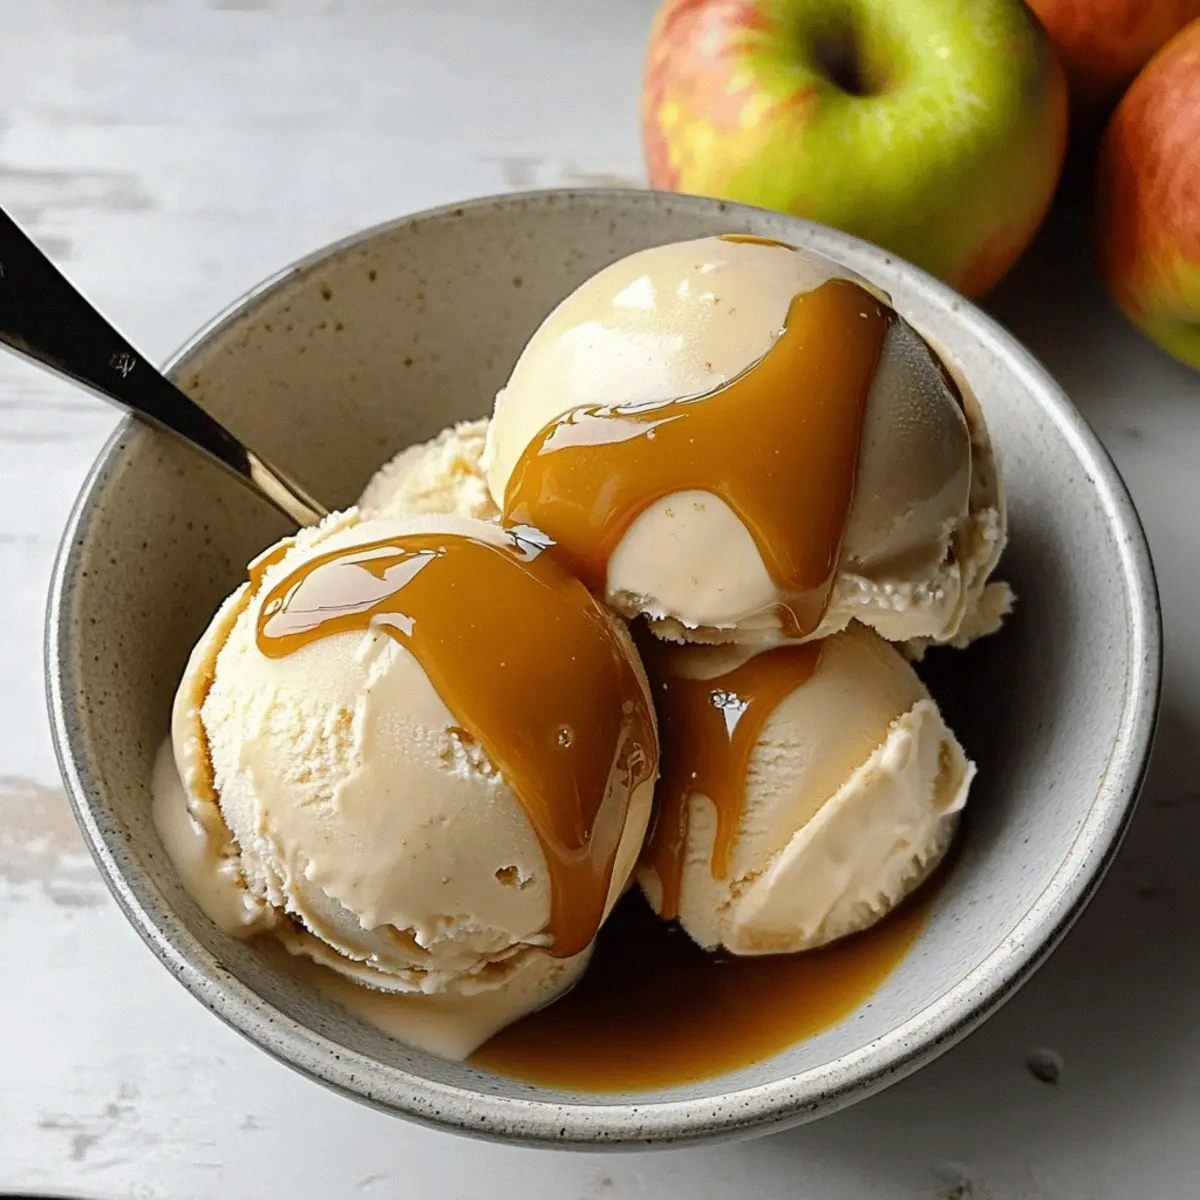
Transfer the churned ice cream into an airtight container, smoothing the top with a spatula. For an extra caramel ribbon, drizzle a spoonful of the leftover hot caramel (if you saved any) over the surface before sealing. Freeze for at least 4 hours to let it firm up. When you finally scoop it, you’ll hear that satisfying crack as the spoon cuts through the creamy mass.
That's it — you did it. But hold on, I've got a few more tricks that'll take this to another level...
Insider Tricks for Flawless Results
The Temperature Rule Nobody Follows
Most home cooks think “room temperature” is fine for the custard before churning, but the truth is that a colder base reduces the time the ice cream maker needs to work, resulting in a smoother texture. Chill the mixture for at least 2 hours, and if you have time, let it sit in the freezer for 15 minutes before pouring it into the machine. This tiny extra chill creates smaller ice crystals, giving you that melt‑in‑your‑mouth feel.
Why Your Nose Knows Best
Before you pour the dairy into the caramel, take a moment to inhale the aroma. If you smell a hint of burnt sugar, the caramel is over‑reduced and will taste bitter. Trust your nose; it’s a better indicator than a timer. A quick sniff can save you from a disastrous batch and keep the flavor bright and balanced.
The 5‑Minute Rest That Changes Everything
After churning, let the ice cream sit at room temperature for exactly five minutes before transferring it to the freezer. This short rest allows the fat molecules to re‑align, preventing a gritty texture later on. I once skipped this step and ended up with an ice cream that felt like shaved ice—lesson learned.
Salt Timing is Everything
Add the fine sea salt at the very end of the caramel reduction, not at the beginning. Adding it too early can cause the sugar to crystallize, ruining the smoothness. A pinch at the end brightens the flavor without compromising texture.
Freeze with a Frozen Bowl
If you don’t have an ice cream maker, you can use a frozen metal bowl. Chill a large stainless‑steel bowl in the freezer for at least an hour, then pour the custard into it and whisk vigorously every 5 minutes. The metal’s conductivity mimics the churn, and the result is surprisingly smooth.
Creative Twists and Variations
This recipe is a playground. Here are some of my favorite ways to switch things up:
Maple‑Brown Sugar Swirl
Replace half of the brown sugar with pure maple syrup during the caramel stage. The maple adds a woody, earthy sweetness that pairs perfectly with the apple notes. Ideal for those who love a breakfast‑in‑dessert vibe.
Spiked Autumn
Add a tablespoon of bourbon or dark rum after the caramel has cooled slightly. The alcohol lifts the flavors and adds a subtle warmth that’s perfect for a chilly night by the fire.
Nutty Crunch
Fold in toasted pecans or walnuts during the last few minutes of churning. The nuts introduce a crunchy texture and a buttery flavor that complements the caramel’s silkiness.
Apple‑Cider Sorbet Twist
For a lighter version, halve the heavy cream and replace the other half with additional apple cider. The result is a frosty sorbet that still carries the caramel depth but feels more refreshing.
Chocolate‑Covered Caramel
Melt dark chocolate and drizzle it over the ice cream just before serving. The bittersweet chocolate cuts through the sweetness, creating a sophisticated flavor combo reminiscent of a classic chocolate‑caramel bar.
Storing and Bringing It Back to Life
Fridge Storage
If you plan to serve the ice cream within 24 hours, keep it in a sealed container in the freezer, but bring it to the fridge for 10‑15 minutes before scooping. This softens the surface, making it easier to form perfect scoops without melting the whole batch.
Freezer Friendly
For longer storage, wrap the container in a layer of parchment paper before sealing the lid. This extra barrier prevents ice crystals from forming on the surface. The ice cream will stay at peak quality for up to 3 weeks.
Best Reheating Method
When you’re ready to serve after a few days, let the ice cream sit at room temperature for about 5 minutes, then stir in a splash of whole milk (about a tablespoon). The milk creates a gentle steam that revives the creamy texture, making it taste as fresh as the day you churned it.