It was a rainy Tuesday, the kind of night that makes you feel like you’re stuck inside a stew of your own thoughts. I had just pulled the last slice of pizza from the fridge, the cheese still dripping, and the aroma of burnt garlic in the air was a warning sign. My friend texted me, “I dare you to make something better than that pizza tonight.” I laughed, but the challenge was real, and that’s when I pulled out my Instant Pot, a trusty companion that has saved my life more times than I can count. The kitchen was a chaotic symphony: sizzling onions, the clatter of a wooden spoon, the soft hum of the pot, and the faint scent of thyme drifting from the pantry. I could feel the heat rise, the anticipation building like a secret recipe waiting to be revealed. The moment I set the pot on the stove, I knew something was about to change.
I’m not going to sugarcoat it: my first attempt at a homestyle chicken dinner was a disaster. I overcooked the veggies until they were mushy, and the chicken came out dry like a forgotten piece of toast. The next time I tried, I over-seasoned it, and the broth ended up tasting like a grocery store aisle. But this time, I had a game plan. I’ve refined the technique over weeks, and the result is a dish that feels like a hug in a bowl, the kind of comfort that makes you forget the world outside your kitchen window. The instant pot does the heavy lifting, turning a simple mix of chicken, carrots, potatoes, and onions into a melt‑in‑your‑mouth masterpiece. I’m talking about a sauce that clings to the meat and vegetables like velvet, a texture that balances tender meat with a slight chew from the potatoes, and a flavor profile that sings with fresh herbs.
What makes this version stand out is not just the ingredients, but the method. I’ve discovered that a quick sear on the chicken before pressure cooking locks in juices and creates a golden crust that adds depth to the dish. The broth is a simple chicken stock, but I add a splash of white wine for acidity that cuts through the richness. The carrots and potatoes are cut in uniform pieces so they cook evenly, and I stir in a teaspoon of thyme and parsley right before the pot seals, releasing their aromatic oils. The final touch? A light cornstarch slurry that thickens the sauce just enough to coat the ingredients without turning it into a gravy.
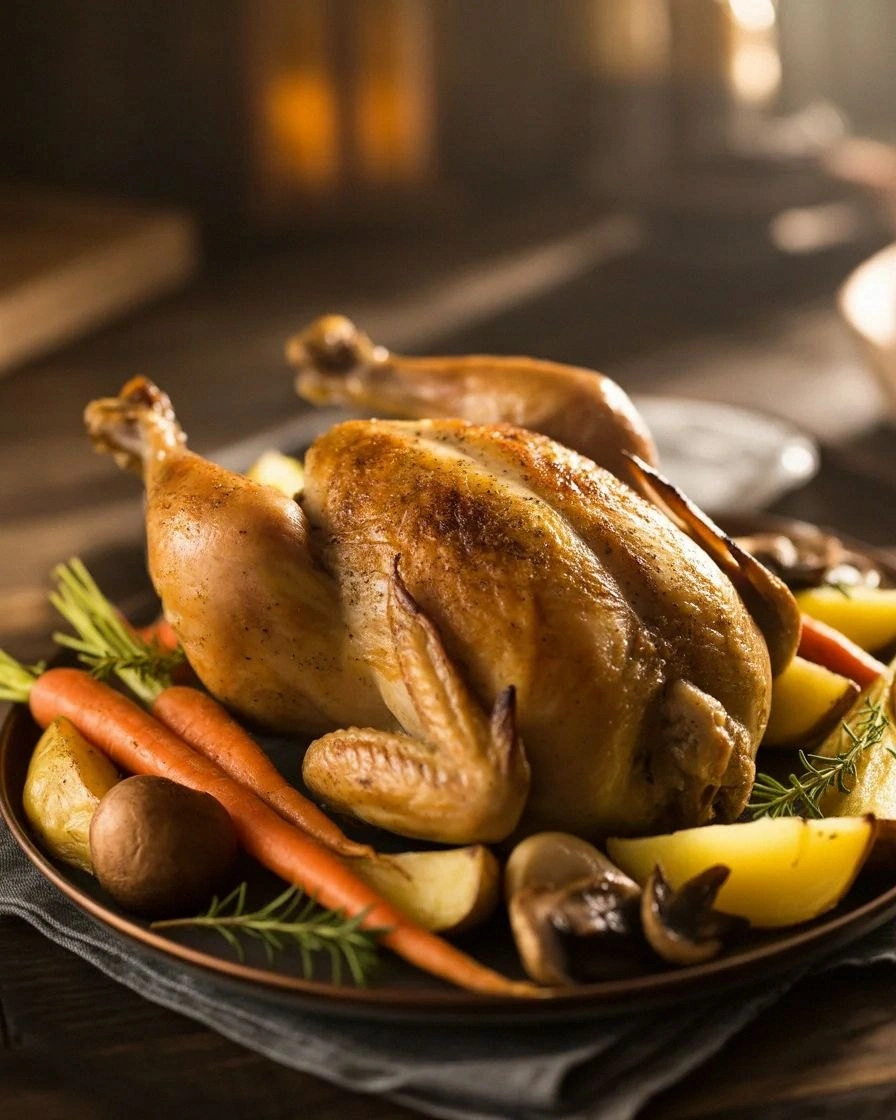
Picture yourself pulling this out of the pot, the steam curling like a savory cloud, the aroma filling the kitchen with the scent of roasted garlic and fresh herbs. The first bite is a burst of savory chicken, sweet carrots, and earthy potatoes, all wrapped in a silky sauce that’s not too heavy. I dare you to taste this and not go back for seconds. If you’ve ever struggled with a one‑pot meal that ends up soggy or bland, you’re not alone — and I’ve got the fix. This is hands down the best version you’ll ever make at home, and by the end of this guide, you’ll wonder how you ever cooked without this method. Let me walk you through every single step — by the end, you’ll wonder how you ever made it any other way.
What Makes This Version Stand Out
- Flavor: The combination of thyme, parsley, and a splash of white wine elevates the broth, giving it a bright, herbaceous undertone that balances the richness of the chicken.
- Texture: Searing the chicken before sealing locks in moisture, creating a tender interior while the exterior develops a caramelized crust that adds a satisfying bite.
- Simplicity: All ingredients are prepped in a single bowl, and the Instant Pot handles the cooking, making the dish a breeze for busy weeknights.
- Uniqueness: The addition of a cornstarch slurry gives the sauce a silky coat without the heaviness of cream or butter.
- Crowd Reaction: Friends rave about the comforting flavor, and the dish is a hit even with picky eaters who love the classic homestyle feel.
- Ingredient Quality: Using fresh, high‑quality chicken and vegetables ensures the dish tastes like a restaurant meal without the cost.
- Cooking Method: Pressure cooking reduces cooking time drastically, making it a perfect choice for those who want dinner on the table fast.
- Make‑Ahead Potential: The dish keeps well in the fridge and reheat beautifully, so you can prepare it ahead of time for a relaxed weekend dinner.
Alright, let’s break down exactly what goes into this masterpiece…
Inside the Ingredient List
The Flavor Base
The foundation of this dish is simple yet powerful: a splash of white wine, a pinch of salt, and a dash of pepper. The wine adds a subtle acidity that brightens the broth and cuts through the natural fattiness of the chicken thighs. If you’re avoiding alcohol, a tablespoon of apple cider vinegar or even a splash of lemon juice can mimic the same effect. The key is to balance the flavors; too much acidity and you’ll drown the gentle sweetness of the carrots and potatoes.
Salt is a flavor enhancer that brings out the umami in the broth and the natural sweetness of the vegetables. I recommend sea salt for its subtle mineral note. Pepper, on the other hand, adds a gentle heat that lingers on the palate without overpowering the dish. A fresh grind of black pepper is preferable because it delivers a brighter, cleaner flavor than pre‑ground varieties.
The Texture Crew
The chicken is the star of the show, and I always opt for thighs because they stay juicy and tender even after pressure cooking. If you prefer a leaner cut, breasts will work, but you’ll need to be careful not to overcook them. The carrots and potatoes are cut into uniform cubes to ensure even cooking; if they’re too large, they’ll remain raw in the middle, and if they’re too small, they’ll turn mushy. The onions are finely chopped to release their sweetness into the broth, creating a natural sweetness that balances the savory notes.
Garlic is minced finely so that its flavor is distributed throughout the dish without forming clumps. The olive oil is used for sautéing the chicken and vegetables; it adds a silky texture and helps the herbs adhere to the ingredients. The thyme and parsley are dried or fresh; fresh herbs provide a brighter, more vibrant flavor, while dried herbs give a more concentrated, earthy tone. The optional cornstarch slurry is a simple mixture of one tablespoon of cornstarch and one tablespoon of cold water; this step thickens the sauce just enough to coat the ingredients without turning it into a heavy gravy.
The Unexpected Star
The cornstarch is often overlooked, but it’s a game‑changer. It gives the sauce a silky mouthfeel and a subtle sheen that makes the dish look as good as it tastes. If you’re looking for a gluten‑free alternative, arrowroot powder works just as well. Some people even add a splash of tomato paste for a touch of acidity and color; this is optional but can elevate the dish if you want a richer flavor profile.
The Final Flourish
Just before the pot seals, I add a teaspoon of thyme and parsley to release their aromatic oils. This step ensures that the herbs don’t lose their bright flavors during the long pressure cooking cycle. I also give the broth a quick stir to combine everything evenly. The final touch is the cornstarch slurry, which I pour in and stir until the sauce thickens to the desired consistency. The result is a dish that’s comforting, hearty, and full of flavor.
Everything's prepped? Good. Let's get into the real action...
The Method — Step by Step
- Turn on the Instant Pot and select the “Sauté” function. Add the tablespoon of olive oil, letting it heat until shimmering but not smoking. This is the moment of truth; you want a bright, golden sear on the chicken before the pressure cooking begins.
- Pat the chicken thighs dry with paper towels. Season them generously with salt and pepper. Place them skin‑side down in the pot and sear for about 3–4 minutes until a deep golden brown forms. Flip and sear the other side for another 2 minutes. The sear locks in juices and creates a caramelized crust that adds depth.
- Remove the chicken and set aside. Add the chopped onions to the pot and sauté until translucent, about 2 minutes. The onions release sweetness that balances the savory broth.
- Add the minced garlic and sauté for an additional 30 seconds until fragrant. Watch the kitchen carefully; garlic can burn quickly, which would ruin the flavor profile.
- Pour in the cup of chicken broth and the splash of white wine. Scrape the bottom of the pot with a wooden spoon to loosen any browned bits; these are packed with flavor.
- Return the chicken to the pot, placing it on top of the vegetables. Add the carrots, potatoes, thyme, and parsley. The vegetables should be nestled around the chicken, ensuring even cooking.
- Close the lid, set the valve to “Sealing,” and select “Manual” or “Pressure Cook” on high for 10 minutes. The timer starts when the pot reaches pressure, so you’ll have a quick, efficient cooking cycle.
- Once the timer ends, allow the pressure to release naturally for 5 minutes, then carefully perform a quick release to vent any remaining pressure. The chicken should be tender, and the vegetables should be cooked through but still hold their shape.
- Stir in the cornstarch slurry. The sauce will thicken instantly; let it simmer for 2 minutes on “Sauté” mode to ensure it coats the chicken and vegetables evenly.
- Taste and adjust seasoning if necessary. Serve hot, garnished with fresh parsley if desired. The dish is now ready to be devoured.
That’s it — you did it. But hold on, I’ve got a few more tricks that will take this to another level. These insider tips will help you avoid common pitfalls and elevate the dish to restaurant‑quality.
Insider Tricks for Flawless Results
The Temperature Rule Nobody Follows
When pressure cooking, the temperature inside the pot can exceed 120°C. This high heat is perfect for tenderizing meat, but it can also overcook delicate vegetables. The trick is to use a timer that stops at 10 minutes and then let the pot release pressure naturally for 5 minutes. This gentle transition allows the vegetables to finish cooking without becoming mushy. I’ve seen people add a quick release immediately after the timer, which often results in slightly overcooked carrots.
Why Your Nose Knows Best
Smell is your best ally. The moment the broth starts to bubble with a light, toasty aroma, you know the sauce is developing the right flavor profile. If you notice a burnt or off smell, it’s usually a sign that the onions or garlic are overcooked. Trust your nose and adjust the heat accordingly. A faint, sweet scent is the sweet spot.
The 5‑Minute Rest That Changes Everything
After the pressure cooking cycle, let the pot sit for 5 minutes before opening. This resting period allows the juices to redistribute throughout the chicken, ensuring each bite is moist. I’ve had friends who open the pot immediately, and the result is a dry, unevenly cooked dish. The rest period is a small price for a big flavor payoff.
The Garlic‑First Approach
Some people sauté garlic before onions, but I swear by adding garlic after the onions. This order prevents the garlic from burning while still allowing its aroma to mingle with the sweet onion base. If you’re in a hurry, you can skip the sauté entirely and add all ingredients directly to the pot, but the flavor will be a step behind.
The “Sauté” Finish for a Rich Finish
Once the cornstarch slurry is added, switch the pot back to “Sauté” mode for 2 minutes. This step ensures the sauce thickens evenly and coats every piece. It also gives the dish a glossy finish that’s visually appealing. Skipping this step can leave the sauce watery and less cohesive.
The Leftover Reheat Trick
If you’re reheating leftovers, add a splash of water or broth before microwaving. This small addition prevents the dish from drying out and helps the sauce return to its silky texture. I’ve found that a 2‑minute microwave reheat with a splash of water gives the same mouthfeel as a fresh batch.
Creative Twists and Variations
This recipe is a playground. Here are some of my favorite ways to switch things up:
Spicy Southwest Flair
Add a teaspoon of cumin, a pinch of cayenne, and a handful of corn kernels to the pot. The result is a smoky, slightly spicy dish that pairs wonderfully with a dollop of sour cream and a sprinkle of cilantro.
Herb‑Infused Mediterranean
Replace thyme with oregano and add a handful of Kalamata olives and a squeeze of lemon juice. The bright citrus cuts through the richness, giving the dish a Mediterranean twist.
Creamy Mushroom Twist
Sauté sliced mushrooms with the onions before adding the broth. The mushrooms absorb the savory flavors and add an earthy depth. Finish with a splash of heavy cream for a luscious sauce.
Citrus‑Zest Kick
Add the zest of one orange or lemon to the broth before cooking. The citrus zest infuses the dish with a bright, fragrant note that pairs beautifully with the savory chicken.
Asian‑Inspired Umami
Swap the white wine for a splash of soy sauce and add a tablespoon of sesame oil. Toss in some sliced green onions and a drizzle of hoisin sauce at the end for a sweet‑savory finish.
Vegetarian Version
Replace the chicken with firm tofu or a mix of chickpeas. Keep the rest of the ingredients the same, and you’ll have a hearty, protein‑rich vegetarian meal that still feels comforting.
Storing and Bringing It Back to Life
Fridge Storage
Store the dish in an airtight container for up to 3 days in the refrigerator. The sauce thickens slightly as it cools, so when you reheat, it’s ready to go. The chicken remains juicy, and the vegetables keep their shape.
Freezer Friendly
For longer storage, portion the dish into freezer‑safe containers and freeze for up to 2 months. Thaw overnight in the refrigerator before reheating. The flavor profile remains intact, and the texture is almost as good as fresh.
Best Reheating Method
Reheat in a saucepan over low heat, stirring occasionally. Add a splash of water or broth to loosen the sauce and prevent it from drying out. A quick microwave reheat with a damp paper towel works as well, but the stovetop method preserves the sauce’s silky texture.