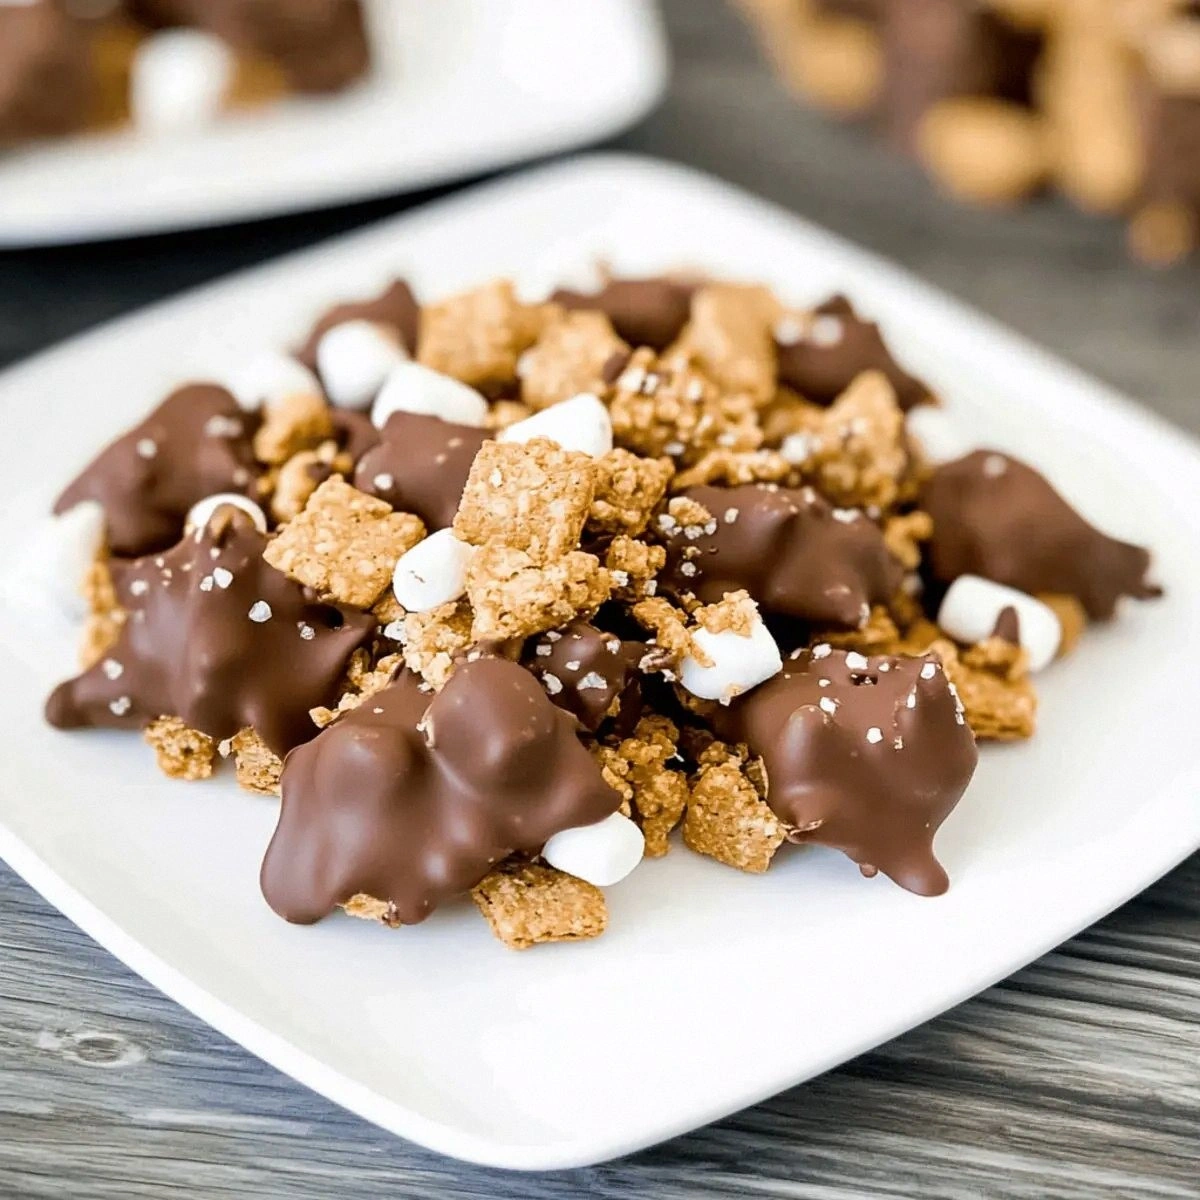
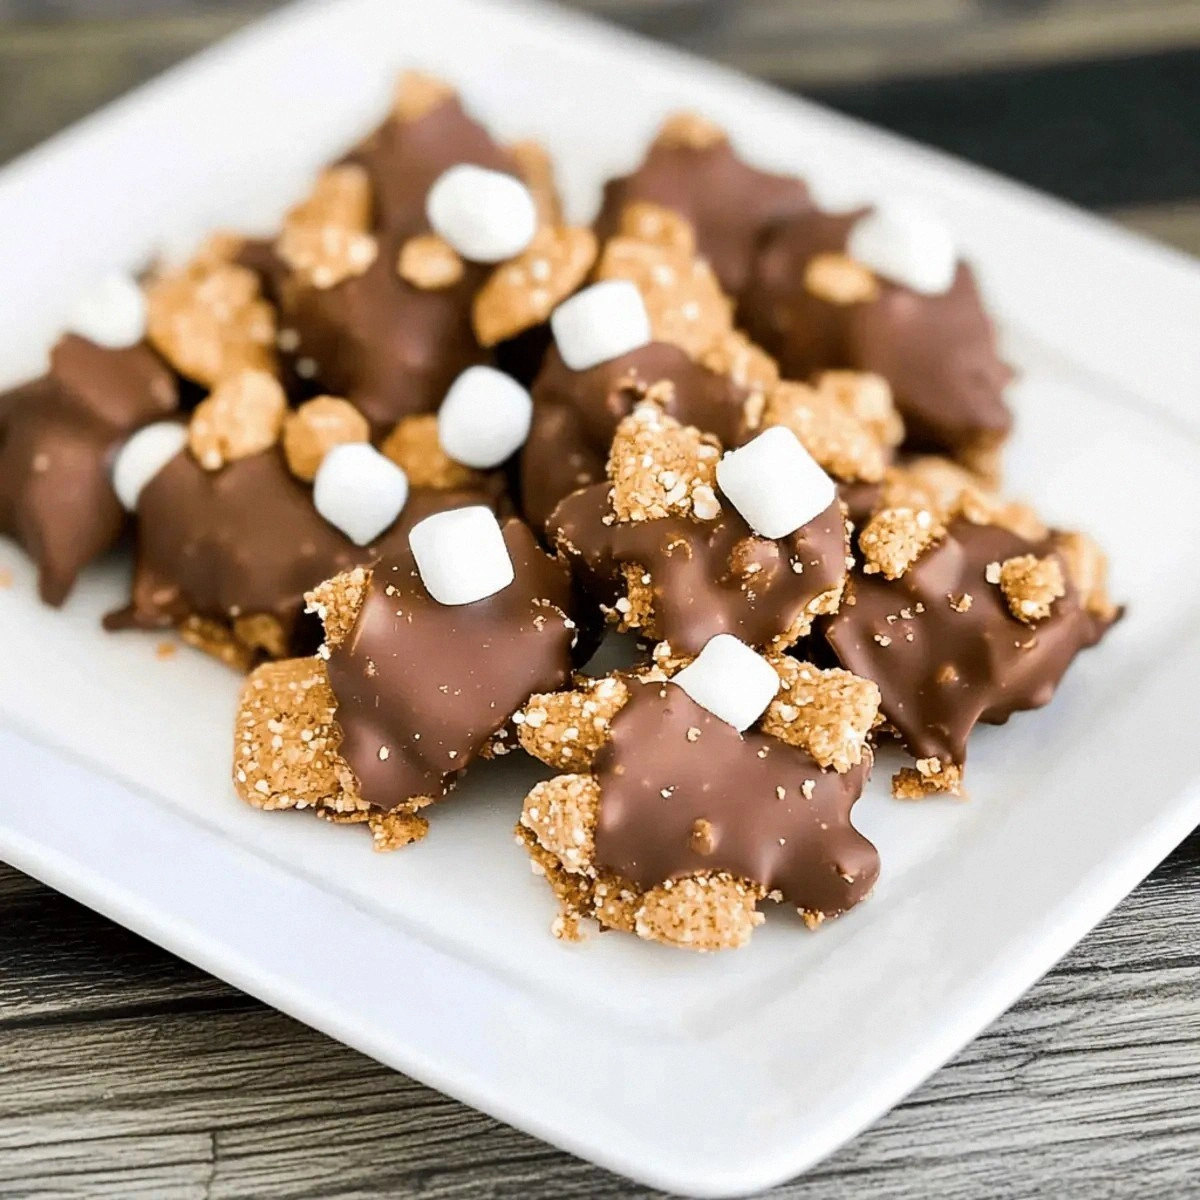
I was sitting on my porch on a sweltering July afternoon, sweat beading on my forehead, when my neighbor shouted, “I’ve got the perfect fire‑pit snack!” I rolled my eyes, because every summer I’ve heard that line, and every summer I’ve ended up with soggy marshmallows and a mess that looks like a crime scene. But then a lightbulb flickered in my brain—what if we could capture that campfire romance without ever lighting a flame? I grabbed a bag of chocolate chips, a box of graham crackers, and a mountain of miniature marshmallows, and the idea for these no‑bake S’mores Clusters was born. I dare you to taste this and not go back for seconds; the moment the chocolate melts into a glossy river and the marshmallows puff up like clouds, you’ll understand why this is hands down the best version you’ll ever make at home.
Picture the scene: the sun is a low, golden disc, the cicadas are humming a lazy tune, and the air smells like fresh cut grass mixed with the faint, sweet perfume of toasted sugar. You hear the soft rustle of a blanket being spread, the clink of a glass of iced tea, and the faint pop of a marshmallow as it hits the hot chocolate coating. Your fingers feel the buttery crumb of graham cracker beneath the glossy chocolate, and the first bite? It’s a symphony of crunch, melt, and gooey stretch that makes your taste buds do a little happy dance. Most recipes get this completely wrong—either they over‑cook the chocolate, or they drown the marshmallows in sugar. Here, we keep the integrity of every component while letting them flirt in perfect harmony.
What sets this version apart is a tiny, seemingly insignificant ingredient: coconut oil. That single tablespoon is the game‑changer, turning solid chocolate into a silky, pour‑able glaze that coats each cluster like a satin sheet. It also adds a whisper of tropical richness that you won’t find in any store‑bought s’mores mix. And because there’s no oven, you avoid the dreaded “burnt bottom” disaster that haunts many novice bakers. I’ll be honest — I ate half the batch before anyone else got to try it, and that’s exactly how you’ll feel after the first round: unstoppable, a little guilty, and already planning the next batch.
Okay, ready for the game‑changer? Let me walk you through every single step — by the end, you’ll wonder how you ever made it any other way. From the precise moment the chocolate meets the oil, to the gentle fold of marshmallows, to the final sprinkle of sea salt that brightens the whole thing, this guide is your backstage pass to sweet summer fun. Stay with me here — this is worth it.
What Makes This Version Stand Out
- Taste: The combination of milk chocolate and a dash of sea salt creates a sweet‑salty balance that sings louder than a campfire guitar solo.
- Texture: Crunchy graham crumbs, airy marshmallows, and a glossy chocolate coating deliver three distinct mouthfeels in every bite.
- Simplicity: No oven, no stovetop flame—just a microwave and a couple of bowls, perfect for dorm rooms or last‑minute parties.
- Uniqueness: The coconut oil glaze gives a glossy finish that typical melt‑and‑mix methods can’t achieve.
- Crowd Reaction: Guests will swear they’re at a backyard bonfire, even if they’re sitting on a couch with a laptop.
- Ingredient Quality: Using high‑quality chocolate chips means the flavor shines through without needing extra sugar.
- Method: The no‑bake approach preserves the marshmallows’ pillowy texture instead of turning them into a rubbery mess.
- Make‑Ahead Potential: These clusters store beautifully, letting you prep a week in advance for stress‑free entertaining.
Inside the Ingredient List
The Flavor Base
The star of the show is the 1 cup of milk chocolate or dark chocolate chips. Chocolate provides the deep, comforting sweetness that anchors the whole cluster. If you opt for dark chocolate, you’ll get a richer, slightly bitter edge that pairs beautifully with the salty finish. Skipping the chocolate? You’d end up with bland crumbs and marshmallows that never truly bind together. Pro tip: pick chips that are at least 60% cacao for a balanced flavor that doesn’t melt into a sugary puddle.
The Texture Crew
3 cups of miniature marshmallows are the airy, melt‑in‑your‑mouth component. Their tiny size means they coat the chocolate quickly, creating a uniform fluffiness. If you substitute regular marshmallows, the clusters become uneven and the texture suffers. Also, avoid stale marshmallows—they’ll absorb moisture and turn gummy. A quick tip: store marshmallows in an airtight container to keep them fresh for months.
1 cup of graham cracker crumbs adds that classic crunchy backbone. The crumbs absorb a hint of chocolate while still offering a buttery snap. If you skip the crumbs, the clusters will be too soft and may fall apart. For an extra twist, try using honey‑graham crackers for a subtle floral note. When buying, look for crackers with real butter listed; the flavor difference is night and day.
The Unexpected Star
1 tbsp coconut oil is the secret weapon that turns solid chocolate into a glossy, pour‑able glaze. It also introduces a faint tropical aroma that lifts the entire flavor profile. If you replace it with butter, the coating becomes grainy and can seize up. And don’t worry about the oil making the clusters greasy; a little goes a long way, and the marshmallows soak up the excess.
The Final Flourish
4‑8 pieces of graham crackers are broken into bite‑size chunks and folded into the mixture for extra crunch. The range allows you to control how chunky you want the final product. Too many and the clusters become overly dry; too few and you lose that satisfying bite. Aim for about six pieces for a balanced texture. If you’re gluten‑free, substitute with gluten‑free graham‑style crackers; the taste remains largely unchanged.
1 tsp sea salt is the whisper that turns sweet into unforgettable. A pinch of salt amplifies the chocolate’s depth and cuts through the sugar, preventing the clusters from feeling cloying. Skipping the salt? Expect a one‑dimensional sweetness that fades quickly. Use flaky sea salt for a delicate crunch that pops as you chew.
1 cup sprinkles are the visual fireworks that make these clusters Instagram‑ready. They add a pop of color and a subtle crunch on the surface. Feel free to swap for crushed nuts, toasted coconut, or even mini chocolate chips if you prefer a less sugary finish. The key is to add them while the chocolate is still warm so they adhere properly.
Everything's prepped? Good. Let's get into the real action…
The Method — Step by Step
Gather all your ingredients and line a large baking sheet with parchment paper. This sheet will be your “assembly zone,” and the parchment ensures the clusters don’t stick. I like to set out three bowls: one for chocolate, one for marshmallows, and one for the graham cracker crumbs. Take a moment to admire the colors—golden crumbs, ivory marshmallows, and glossy chocolate—because visual anticipation is half the fun.
Kitchen Hack: Place the parchment paper on a flat surface and lightly spray it with non‑stick cooking spray. This gives the clusters a quick release and prevents any chocolate from tearing.Combine the chocolate chips and coconut oil in a microwave‑safe bowl. Microwave on high for 20 seconds, stir, then repeat until the mixture is completely smooth and glossy. You’ll notice the chocolate turning from a grainy mess into a liquid silk—this is the moment of truth. If you see any lumps, keep stirring; the heat will melt them away.
While the chocolate is melting, break the graham crackers into bite‑size pieces. Aim for irregular shards; they create more surface area for the chocolate to cling to. Toss the pieces into the bowl with the graham cracker crumbs, then give everything a quick toss so the crumbs coat the larger pieces. This step is crucial—if the crumbs are left dry, they’ll absorb too much chocolate later and become soggy.
Now, gently fold the miniature marshmallows into the chocolate‑oil mixture. Use a rubber spatula and a gentle hand; you want the marshmallows to stay puffed, not melt completely. The chocolate should coat each marshmallow like a thin veil, turning them a soft amber color. When you lift the spatula, the mixture should look glossy and slightly thick—if it looks runny, microwave for another 5 seconds and stir.
Stir in the graham cracker pieces and crumbs, ensuring every fragment is lovingly enrobed in chocolate. The mixture will start to look like a chunky, sweet trail mix. This is where the texture magic happens: the crumb‑laden crackers give bite, while the marshmallows keep it soft. Keep mixing until you see no dry specks—every crumb should be shimmering.
Using a spoon or a small ice‑cream scoop, drop generous mounds of the mixture onto the prepared parchment. Aim for clusters about the size of a walnut—big enough to satisfy, small enough to handle. As you place each mound, the chocolate will begin to set around the edges, creating a defined border. This is the perfect time to practice your “cluster‑shaping” skills; a little practice leads to perfectly round, uniform treats.
Watch Out: If the chocolate begins to harden before you finish shaping, return the bowl to the microwave for 5‑second bursts. Over‑cooled chocolate will crack and ruin the smooth finish.Immediately sprinkle each warm cluster with sea salt and a generous handful of sprinkles. The salt should land on the still‑soft chocolate, creating tiny crystals that sparkle. The sprinkles add color and a subtle crunch that contrasts the marshmallow’s softness. Don’t be shy—this is the visual climax, and you want each cluster to look like a miniature fireworks display.
Let the clusters sit at room temperature for about 15 minutes, or place the sheet in the refrigerator for a faster set. You’ll hear a faint “snap” as the chocolate fully hardens, a sound that signals success. Once set, gently lift the clusters with a spatula; they should release cleanly from the parchment.
Transfer the finished clusters to an airtight container. Store them at room temperature for up to three days, or in the fridge for a week. If you’re planning a party, arrange them on a platter and watch guests gravitate toward the glossy, salty‑sweet piles. And now the fun part—watch everyone devour them while you bask in the glory of your no‑bake masterpiece.
That's it — you did it. But hold on, I've got a few more tricks that'll take this to another level. From flavor‑boosting add‑ins to storage hacks, the journey doesn't end when the clusters cool.
Insider Tricks for Flawless Results
The Temperature Rule Nobody Follows
Never melt chocolate directly over high heat; a gentle, low‑temperature melt preserves the cocoa butter’s natural sheen. I always use the microwave in 15‑second intervals, stirring vigorously each time. This prevents the dreaded “seized” chocolate that turns grainy and unusable. A pro tip: add a pinch of salt to the melt; it acts as an emulsifier and keeps the mixture fluid.
Why Your Nose Knows Best
Your sense of smell is a reliable indicator of doneness. When the chocolate‑oil blend starts to emit a buttery, roasted aroma, you know it’s ready for the marshmallows. If the scent is faint, give it another 5‑second burst. Trusting your nose saves you from over‑cooking, which can lead to a bitter aftertaste.
The 5‑Minute Rest That Changes Everything
After you finish mixing, let the blend rest for exactly five minutes before scooping. This brief pause allows the chocolate to thicken just enough to hold its shape when dropped onto the parchment. Skipping this step often results in clusters that spread too thin and lose their defined edges. I swear by the timer—set it, walk away, and come back to perfectly set clusters.
The Crunch Factor
If you crave extra crunch, toast the graham cracker crumbs lightly in a dry skillet for 2‑3 minutes. The toasting brings out a nutty aroma and adds a subtle caramelized note. Be careful not to burn them; a light golden hue is the sweet spot. This tiny tweak transforms ordinary crumbs into a gourmet garnish.
The Salt Sprinkle Secret
Use flaky sea salt rather than fine table salt. The larger crystals provide a satisfying pop that you can actually feel between your teeth. I like the brand Maldon because the crystals dissolve slowly, extending the flavor journey. A dash of salt on each cluster is all you need to elevate the sweetness without overwhelming it.
Creative Twists and Variations
This recipe is a playground. Here are some of my favorite ways to switch things up:
Nutty Delight
Swap half of the graham cracker crumbs for finely chopped toasted almonds. The nutty aroma pairs beautifully with the chocolate, and the extra crunch adds a sophisticated twist. Perfect for guests who love a bit of texture beyond the classic marshmallow fluff.
Coconut Dream
Replace the regular sprinkles with toasted coconut flakes. The tropical flavor amplifies the coconut oil already in the glaze, creating a cohesive island vibe. This variation is a hit at beach‑themed parties or any summer gathering where you want to transport people to a palm‑lined shore.
Spicy S’mores
Add a pinch of cayenne pepper to the melted chocolate before folding in the marshmallows. The subtle heat cuts through the sweetness and adds an unexpected depth. Pair with a cold glass of milk, and you’ve got a sweet‑spicy combo that’s surprisingly addictive.
White Chocolate Wonder
Use white chocolate chips instead of milk or dark chocolate. The creamy vanilla notes brighten the flavor profile, and the contrast with the dark sea salt becomes a visual treat. Top with pink or blue sprinkles for a pastel‑perfect summer aesthetic.
Berry Burst
Fold in a handful of freeze‑dried raspberry pieces right after the marshmallows. The tart berries punctuate the sweet base, delivering a burst of flavor with each bite. This version is especially popular with kids who love a little fruitiness.
Storing and Bringing It Back to Life
Fridge Storage
Place the clusters in an airtight container and store them in the refrigerator for up to one week. The cool environment keeps the chocolate firm and prevents any moisture from the marshmallows from making them soggy. Before serving, let them sit at room temperature for 10 minutes so the chocolate softens just enough to bite through easily.
Freezer Friendly
If you need to make a large batch, freeze the clusters on a parchment sheet, then transfer them to a zip‑top bag. They’ll hold up for up to three months. To revive, pop them in the fridge for 20 minutes, then give them a quick room‑temperature rest. A tiny splash of water before reheating (microwave 10 seconds) creates a gentle steam that restores the marshmallow’s fluffiness.
Best Reheating Method
For an instant warm‑up, place a handful of clusters on a microwave‑safe plate and heat for 10‑15 seconds. The chocolate will melt just enough to become glossy again, and the marshmallows will puff up like fresh‑baked clouds. Avoid overheating; you want a gentle melt, not a rubbery mess.