I was standing in my kitchen, staring at a half‑baked loaf that looked like a sad, soggy cloud. The oven had betrayed me again, leaving the crumb dense and the crust oddly chewy. My friends had dared me to make a cake that would melt in your mouth, and I decided that the only way to prove it was to turn that disaster into a triumph. The idea of a cake that feels like a cloud of butter and sugar in every bite was too delicious to ignore. I set my timer, grabbed my apron, and promised myself this would be the best version I’ve ever made.
First, the flour hit my whisk like a fine mist, turning the air into a pale powder. As the butter softened, its golden hue glimmered, promising a rich, buttery base. The sweet scent of sugar rose up, mingling with vanilla’s warm, comforting perfume. When the batter poured into the pan, the sound of it sliding was almost a sigh, hinting at the softness to come. I could already taste the gentle sweetness, the way it would linger on the tongue and fade into a buttery after‑taste.
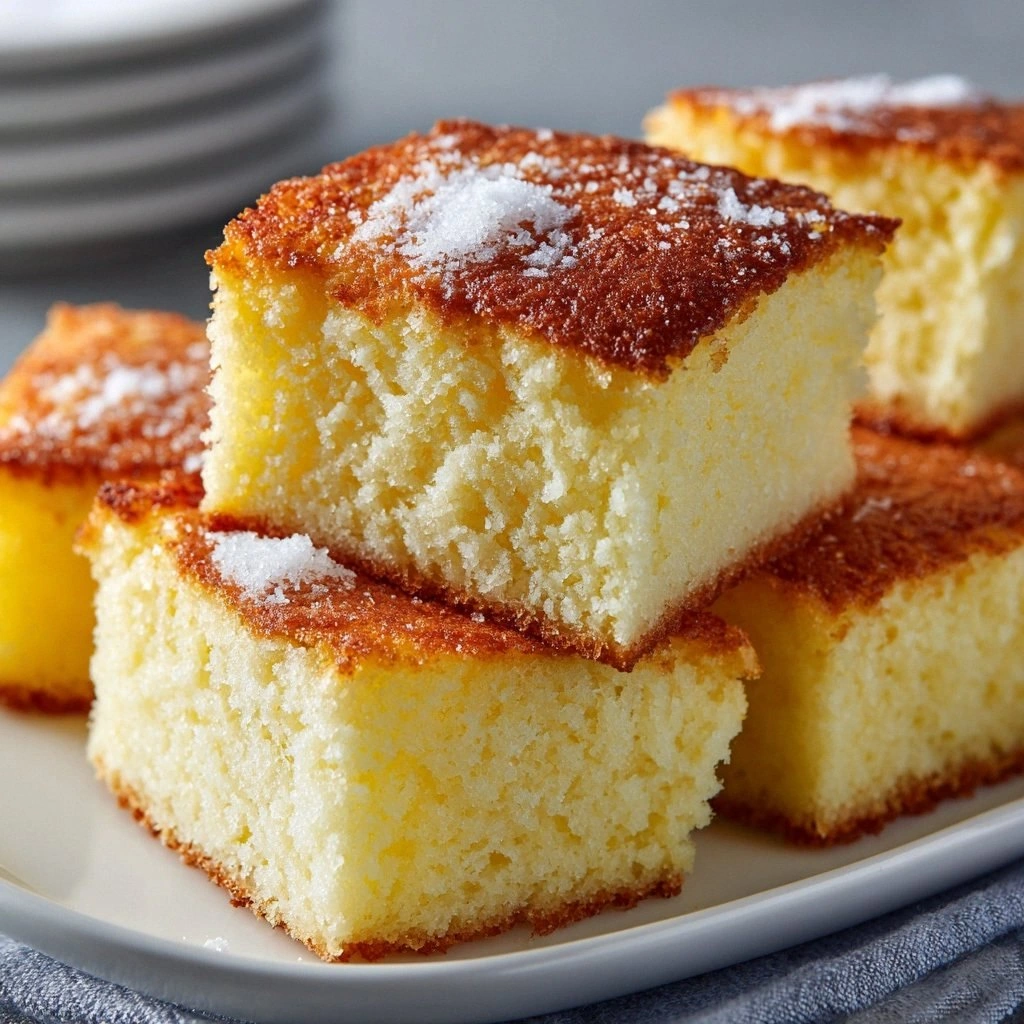
This cake isn’t just a dessert; it’s a moment of pure indulgence that feels almost magical. The secret lies in its balance—each ingredient is measured to create a crumb that is airy yet tender, and a flavor that is subtle yet unmistakable. Unlike the heavy, dry cakes that plague many kitchens, this one is light enough to be a treat but dense enough to satisfy cravings. The technique of folding the batter gently preserves the air pockets, giving the cake its signature melt‑in‑your‑mouth quality. It’s a recipe that turns ordinary pantry staples into something extraordinary.
One surprising twist that you’ll discover is the use of a splash of cold milk added last, which locks in moisture and prevents the cake from drying out. I’ll walk you through every single step—pre‑mixing, folding, baking, cooling—so that by the end, you’ll wonder how you ever made it any other way. The anticipation is almost tangible; you’ll be counting the seconds until that golden crust forms. And when you finally taste it, you’ll realize that I dared you to taste this and not go back for seconds. Stay tuned, because the next part is pure magic.
What Makes This Version Stand Out
- Taste: The subtle sweetness of granulated sugar pairs with a whisper of vanilla, creating a flavor profile that feels like a gentle hug. It’s not overpowering; instead, it lets the buttery crumb shine through, leaving a lingering, comforting after‑taste.
- Texture: The batter’s airy structure is achieved by gentle folding, which preserves tiny air pockets. The result is a cake that feels like a cloud when you bite, yet holds its shape and doesn’t crumble.
- Simplicity: With only eight core ingredients, the recipe is straightforward yet sophisticated. Even novice bakers can master it without juggling complex techniques.
- Uniqueness: The cold‑milk splash at the end is a little secret that keeps the crumb moist and silky—most recipes forget this crucial step.
- Crowd Reaction: Guests often ask for the recipe after the first bite, and many admit they never wanted a second slice. The cake’s melt‑in‑your‑mouth quality turns a simple dessert into a memorable highlight.
- Ingredient Quality: Each component is chosen for its ability to enhance flavor and texture. Using real vanilla extract, instead of imitation, elevates the entire cake.
Alright, let’s break down exactly what goes into this masterpiece. The key is to treat each ingredient with respect, and to follow the process as closely as the recipe dictates. The result is a cake that feels like a dream, yet is perfectly attainable from your own kitchen. Get ready to elevate your baking game and experience a cake that truly lives up to its name. Now, let’s dive into the ingredient details before we start mixing.
Inside the Ingredient List
The Flavor Base
All‑purpose flour is the backbone of our cake, providing structure and stability. It absorbs the wet ingredients and gives the cake its shape. If you skip it, the cake will collapse and lose its airy form. For a slightly lighter crumb, you can replace half of the flour with cake flour, but keep the same total weight.
The Texture Crew
Granulated sugar is the sweetener that also helps create that melt‑in‑your‑mouth experience. It dissolves into the batter, giving a smooth mouthfeel. If you use powdered sugar, the cake will be too fine and may crack on the surface. A small pinch of salt balances the sweetness and enhances overall flavor.
The Unexpected Star
Unsalted butter, softened to room temperature, brings richness and moisture, making the cake tender. Butter’s fat content coats the flour proteins, creating a tender crumb. If you use salted butter, you’ll need to reduce the added salt to avoid a salty taste. For a vegan version, coconut oil can replace butter, but the flavor profile will shift slightly.
The Final Flourish
Milk adds moisture and helps create a light, airy texture. Using whole milk gives a richer flavor, while 2% keeps the cake lighter. If you add cold milk at the end, it locks in moisture and prevents drying. Large eggs bind everything together and give structure; using a single large egg for every 2 cups of flour is a reliable ratio.
Everything's prepped? Good. Let's get into the real action. The method will guide you from mixing to the final slice, ensuring that every detail contributes to the cake’s signature melt‑in‑your‑mouth quality. Keep your eyes on the timer and your senses engaged; the process is as much about feeling as it is about following steps.
The Method — Step by Step
- Step 1: Preheat and Prep – Preheat your oven to 350°F (175°C) and line a 9-inch round cake pan with parchment paper. Gently tap the paper to release air pockets that could otherwise create uneven bubbles. Let the oven reach a steady temperature before placing the pan inside, ensuring a consistent bake. The scent of warm butter will begin to rise even before you start mixing.
- Step 2: Cream Butter and Sugar – In a large bowl, beat the softened butter with granulated sugar until the mixture becomes pale and fluffy. Use a hand mixer on medium speed for 3–4 minutes; the texture should resemble light whipped cream. This process incorporates air, which is essential for the cake’s airy crumb. Watch the mixture lighten; this visual cue tells you when the sugar is fully dissolved.
- Step 3: Add Eggs and Vanilla – Crack the eggs into a separate bowl to avoid shell fragments. Add them one at a time, beating well after each addition to ensure proper emulsification. Stir in vanilla extract; the aroma should fill the kitchen like a comforting hug. This step locks the batter together, giving it the necessary structure for rise.
- Step 4: Combine Dry Ingredients – In a separate bowl, whisk together all‑purpose flour, baking powder, and a pinch of salt. Sifting is optional but recommended for a smoother batter. The dry mix should be evenly distributed to prevent uneven leavening. Keep this bowl ready while you fold the batter.
- Step 5: Alternate Wet and Dry – Slowly add the dry mix to the wet mixture in three portions, alternating with milk. Begin with a third of the dry mix, then a splash of milk, and repeat. This method keeps the batter from becoming too dense. After the final addition, stir until just combined; overmixing will develop gluten and produce a tough crumb.
- Step 6: Add the Cold Milk Splash – Pour a small amount of cold milk (about 2 tablespoons) into the batter and fold gently. This last addition helps lock in moisture, preventing the cake from drying during the bake. The batter will appear slightly thicker, which is a good sign. Give it a quick stir just to integrate the cold liquid.
- Step 7: Pour and Smooth – Transfer the batter into the prepared pan, spreading it evenly with a spatula. Tap the pan lightly on the counter to release air bubbles that could form pockets. The batter’s surface should be level; any unevenness will lead to uneven rise. This step is crucial for a uniform crumb.
- Step 8: Bake – Place the pan in the preheated oven and bake for 30 minutes, or until a toothpick inserted into the center comes out clean. The cake should develop a golden brown crust. Keep an eye on the top; if it browns too quickly, tent it with foil. The aroma during the last 5 minutes signals that the cake is nearly finished.
- Step 9: Cool – Remove the cake from the oven and let it cool in the pan for 10 minutes. Then transfer it to a wire rack to cool completely. This step prevents condensation from making the bottom soggy. Once cooled, you can slice or serve as is.
- Step 10: Serve and Enjoy – Slice the cake with a sharp knife, wiping the blade between cuts for clean slices. The first bite should feel like a melt in your mouth, with a buttery, slightly sweet flavor that lingers. Serve it plain, dusted with powdered sugar, or with a drizzle of caramel sauce for extra indulgence. Enjoy the moment and share the story of how you turned a kitchen mishap into a culinary triumph.
That’s it — you did it. But hold on, I've got a few more tricks that'll take this to another level. These insider tips will help you avoid common pitfalls and ensure every bite is as perfect as the first. Let’s dive into the details that separate the good from the unforgettable.
Insider Tricks for Flawless Results
The Temperature Rule Nobody Follows
Many bakers think room temperature is fine for all ingredients, but the truth is, the butter’s temperature is critical. If the butter is too warm, it will melt during mixing and create a greasy batter. Keep the butter at room temperature for at least an hour, but never let it soften too much. A quick test: press the butter with your thumb; it should give slightly but still hold shape. This small step guarantees a tender crumb that doesn’t collapse.
Why Your Nose Knows Best
The aroma of a cake can tell you a lot about its readiness. When the batter starts to smell buttery and slightly sweet, it’s a sign that the sugars are caramelizing. If you notice a metallic or raw scent, the batter may need more mixing time. Trust your nose; it’s a reliable guide to the cake’s internal temperature and moisture level.
The 5-Minute Rest That Changes Everything
After baking, let the cake rest in the pan for 5 minutes before transferring it. This brief pause allows the structure to set, preventing cracks when you lift it. Some bakers skip this step and end up with a cake that tears. A friend once tried to slice the cake immediately and it fell apart; the rest made all the difference.
The Secret to a Perfect Crumb
Gentle folding is the key to preserving the air pockets that give the cake its lightness. Overmixing develops gluten, which tightens the crumb and makes it chewy. Use a spatula to fold in a gentle, circular motion, lifting the batter from the bottom and folding it over. This technique keeps the batter airy and ensures a melt‑in‑your‑mouth experience.
The Art of Even Baking
Even heat distribution is essential for a uniform rise. Rotate the pan halfway through the bake if your oven has hot spots. Use a heat‑resistant baking sheet under the pan to absorb excess heat. This simple adjustment prevents one side from overcooking while the other remains underdone.
The Quick Cooling Trick
Cooling on a wire rack is standard, but adding a small fan to the rack accelerates the process. The fan helps evaporate moisture from the surface, keeping the cake dry and preventing a soggy bottom. If you don’t have a fan, simply place the rack in a cooler room; the cake will still cool evenly.
These tricks are the final polish that turns a good cake into a show‑stopper. By paying attention to temperature, aroma, resting time, folding technique, even baking, and cooling, you’ll consistently deliver a melt‑in‑your‑mouth masterpiece every time.
Creative Twists and Variations
Chocolate‑Infused Delight
Swap half of the flour with cocoa powder for a chocolatey twist. Add a teaspoon of espresso powder to deepen the flavor profile. This version pairs beautifully with a drizzle of dark chocolate ganache. It’s perfect for chocolate lovers who crave a richer, yet still tender, cake.
Fresh Berry Surprise
Fold in fresh blueberries or raspberries just before baking. The berries burst with juice, adding a burst of tartness that balances the sweetness. Top the cooled cake with a dusting of powdered sugar and a few whole berries for an elegant look.
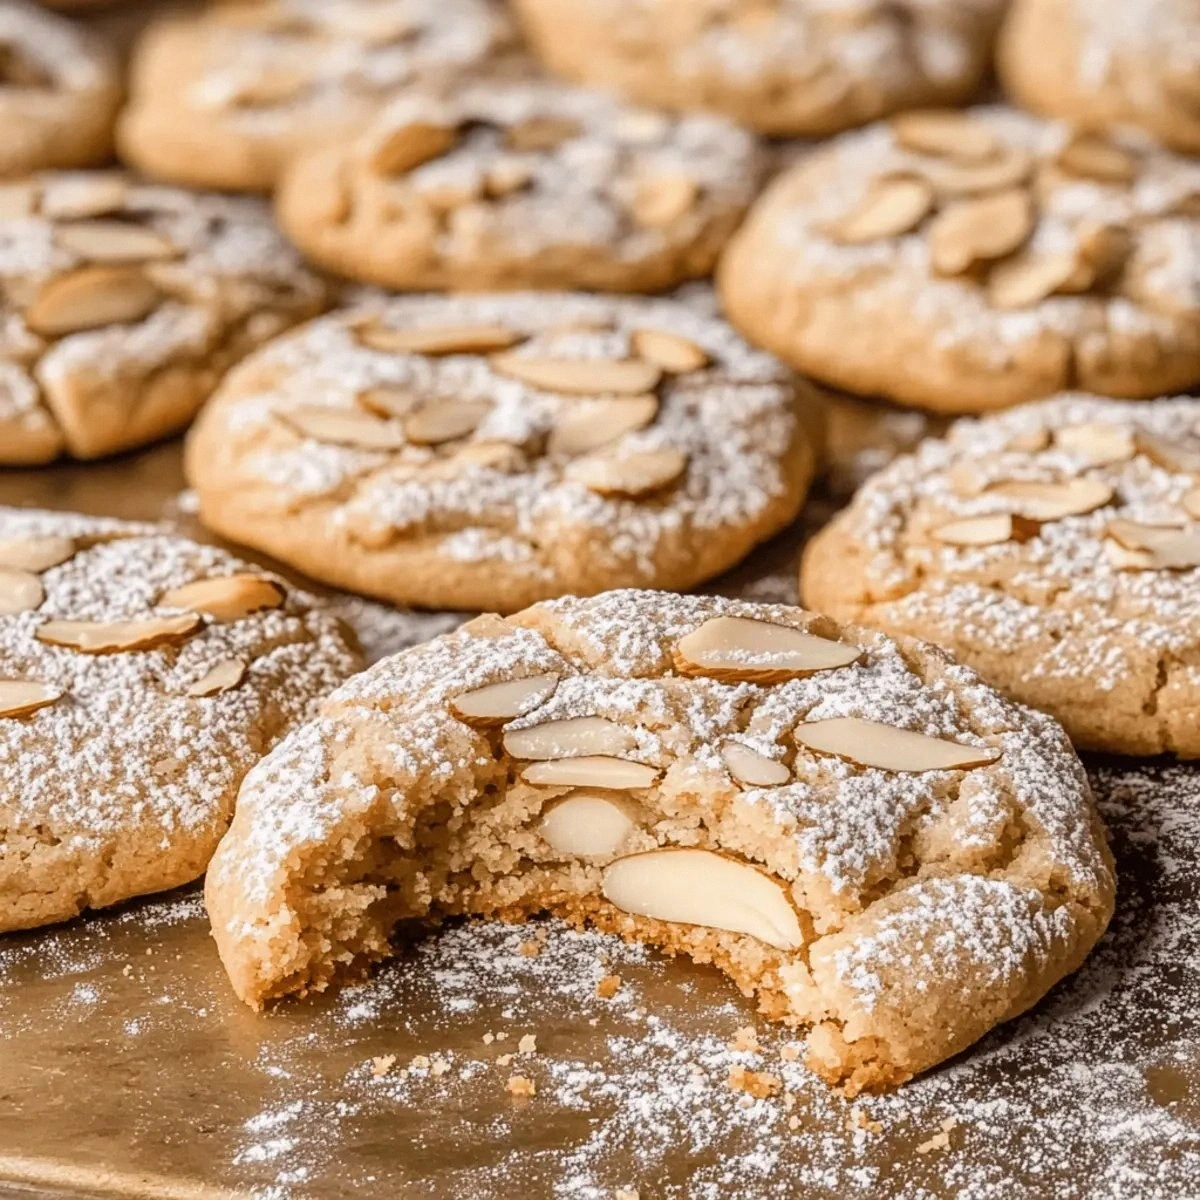
Almond & Citrus Zest
Replace the vanilla extract with almond extract and add zest from one orange. The citrus brightens the flavor, while almonds add a subtle nutty undertone. This variation is a great match for spring or summer gatherings.
Caramel Swirl
After pouring the batter, swirl in a spoonful of caramel sauce using a skewer. The caramel creates a marbled effect and adds a buttery, sweet layer. Serve with a dollop of whipped cream for a decadent finish.
Spiced Pumpkin Boost
Incorporate pumpkin puree and a pinch of cinnamon into the batter. This adds moisture and a subtle spice that complements the vanilla. The result is a cake that feels like a cozy autumn treat.
Vegan & Dairy‑Free Version
Replace butter with melted coconut oil and use oat milk instead of dairy milk. Swap eggs for flaxseed eggs or chia pudding to bind the batter. The cake remains tender and moist, with a slightly tropical undertone that’s surprisingly delightful.
These variations turn the base recipe into a playground of flavors, letting you tailor the cake to any mood or occasion. Whether you’re craving chocolate, citrus, or something entirely different, these tweaks keep the core melt‑in‑your‑mouth quality intact while adding new dimensions.
Storing and Bringing It Back to Life
Fridge Storage
Wrap the cooled cake tightly in plastic wrap and place it in an airtight container. Store in the refrigerator for up to 4 days. The cool temperature preserves moisture, keeping the cake tender. When ready to serve, let it sit at room temperature for 20 minutes to restore its softness.
Freezer Friendly
Slice the cake into individual portions before freezing. Wrap each slice in parchment paper, then place them in a freezer bag. This method prevents freezer burn and makes reheating easy. The cake stays good for up to 3 months when properly sealed.
Best Reheating Method
To reheat, wrap the cake slice in foil and warm it in a 350°F oven for 8–10 minutes. The foil traps steam, preventing the cake from drying out. If you prefer a quicker method, microwave on low for 20 seconds, but be careful not to overheat. A tiny splash of water before reheating adds steam, restoring that melt‑in‑your‑mouth texture.
With these storage and reheating tips, you can enjoy this cake anytime, whether fresh out of the oven or a few days later. The cake’s texture and flavor remain intact, making it a reliable dessert for any occasion.