Picture this: the kitchen is a battlefield, onions sliced into fine ribbons, butter sizzling like a golden army on the skillet, and the sweet scent of caramelized sugar rising to mingle with the sharp bite of garlic. I was halfway through a dinner party, and the last thing I wanted was a bland side that would make the guests stare at their plates. I had just discovered a way to turn the humble onion into a creamy, caramelized dip that melts in your mouth and makes everyone ask for seconds. I dare you to taste this and not go back for seconds.
The moment the onions hit the pan, a gentle sizzle answered the call, like a choir of tiny applause. The butter melted, coating each translucent slice, and the brown sugar dissolved into a glossy syrup that kissed the surface. As the onions browned, the room filled with a sweet, nutty aroma that felt like a warm hug on a cold night. I could hear the gentle pop of the sugar caramelizing, a sound that promised something extraordinary. The anticipation built like a crescendo, and I knew I was about to create a dish that would change the way you think about appetizers.
I’ve tried countless versions of caramelized onion dips over the years—some too greasy, others too sweet, and a few that simply fell flat. This version, however, balances the richness of cream cheese and mayo with the sharp tang of balsamic vinegar and Worcestershire sauce. The addition of dry white wine adds depth, and the final touch of fresh chives gives a bright, herbaceous finish. It’s hands down the best version you’ll ever make at home, and I’ve got the proof: I’ve been serving it to friends for months, and each time they’re amazed.
If you’ve ever struggled with caramelizing onions without burning them, you’re not alone. I’ve been there—watching the onions char and feeling that pang of disappointment. The key is patience and a low, steady heat. I’ll be honest—I ate half the batch before anyone else got to try it, because I couldn’t resist the buttery, sweet pull of that first bite. The result? A dip that’s silky, slightly sweet, and with a subtle bite that lingers on the palate.
Picture yourself pulling this out of the oven, the whole kitchen smelling incredible, and seeing the golden crust that shatters like thin ice when you dip a crusty roll. The next part? It’s pure magic. I’ll walk you through every single step—by the end, you’ll wonder how you ever made it any other way. Let’s dive in.
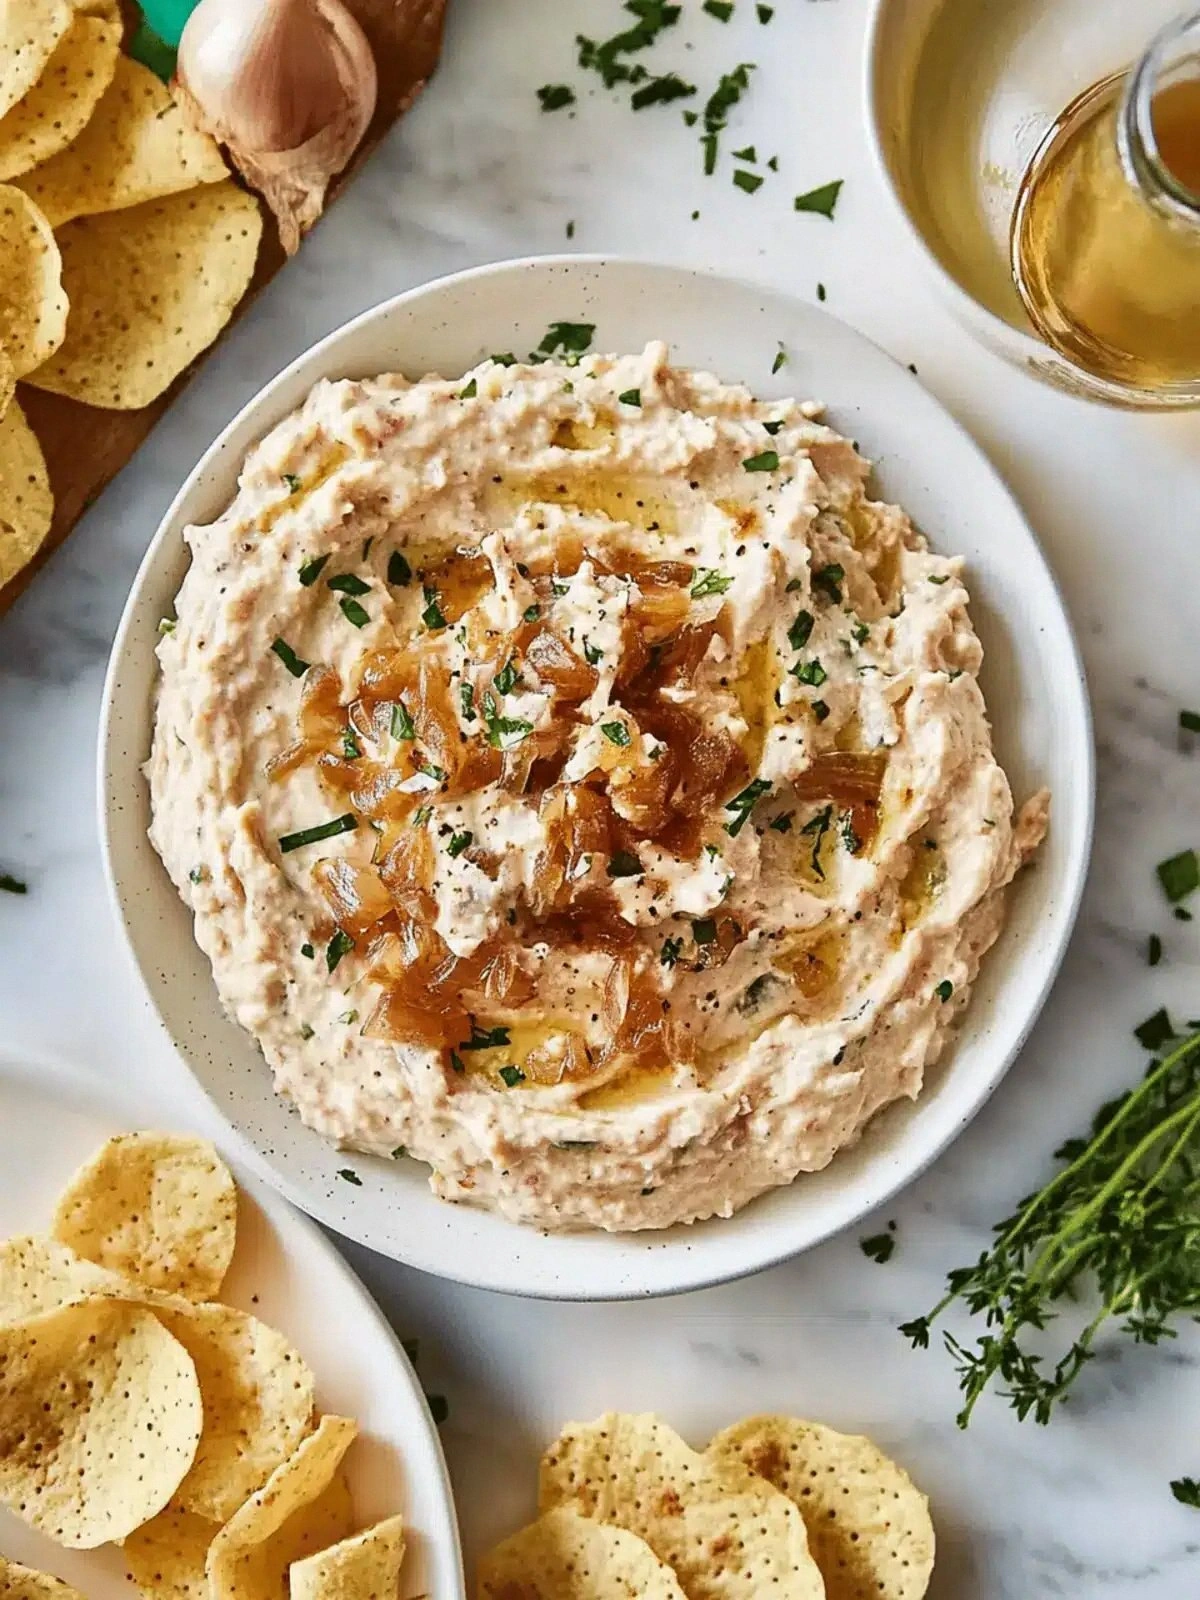
What Makes This Version Stand Out
- Flavor: The combination of sweet caramelized onions, sharp vinegar, and savory Worcestershire creates a layered taste profile that’s both comforting and sophisticated.
- Texture: Cream cheese and mayo give a silky body that coats the tongue, while the caramelized onions add a satisfying crunch.
- Visual Appeal: A golden crust on top that’s crisp to the touch and a glossy sheen that invites you to dig in.
- Ingredient Quality: Using fresh, unsalted butter and high‑quality cream cheese ensures the richness isn’t cloying.
- Make‑Ahead Potential: The dip can be prepared up to 48 hours ahead; the flavors only deepen, making it perfect for parties.
- Crowd Reaction: Guests rave about the balance of sweet and savory, often asking for the recipe.
- Versatility: It’s a perfect base for dips, spreads, or sauces for meats and vegetables.
- Ease of Execution: The steps are straightforward, yet the result is restaurant‑quality.
Inside the Ingredient List
The Flavor Base
The sweet onions are the heart of this dip. They provide the caramelized sweetness that balances the richness of the dairy. If you skip them, the dip will feel flat and lack depth. For a more robust flavor, choose yellow onions; they caramelize beautifully.
Brown sugar is the secret to that glossy caramel finish. It dissolves into a sweet syrup that coats each onion slice. If you’re watching sugar, you can swap it for a natural sweetener like honey or maple syrup, but the color will change slightly.
Garlic adds a punch that cuts through the sweetness. Two cloves are enough to give a subtle bite without overpowering the dish. If you’re sensitive to garlic, reduce to one clove or use garlic powder sparingly.
Dry white wine deglazes the pan, lifting the browned bits into the sauce and adding acidity. A dry, crisp white works best; avoid sweet wines that could muddle the flavor. If you don’t have wine, replace it with chicken broth for a milder version.
The Texture Crew
Cream cheese provides a velvety body that keeps the dip smooth and creamy. Eight ounces is a generous amount, ensuring the dip isn’t too thin. For a lighter version, replace half with Greek yogurt.
Sour cream adds tang and balances the richness of the cream cheese. It also helps stabilize the mixture, preventing separation. If you’re lactose intolerant, use lactose‑free sour cream or a vegan alternative.
Mayonnaise gives the dip its silky mouthfeel and helps bind the ingredients. It also adds a subtle mayonnaise flavor that many people love. For a healthier version, use a light or avocado‑based mayo.
Fresh chives are the finishing touch that adds brightness. They cut through the richness and provide a fresh, herbaceous note. If you don’t have chives, finely chopped parsley or green onions can work.
The Unexpected Star
Balsamic vinegar adds a subtle sweet acidity that lifts the entire flavor profile. One tablespoon is enough to give that depth without overpowering the dish. If you’re new to balsamic, start with a lower amount and adjust to taste.
Worcestershire sauce brings umami and a hint of spice. It’s a classic addition to many dips, and here it adds a savory depth that balances the sweetness. A splash of soy sauce can be an alternative for a different umami punch.
Everything's prepped? Good. Let's get into the real action...
The Method — Step by Step
- Heat a large, heavy‑bottom skillet over medium heat. Add the 2 tablespoons of unsalted butter, letting it melt until it foams lightly. The butter should shimmer, not burn. Once melted, add the 3 cups of thinly sliced sweet onions, spreading them evenly. Watch the onions soften and start to brown, which should take about 10 minutes. The key is patience; low heat prevents burning.
- Stir in the 1 tablespoon of brown sugar. The sugar will dissolve into a sweet glaze, coating the onions. Keep stirring to ensure even caramelization. You’ll notice the onions turning golden brown and developing a deep amber color. This step is crucial for that glossy, buttery finish.
- Add the 2 cloves of minced garlic. Garlic releases its aroma quickly, so cook for about 30 seconds until fragrant. Be careful not to let it brown, or it will taste bitter. The garlic should mingle with the onions, creating a fragrant base for the dip.
- Deglaze the pan with 1/2 cup of dry white wine. Pour slowly, scraping the bottom of the skillet to lift all the browned bits. The wine will reduce slightly, concentrating the flavor. Let it simmer for 2 minutes until most of the liquid has evaporated. The aroma will shift from sweet to slightly acidic, signaling readiness.
- Stir in 1 tablespoon of balsamic vinegar and 1 tablespoon of Worcestershire sauce. The combination adds depth and umami. Mix thoroughly so the sauces blend with the onions and wine. The mixture should become glossy and slightly thickened.
- Lower the heat to low and add the 8 ounces of cream cheese, 1/2 cup of sour cream, and 1/2 cup of mayonnaise. Stir continuously until the dairy melts into a smooth sauce. The mixture should coat the onions evenly, forming a velvety base. Keep the heat low to prevent curdling.
- Season with kosher salt and black pepper to taste. Start with a pinch of each and adjust as needed. The salt will enhance the sweetness, while the pepper adds a subtle heat. Taste before serving; the flavors should be balanced.
- Fold in the 1/4 cup of fresh chives and the 1/2 cup of pre‑caramelized onions. The chives add a bright, herbal note that cuts through the richness. The pre‑caramelized onions bring extra texture and flavor. Stir gently to distribute evenly.
- Transfer the dip to a shallow baking dish, smoothing the top with a spatula. Bake at 350°F (175°C) for 10 minutes until the surface is slightly golden and bubbling. The baking step caramelizes the top, giving it that irresistible crust.
- Remove from the oven and let it cool for 5 minutes before serving. The dip will thicken slightly as it cools, creating the perfect consistency for dipping. Serve with warm crackers, sliced baguette, or fresh veggies.
That's it — you did it. But hold on, I've got a few more tricks that'll take this to another level. Stay tuned for insider tips that will make your dip even more unforgettable.
Insider Tricks for Flawless Results
The Temperature Rule Nobody Follows
Cooking the onions at a steady low temperature prevents scorching and ensures a deep, even caramelization. I’ve learned that a slight flare‑up can ruin the texture. Keep the heat between 300–350°F (150–175°C) and stir frequently. This simple tweak guarantees a buttery finish that’s silky to the touch.
Why Your Nose Knows Best
The aroma of caramelizing onions is a reliable indicator of progress. A sweet, nutty smell means you’re on track, while a sharp, burnt scent signals trouble. Trust your nose; it’s a seasoned chef’s best friend. If you notice a metallic tang, reduce the heat immediately.
The 5‑Minute Rest That Changes Everything
Letting the dip rest for 5 minutes after baking allows the flavors to meld and the texture to set. During this brief pause, the dairy thickens, and the caramelized onions soften further. The result is a dip that’s perfectly balanced and easy to serve. I’ve seen people skip this step and end up with a thinner, less cohesive dip.
Avoiding the “Too Greasy” Trap
If the dip feels oily, it’s likely because too much butter was used or the onions weren’t cooked long enough. To fix this, drain excess fat by spooning the onions onto a paper towel before adding the dairy. Alternatively, use half the butter and replace the rest with a neutral oil like grapeseed.
The Perfect Garnish
A sprinkle of fresh chives or a dusting of smoked paprika on top adds visual appeal and a burst of flavor. The garnish should be light; you want the dip’s core flavors to shine. I love adding a few microgreens for a pop of color and freshness.
The “No‑Bake” Option
If you’re short on time or don’t have an oven, you can skip the final baking step. Simply let the mixture cool in the pan, then transfer to a serving dish. The dip will still be creamy and flavorful, though it won’t have that caramelized crust. It’s a great alternative for quick weeknight snacks.
The “Make‑Ahead” Magic
This dip actually tastes better the next day. The flavors meld, and the texture becomes richer. Store it in an airtight container in the refrigerator for up to 48 hours. When reheating, add a splash of milk or water to restore creaminess.
Creative Twists and Variations
This recipe is a playground. Here are some of my favorite ways to switch things up:
Smoky Chipotle Version
Add 1 teaspoon of chipotle powder and a splash of chipotle adobo sauce. The smoky heat pairs beautifully with the sweet onions. Serve with corn chips for a Tex‑Mex twist.
Herb‑Infused Basil Dip
Replace the chives with fresh basil leaves and add 1 tablespoon of pesto. The basil’s sweet, peppery flavor brightens the dip. It’s perfect for summer picnics.
Cheesy Gouda Variation
Incorporate 1/2 cup of shredded Gouda cheese during the last step. The cheese melts into the dip, creating a gooey, savory layer. Pair it with pretzel sticks for a comforting snack.
Vegan Creamy Delight
Swap cream cheese for a plant‑based alternative and use coconut‑milk sour cream. Keep the mayonnaise vegan as well. The result is a dairy‑free dip that still delivers on flavor.
Tangy Lemon Twist
Add the zest of one lemon and 1 tablespoon of lemon juice. The citrus cuts through the richness, giving the dip a bright finish. Great for pairing with grilled chicken.
Roasted Red Pepper Fusion
Blend a roasted red pepper into the dairy mixture for a smoky, sweet undertone. The pepper’s color adds vibrancy to the dip. Serve with roasted vegetable sticks for a wholesome snack.
Bacon‑Laced Crunch
Fold in 1/2 cup of crispy bacon bits at the end. The salty crunch contrasts with the creamy base. This variation is a hit at game‑day gatherings.
Storing and Bringing It Back to Life
Fridge Storage
Keep the dip in an airtight container in the refrigerator for up to 48 hours. The flavors deepen, and the texture becomes more cohesive. When ready to serve, let it sit at room temperature for 15 minutes to soften.
Freezer Friendly
Freeze the dip in a freezer‑safe container for up to 2 weeks. Thaw overnight in the refrigerator before reheating. Add a splash of milk or water before microwaving to restore creaminess.
Best Reheating Method
Reheat gently in a saucepan over low heat, stirring constantly. Avoid boiling, as the dairy can separate. Once heated through, add a tiny splash of water or milk to steam it back to perfection.