I was standing in my kitchen, staring at a half‑baked chocolate cake that had turned into a charcoal slab, when my roommate dared me to whip up something that would actually make people smile. “Make a peanut butter pie that doesn’t collapse,” she said, half‑joking, half‑serious, and I felt a spark of competitive fire ignite. I’ve spent years hunting for that perfect no‑bake pie that feels like a slice of Amish heaven, and after a dozen failed attempts—think grainy fillings and crusts that crumble like dry leaves—I finally nailed it. This version is the result of relentless tweaking, a few kitchen shortcuts, and a sprinkle of stubbornness that says, “I won’t settle for anything less than perfection.”
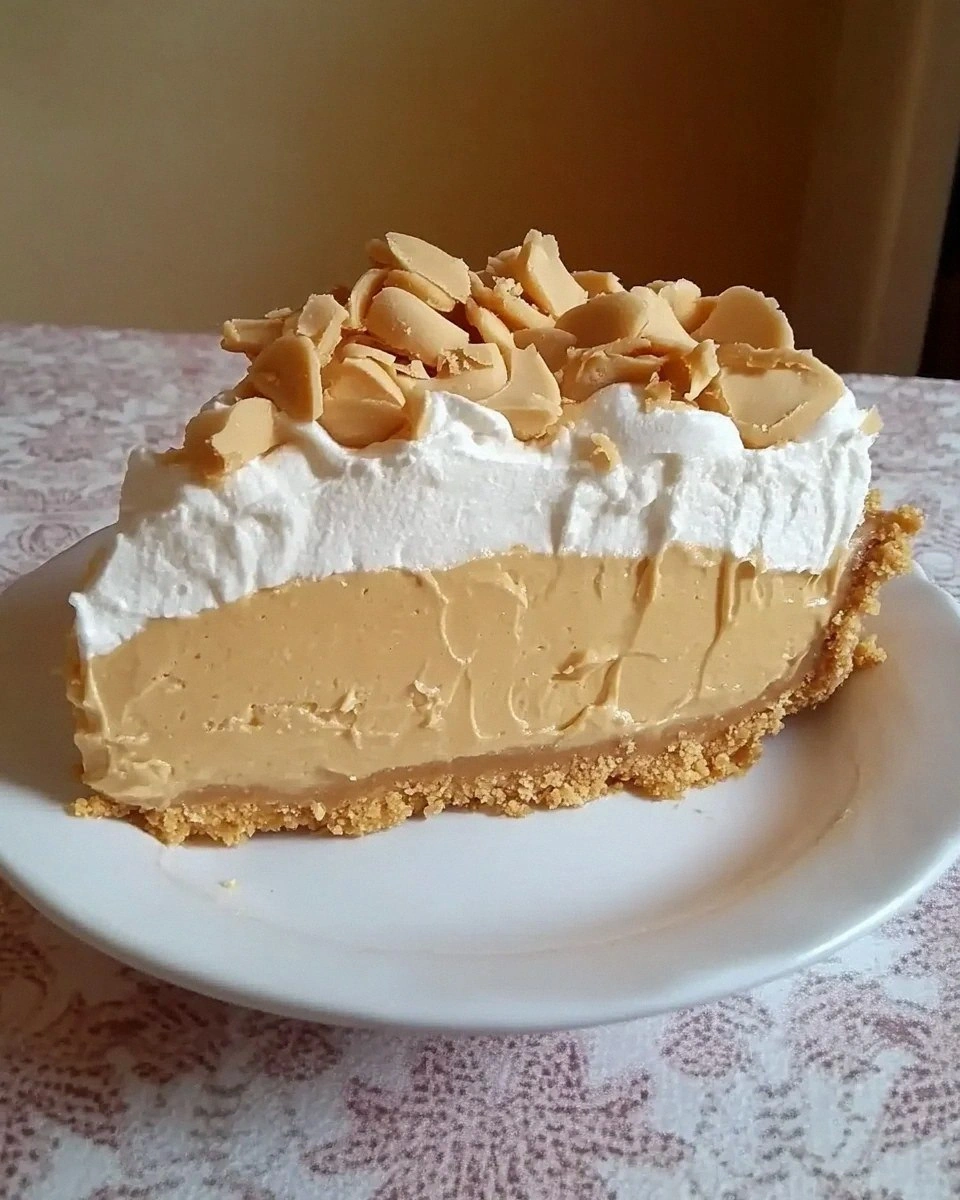
Picture this: the moment you crack open the refrigerator, a sweet, nutty aroma wafts out, hugging the air like a warm blanket on a cold winter morning. The crust is golden, buttery, and sturdy enough to hold the creamy filling without sagging, while the filling itself is silkier than a fresh‑made ganache, with a peanut‑butter flavor that’s deep, roasted, and just a touch salty. When you take that first bite, the velvety mousse slides across your tongue, the whipped cream crowns it with airy lightness, and the chopped peanuts add a satisfying crunch that snaps like fresh twigs underfoot. It’s a symphony of textures and flavors that makes you want to close your eyes and say, “I dare you to taste this and not go back for seconds.”
Most recipes out there either skimp on the peanut butter, over‑sweeten the filling, or demand a bake that turns the whole thing into a soggy mess. I’ve seen people try to shortcut by using powdered gelatin, only to end up with a wobble that looks like Jell‑O gone rogue. This version, however, uses a simple cream‑cheese base that stabilizes the filling without any gelatin, and the secret weapon? A splash of milk that loosens the mixture just enough to make it spreadable, yet keeps it firm once chilled. The result? A pie that holds its shape, tastes like a nostalgic peanut butter cookie, and can survive a whole day on a buffet table without turning into a puddle of regret.
And now, the kicker that most home bakers miss: I’m going to show you how to get that glossy, restaurant‑quality finish on the top without a torch, using just a quick whip of heavy cream and a dusting of powdered sugar. Okay, ready for the game‑changer? Let me walk you through every single step — by the end, you’ll wonder how you ever made it any other way.
What Makes This Version Stand Out
- Taste: The combination of creamy peanut butter and tangy cream cheese creates a depth that’s richer than any store‑bought version.
- Texture: Silky, mousse‑like filling meets a buttery, crumb‑perfect crust, while the topping adds a light, airy cloud.
- Simplicity: No oven, no gelatin, no complicated steps—just mix, chill, and serve.
- Uniqueness: The splash of milk is the secret that prevents a grainy texture and keeps the filling spreadable.
- Crowd Reaction: Guests often claim this is the best peanut‑butter pie they’ve ever tasted, and they’ll be begging for the recipe.
- Ingredient Quality: Using a high‑quality, creamy peanut butter makes all the difference; it’s the heart of the pie.
- Method: The no‑bake approach saves you time and guarantees a flawless set every single time.
- Make‑Ahead Potential: This pie can be assembled a day ahead, letting the flavors meld while you focus on other dishes.
Inside the Ingredient List
The Flavor Base
The star of the show is the creamy peanut butter. I use a ¾ cup of a natural, no‑sugar‑added brand that’s smooth as silk; it coats the palate like velvet and delivers that unmistakable roasted flavor that makes peanut butter lovers swoon. If you swap it for a chunky version, you’ll end up with a gritty texture that feels like you’re chewing on sand—definitely not the experience we’re after. For a subtle twist, try a honey‑roasted peanut butter, but remember to reduce the added sugar in the powdered sugar portion.
The Texture Crew
Next up is the cream cheese, an 8‑ounce block that brings tang and stability. It’s the glue that holds the filling together, preventing the dreaded wobble. When softened to room temperature, it blends seamlessly with the peanut butter, creating a smooth, glossy base. If you’re lactose intolerant, a full‑fat Greek yogurt can substitute, but expect a slightly tangier finish.
The heavy cream (1 cup) is whipped into soft peaks and folded in, introducing airy lightness that makes the filling feel like a cloud. Heavy cream’s high butterfat content is essential; skimmed milk would leave the mixture flat and heavy. Whip it just until it holds its shape—over‑whipping will turn it buttery and cause the pie to collapse after chilling.
The Unexpected Star
A splash of milk (¼ cup) might seem trivial, but it’s the unsung hero that loosens the mixture just enough to spread effortlessly into the crust without breaking the delicate emulsion. Think of it as the conductor that keeps the orchestra in sync. If you skip the milk, you’ll end up with a dense, almost fudge‑like filling that’s difficult to spread and can crack when sliced.
The Final Flourish
Finally, the topping: whipped cream and chopped peanuts. The whipped cream adds a light, airy crown that balances the dense filling, while the peanuts bring a crunchy contrast that’s as satisfying as stepping on fresh snow. Use unsalted peanuts and toast them lightly for extra aroma; the toasted notes will elevate the whole pie to a new level of indulgence. If you’re watching carbs, you can replace the whipped cream with a dollop of Greek yogurt mixed with a touch of honey.
Everything's prepped? Good. Let’s get into the real action…
The Method — Step by Step
Start by gathering your pre‑baked 9‑inch pie crust and placing it on a sturdy serving platter. Feel the cool, buttery crust under your fingertips; it should be firm but not brittle. If the crust feels a little soft, pop it in the freezer for five minutes to firm up—this prevents cracks when you add the filling later. Watch out: a warm crust will soften the filling and cause it to slide off.
Watch Out: Do not over‑press the crust into the pan; you’ll create a compacted edge that can become hard after chilling.In a large mixing bowl, combine the 8‑ounce softened cream cheese with the ¾ cup creamy peanut butter. Using a handheld mixer on medium speed, blend until the mixture is smooth and glossy—think of the sheen you see on a freshly polished marble countertop. Scrape down the sides regularly to avoid pockets of unmixed cheese. This step is the foundation; any lumps will be amplified once the pie sets.
Add the 1 cup powdered sugar to the bowl. The sugar dissolves into the creamy base, sweetening it without making it gritty. If you prefer a less sweet pie, you can reduce the sugar to ¾ cup, but keep in mind the texture might become slightly grainier. Once incorporated, the mixture should be thick enough to hold a spoonful without running off.
Kitchen Hack: Sift the powdered sugar before adding it; this prevents any clumps that could ruin the smoothness of the filling.Stir in the ¼ cup milk, a little at a time, until the mixture loosens to a spreadable consistency. You’ll notice the mixture becomes glossy, almost like a thick sauce that coats the back of a spoon. This is the moment of truth: if the filling is too thick, add a tablespoon more milk; if it’s too runny, add a tablespoon of powdered sugar.
In a separate chilled bowl, whip the 1 cup heavy cream with the 1 teaspoon vanilla extract until soft peaks form. The cream should double in volume and hold a gentle curl when the whisk is lifted. This step is pure magic—the air you incorporate here will give the pie its airy, melt‑in‑your‑mouth texture.
Gently fold the whipped cream into the peanut‑butter mixture using a spatula. Use a lifting motion, turning the bowl over on itself, to keep as much air as possible. The color will lighten slightly, and the texture will become feather‑light. I dare you to taste this and not go back for seconds once it’s chilled.
Spread the filling evenly over the pre‑baked crust, smoothing the top with an offset spatula. The filling should sit level with the crust’s edge, creating a clean, professional look. If you notice any gaps, tap the pan gently on the counter; the filling will settle into any crevices.
Cover the pie with plastic wrap and refrigerate for at least 2 hours, though I recommend 4 hours for a firmer set. During this time, the flavors meld, and the filling firms up without any baking. While you wait, you can prep the topping—whip a second batch of cream if you like extra height, then sprinkle chopped peanuts over the top.
Watch Out: Leaving the pie uncovered in the fridge can cause the surface to dry out; always keep it sealed.When you’re ready to serve, remove the pie from the fridge, add a generous swirl of fresh whipped cream, and sprinkle the chopped peanuts evenly. The contrast of the creamy topping and the crunchy peanuts creates a textural dance that’s nothing short of spectacular. Slice with a hot, wet knife for clean cuts—this prevents the filling from dragging and keeps each slice looking picture‑perfect.
That's it — you did it. But hold on, I've got a few more tricks that'll take this to another level, ensuring every bite is as unforgettable as the first.
Insider Tricks for Flawless Results
The Temperature Rule Nobody Follows
Never, ever use room‑temperature heavy cream when you need to whip it. The colder the cream, the faster it reaches stiff peaks, and the more stable those peaks will be after chilling. I keep a bowl in the freezer for five minutes before whipping; the chilled metal surface acts like a mini‑ice bath. One friend tried skipping this step once—her whipped cream turned into butter in the fridge, and the pie collapsed like a house of cards.
Why Your Nose Knows Best
When you blend the peanut butter and cream cheese, trust your sense of smell. The mixture should emit a warm, roasted aroma that signals the fats have fully emulsified. If you detect a sour or off‑note, it usually means the cream cheese wasn’t fully softened, which can lead to grainy texture. Take a moment to pause, give the bowl a quick stir, and let the scent guide you.
The 5‑Minute Rest That Changes Everything
After folding in the whipped cream, let the bowl sit for five minutes before spreading the filling into the crust. This short rest allows any tiny air bubbles to rise to the surface, preventing unsightly pockets in the final slice. It also gives the milk a chance to fully integrate, ensuring a smooth, glossy finish. I swear by this micro‑pause; it’s the difference between a professional‑grade pie and a home‑cooked mishap.
Peanut Butter Toasting Trick
If you want a deeper, almost caramelized peanut flavor, gently toast the peanut butter in a dry skillet for 30 seconds, stirring constantly. The heat releases the oils and intensifies the nutty aroma, making the filling taste like a freshly baked batch of peanut butter cookies. Just be careful not to burn it—once it starts to smoke, it’s over.
The Secret of the Crust Edge
Before you pour the filling, lightly brush the crust edge with a tiny dab of melted butter mixed with a pinch of sugar. This creates a caramelized rim that adds a subtle crunch and a golden hue, turning an ordinary crust into a show‑stopping border. It’s a tiny detail that makes the whole pie feel like a bakery masterpiece.
Creative Twists and Variations
This recipe is a playground. Here are some of my favorite ways to switch things up:
Chocolate Swirl Delight
Melt ½ cup dark chocolate and swirl it into the filling before chilling. The chocolate ribbons create a marbled effect and add a bittersweet counterpoint to the sweet peanut butter. Chocolate lovers will adore the contrast, and it’s a visual treat that looks as good as it tastes.
Banana Cream Fusion
Fold in 1 cup of mashed ripe banana into the filling for a tropical twist. The banana adds natural sweetness and a subtle fruitiness that pairs beautifully with the nutty base. Top with banana slices and a drizzle of caramel for an extra wow factor.
Spicy Kick
Add a pinch of cayenne pepper or a dash of chili‑infused honey to the peanut butter mixture. The heat awakens the palate and makes the pie unexpectedly bold. Serve it at a summer BBQ and watch guests reach for seconds, daring each other to handle the spice.
Maple Bacon Crunch
Stir in ¼ cup of crisped, maple‑glazed bacon bits into the topping. The salty‑sweet bacon adds a crunchy surprise that elevates the dessert to a brunch‑worthy centerpiece. It’s the perfect sweet‑and‑savory mashup that will have people talking for weeks.
Vegan Velvet
Swap the cream cheese for a vegan cream cheese alternative, use coconut cream instead of heavy cream, and choose a plant‑based peanut butter. The result is a dairy‑free version that still boasts that creamy, rich texture. Top with coconut‑whipped cream and toasted coconut flakes for a tropical vibe.
Storing and Bringing It Back to Life
Fridge Storage
Cover the pie tightly with plastic wrap or store it in an airtight container. It will stay fresh for up to 4 days in the refrigerator. The whipped cream topping may soften slightly, but a quick re‑whip will bring back its airy lift. Keep it on a middle shelf away from strong odors.
Freezer Friendly
If you need to make it ahead, freeze the pie (without the whipped cream topping) for up to 2 months. Wrap it first in a layer of parchment paper, then in foil, and finally place it in a freezer‑safe bag. When you’re ready to serve, thaw it in the fridge overnight, then add fresh whipped cream and peanuts.
Best Reheating Method
While this pie is best served cold, if you prefer a warm slice, gently heat it in a low oven (250°F) for 10‑12 minutes. Add a tiny splash of milk (about a tablespoon) before warming; the steam will revive the creamy texture and prevent it from drying out. Serve immediately for a comforting, melt‑in‑your‑mouth experience.