I'm going to be brutally honest with you — I once ate an entire loaf of banana bread in one sitting and felt zero shame. But this wasn't just any banana bread. This was the moment when my snickerdoodle obsession crashed headfirst into my banana bread addiction, creating a hybrid so dangerously delicious that I now have to make two loaves every time because I know one won't survive the cooling period.
Picture this: it's 2 AM, you're in your pajamas, the house is quiet, and that bunch of bananas on your counter has gone from perfect yellow to spotty brown faster than your New Year's resolutions disappeared. Most people would sigh and toss them, but not you. Not anymore. Because you're about to discover the recipe that turns those sad bananas into pure gold — a cinnamon-sugar crusted masterpiece that makes your kitchen smell like a cozy bakery while creating a texture so moist and tender it practically melts on your tongue.
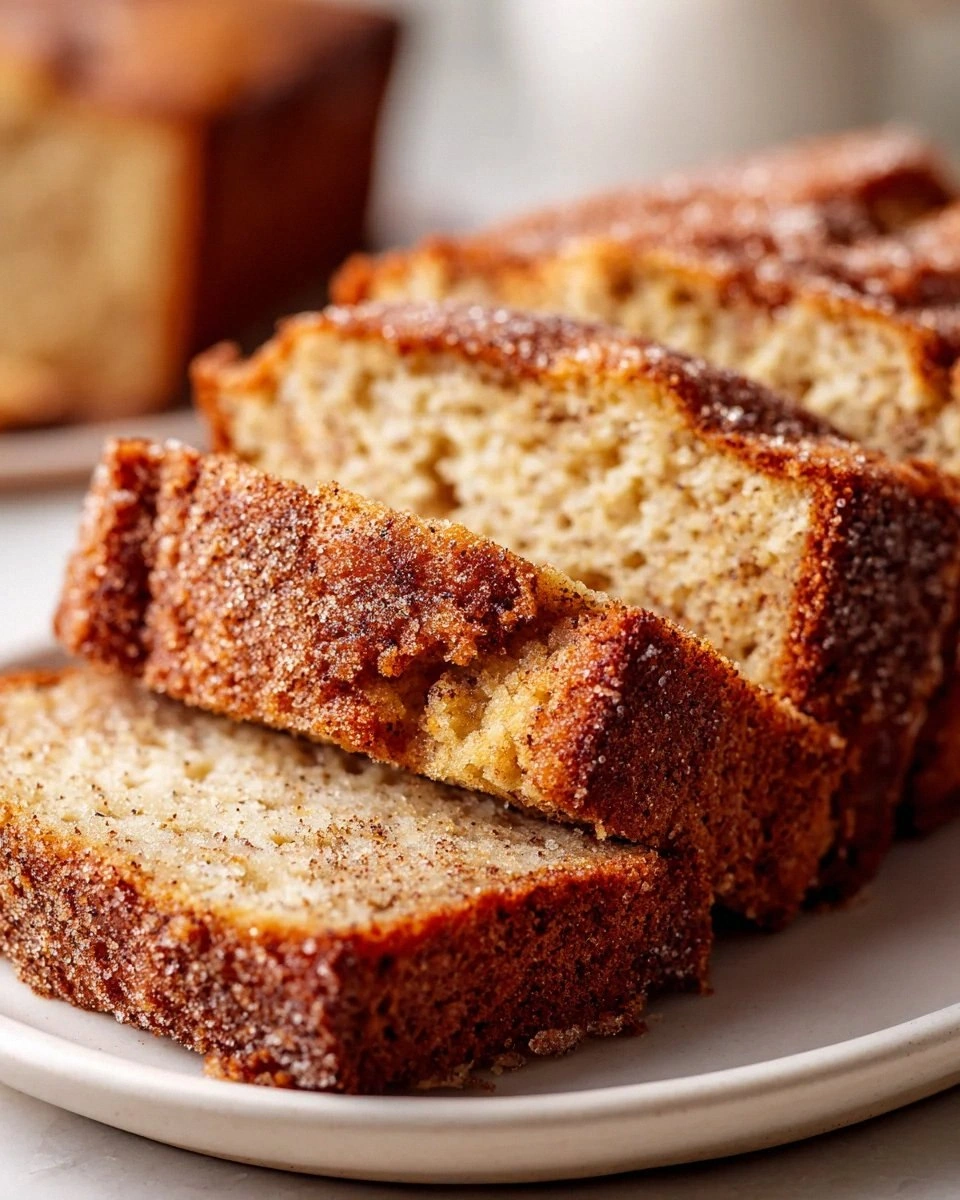
I've tried every banana bread recipe under the sun, from the fancy bakery versions to the back-of-the-box basics, but nothing prepared me for what happened when I accidentally knocked my snickerdoodle cookie dough into my banana bread batter. That happy accident created something magical — the familiar comfort of banana bread wrapped in the warm embrace of cinnamon-sugar goodness that crackles slightly when you bite through the top. It's like someone took your favorite cookie and your favorite quick bread, introduced them at a party, and nine months later, this beautiful baby arrived.
What makes this version different? We're not just sprinkling some cinnamon on top and calling it a day. We're creating layers of flavor that build on each other like a symphony — the bananas provide that familiar sweetness and moisture, the cinnamon-sugar topping creates that signature snickerdoodle crackle, and the texture hits that perfect middle ground between cakey and fudgy that most recipes completely miss. Let me walk you through every single step — by the end, you'll wonder how you ever made it any other way.
What Makes This Version Stand Out
Cinnamon-Sugar Crust Perfection: Unlike those sad, dry banana breads with a pathetic sprinkle of cinnamon on top, we create a proper snickerdoodle crust that forms a slightly crisp, sweet shell. When you tap it with your finger, it makes that satisfying crackling sound that tells you something magical happened in that oven.
Moisture Lock Technology: Most banana breads turn into desert-dry bricks by day two, but not this beauty. The combination of melted butter, brown sugar, and those overripe bananas creates a moisture barrier that keeps this loaf tender for up to five days — if it lasts that long, which in my house is about as likely as me skipping dessert.
One-Bowl Wonder: I don't know about you, but my dishwasher and I are not on speaking terms after the Great Cookie Disaster of 2023. This recipe lets you mix everything in one bowl, which means fewer dishes and more time for the important things in life — like eating warm banana bread straight from the pan while standing over the sink.
Flavor Layering Genius: We're not just dumping everything in and hoping for the best. The way we add the ingredients creates distinct flavor pockets — cinnamon in the batter, cinnamon in the topping, and a surprise third hit that I'll reveal later. It's like a treasure hunt in every slice.
Texture That Makes People Moan: You know that sound people make when they taste something incredible? That involuntary "mmmm" that escapes before they can stop it? This bread gets that reaction every single time. The edges stay tender while the center stays fudgy, creating a textural contrast that'll make you close your eyes in appreciation.
Make-Ahead Champion: This bread actually improves overnight as the flavors meld and deepen. Make it on Sunday, and you've got breakfast sorted through Thursday — assuming you have more self-control than I do, which honestly isn't setting the bar very high.
Instagram-Worthy Without Trying: That crackled cinnamon-sugar top photographs like a dream. Even if your photography skills are limited to "point phone at food and hope," this bread makes you look like you know what you're doing. Your followers will think you've been secretly attending culinary school.
Alright, let's break down exactly what goes into this masterpiece...
Inside the Ingredient List
The Flavor Base
Let's start with those bananas — and yes, they need to be practically black. I know it looks like they've given up on life, but trust me, they're just getting started. The blacker and spottier your bananas, the more concentrated their flavor becomes. We're talking about bananas that have reached the "embarrassing relative at Thanksgiving" level of overripe. These botanical disasters contain more natural sugars than their yellow counterparts, which means deeper banana flavor and natural sweetness that reduces how much sugar we need to add.
Speaking of sugar, we're using a dynamic duo here — granulated sugar for structure and brown sugar for that caramel-like depth that makes people ask "what's your secret?" The brown sugar adds moisture and a subtle molasses note that plays beautifully with the cinnamon. If you're out of brown sugar, you can substitute white sugar plus a tablespoon of maple syrup, but honestly, brown sugar is worth keeping around just for this recipe.
The melted butter is non-negotiable. I've tried this with oil, with softened butter, even with coconut oil in a moment of health-conscious weakness, but nothing beats melted butter for creating that tender, almost fudgy texture. It coats the flour particles differently than solid fat, resulting in a more tender crumb that stays moist for days instead of drying out faster than my houseplants.
The Texture Crew
Eggs are your binding agents, but they're doing double duty here. They add richness, help with structure, and contribute to that beautiful golden color. Make sure they're at room temperature — cold eggs can cause your melted butter to seize up into sad little butter chunks that refuse to incorporate properly. If you forgot to take them out (been there), pop them in a bowl of warm water for five minutes while you mash those bananas.
The milk might seem unnecessary when you've already got bananas adding moisture, but here's where we get scientific. The milk proteins interact with the flour to create a more tender texture, plus it helps thin the batter just enough to ensure even baking. Whole milk works best, but 2% will do in a pinch. I've even used almond milk when catering to dairy-free friends, though the texture isn't quite as luxurious.
Our flour choice matters more than you'd think. All-purpose flour gives us the perfect balance of structure and tenderness — bread flour would make it tough, while cake flour would make it too delicate to support those mix-ins we're going to add. The key is not overmeasuring; fluff your flour first, then spoon it into your measuring cup and level it off. Scooping directly from the bag compacts the flour and can add up to 25% more than you need, resulting in dry, sad bread.
The Unexpected Star
Here's where we diverge from traditional banana bread — we're adding cinnamon directly into the batter, not just on top. But not just any cinnamon; I'm talking about the good stuff. That ancient jar that's been lurking in your spice cabinet since 2019 isn't going to cut it. Fresh, fragrant cinnamon makes all the difference between "meh" and "OMG what is this magic?" Vietnamese cinnamon packs the most punch, but any fresh cinnamon will work wonders.
The baking powder and baking soda combo might seem like overkill, but each plays a specific role. Baking soda neutralizes the acid in the bananas and brown sugar while helping with browning, while baking powder provides lift. Using both ensures we get the perfect rise without any metallic aftertaste. Make sure they're fresh — if you can't remember when you bought them, toss them and start fresh.
Salt is the unsung hero here. It doesn't make things salty; it makes everything taste more like itself. A half teaspoon might seem insignificant, but it's the difference between flat, one-note banana bread and a complex, layered flavor profile that keeps people coming back for "just one more slice" until suddenly the whole loaf has vanished like a magician's assistant.
The Final Flourish
The cinnamon-sugar topping isn't just gilding the lily — it's creating the signature snickerdoodle experience. We're using a specific ratio of two parts sugar to one part cinnamon, which creates that perfect sweet-spicy balance. Too much cinnamon and it becomes bitter, too little and you lose that distinctive snickerdoodle punch. This isn't the time for restraint; we want that topping thick enough to create a proper crust.
Everything's prepped? Good. Let's get into the real action...

The Method — Step by Step
- Preheat your oven to 350°F (175°C), but don't just crank it up and hope for the best. Position your rack in the lower third of the oven — this prevents the top from browning too quickly while the center stays raw. Grease a 9x5-inch loaf pan with butter, then dust it lightly with flour, tapping out the excess. This double insurance policy ensures your beautiful bread slides out like a dream instead of leaving half its behind stuck to the pan like a tragic breakup.
- In a large bowl, mash those bananas until they resemble baby food — smooth with just a few tiny lumps for texture. You should end up with about 1½ cups of banana puree. If you're short, don't panic; you can supplement with applesauce, but ripe bananas really are worth the wait. The mash should smell intensely banana-y, like a tropical vacation in a bowl. This is the foundation of your flavor, so take your time getting it right.
- Whisk in both sugars until the mixture looks like wet sand at the beach — grainy but cohesive. The sugars will start dissolving in the banana liquid, creating a glossy sheen that tells you the sweeteners are doing their job. This step takes about a minute of vigorous whisking, which counts as your arm workout for the day. The mixture should look slightly lighter in color and feel less grainy when you rub a bit between your fingers.
- Drizzle in the melted butter while whisking constantly. The key here is to add it slowly in a thin stream, like you're making mayonnaise. This prevents the hot butter from cooking the eggs we're about to add. The mixture will become silky and luxurious, coating your whisk in a way that makes you want to lick it clean (go ahead, I won't judge). It should smell like banana caramel and look glossy enough to reflect your face.
- Add the eggs one at a time, whisking each until fully incorporated before adding the next. Room temperature eggs mix in more easily and prevent the butter from seizing up into grainy bits. The batter should become lighter in color and slightly thicker, like a milkshake that's been sitting for a few minutes. If you see any butter bits that refuse to incorporate, warm the bowl slightly by placing it over a pan of warm water for 30 seconds, then whisk again.
- Stir in the vanilla extract — and please, use real vanilla, not the imitation stuff that tastes like sadness. The alcohol in the vanilla helps carry the other flavors, while the vanilla itself adds depth and warmth. Your batter should now smell like a banana split drizzled with caramel sauce, and you'll be fighting the urge to drink it straight from the bowl. Resist, my friend. The best is yet to come.
- In a separate bowl, whisk together the flour, baking powder, baking soda, salt, and cinnamon. This ensures the leavening agents distribute evenly instead of creating random air pockets that make your bread look like the surface of the moon. The cinnamon should smell fragrant and warm when you whisk it through the flour — if it doesn't, it's time to buy fresh spices. Nobody wants dusty-tasting banana bread.
- Add the dry ingredients to the wet ingredients and fold them together with a spatula. Here's the critical part: stop mixing as soon as you don't see dry flour anymore. The batter will be lumpy and look like it needs more mixing, but resist the urge. Overmixing develops gluten, which turns your tender bread into a rubbery hockey puck. The batter should look like thick pancake batter with streaks of flour still visible — they'll disappear as it bakes.
- Pour half the batter into your prepared pan and smooth the top. Mix together your cinnamon-sugar topping and sprinkle half of it over the batter. Pour the remaining batter on top and finish with the rest of the cinnamon-sugar. This creates layers of flavor instead of just a boring single-note topping. The sugar will melt and create that signature crackly crust that makes snickerdoodles so addictive.
- Bake for 55-65 minutes, but don't just set a timer and walk away. Check it at 45 minutes — if the top is browning too quickly, tent it loosely with foil. The bread is done when a toothpick inserted in the center comes out with just a few moist crumbs. The edges should be pulling away from the sides of the pan, and the top should spring back when lightly pressed. Your kitchen will smell like a cinnamon roll factory had a baby with a banana plantation.
That's it — you did it. But hold on, I've got a few more tricks that'll take this to another level...
Insider Tricks for Flawless Results
The Temperature Rule Nobody Follows
Here's where most home bakers go wrong — they yank that bread out of the oven and immediately try to unmold it like it's a Bundt cake emergency. Stop right there, partner. Let that beauty cool in the pan for exactly 15 minutes. Any longer and it'll start to steam itself soggy. Any less and it'll crumble like my resolve when someone offers me fresh bread. During this crucial window, the bread finishes setting up and the crust achieves its final crackly texture. Run a knife around the edges after 10 minutes to prevent sticking, but resist the urge to turn it out until it's ready.
Why Your Nose Knows Best
Forget the timer — your nose is the best kitchen timer you own. When this bread is perfectly baked, your entire house will smell like a cinnamon bun got cozy with banana pudding. The aroma should be so intoxicating that neighbors randomly drop by "just to say hi" with suspicious timing. If you can smell it from the front door, it's probably done. If you can smell it from the street, you might have overbaked it. Trust your senses — they evolved over millions of years specifically to prevent banana bread disasters.
The 5-Minute Rest That Changes Everything
After you unmold your bread, let it cool completely on a wire rack for at least an hour before slicing. I know, I know — warm banana bread is one of life's greatest pleasures. But here's the thing: when it's hot, the starches haven't fully set, which means you'll get gummy, compressed slices that fall apart faster than my diet resolutions. If you absolutely must have warm bread (and honestly, who could blame you?), wait 30 minutes, then warm individual slices in the toaster. The crust will crisp up beautifully while the inside stays tender and moist.
The Storage Secret That Extends Deliciousness
Here's where most recipes fail you — they tell you to wrap it in plastic wrap and call it a day. But plastic wrap traps moisture, turning your beautiful crust soft and sad. Instead, let the bread cool completely, then store it in a paper bag at room temperature for up to 3 days. The paper allows just enough air circulation to keep the crust crackly while preventing it from drying out. For longer storage, wrap it tightly in plastic wrap, then foil, and freeze for up to 3 months. When you're ready to eat, let it thaw at room temperature, then warm it in a 300°F oven for 10 minutes to revive that fresh-baked magic.
Creative Twists and Variations
This recipe is a playground. Here are some of my favorite ways to switch things up:
The Chocolate Chunk Champion
Fold in ¾ cup of dark chocolate chunks (not chips — chunks melt into gooey pockets of chocolate heaven) right before pouring into the pan. The bitterness of dark chocolate creates a sophisticated balance with the sweet cinnamon topping. I dare you to taste this version and not go back for seconds. The chocolate stays slightly soft even when the bread cools, creating little surprise bites of richness throughout each slice.
The Nutty Professor
Add ½ cup of toasted pecans or walnuts to the batter for crunch that shatters like thin ice against the tender bread. Toast them first in a dry pan until they smell nutty and fragrant — this extra step brings out oils that make the nuts taste more like themselves. The cinnamon-sugar topping pairs beautifully with the earthy nuts, creating a flavor profile that tastes like fall feels.
The Tropical Getaway
Replace ¼ cup of the flour with unsweetened shredded coconut and add ½ cup of crushed pineapple (well-drained) to the batter. The coconut adds chew while the pineapple brings tropical vibes that make you feel like you're eating banana bread on a beach somewhere. The cinnamon-sugar topping becomes the sunset that makes everything golden and beautiful.
The Breakfast of Champions
Swirl in ¼ cup of cream cheese mixed with 2 tablespoons of sugar and 1 teaspoon of vanilla before baking. Drop spoonfuls on top and use a knife to create marbled patterns. As it bakes, the cream cheese creates tangy pockets that taste like banana bread and cheesecake had a beautiful baby. Serve this version slightly warm for maximum impact.
The Spicy Rebel
Add ¼ teaspoon of cayenne pepper and ½ teaspoon of chipotle powder to the cinnamon-sugar topping. The heat sneaks up on you, creating a sweet-heat combination that makes people ask "what is that amazing flavor?" It's like your banana bread went to Mexico and came back with stories to tell and a spicy new attitude.
The Breakfast Sandwich Revolution
Slice this bread thick and use it for French toast — the cinnamon-sugar crust caramelizes into a brûlée-like shell while the inside stays custardy. Dip it in egg batter with a splash of rum and orange zest, then cook in butter until golden. Top with maple syrup and watch grown adults weep with joy. This is hands down the best version you'll ever make at home, and that's not hyperbole.
Storing and Bringing It Back to Life
Fridge Storage
Contrary to popular belief, banana bread doesn't need to live in the refrigerator — it's not dairy-based and the sugar acts as a preservative. But if you live somewhere humid or want to extend its life, wrap it tightly in plastic wrap, then foil, and refrigerate for up to a week. The cold will firm up the texture, so let it come to room temperature before serving, or warm slices briefly in the toaster. I'll be honest — I ate half the batch before anyone else got to try it, so storage hasn't been a huge issue in my house.
Freezer Friendly
This bread freezes like a dream. Slice it first, then wrap individual slices in plastic wrap, then foil, then store in a freezer bag. This way you can grab a slice whenever the craving hits without defrosting the whole loaf. Frozen slices toast up beautifully — just pop them straight from freezer to toaster and add a pat of butter. They'll taste almost as good as fresh, and future you will thank present you for this gift of future deliciousness.
Best Reheating Method
The microwave is the enemy of good banana bread — it turns the texture rubbery and the crust soft. Instead, use a toaster or toaster oven for individual slices, or wrap the whole loaf in foil and warm it in a 300°F oven for 10-15 minutes. If you're feeling fancy (and you should), add a tiny splash of water to the foil before reheating — it steams back to perfection, recreating that fresh-baked texture that makes your kitchen smell amazing all over again.