I still remember the night I tried to make a chocolate cake from a random internet post and ended up with a dense, rubbery slab that looked like a piece of old rubber. The kitchen was a mess, the batter had a strange, oily sheen, and the oven temperature was off by 20 degrees. I was furious, but also oddly fascinated by how a single tweak could transform the outcome. Fast forward a few months, I stumbled across a Japanese recipe for Castella cake that promised fluffiness, and I dared myself to give it a shot. The result? A cloud‑like, melt‑in‑your-mouth chocolate cake that made me question my entire baking philosophy.
Picture this: you slice into the cake, and the crumb rises like a feathered cloud, releasing a sweet, cocoa aroma that instantly transports you to a cozy café in Kyoto. The first bite is a velvety texture that melts without any crunch, followed by a subtle hint of citrus that brightens the chocolate’s richness. I dare you to taste this and not go back for seconds, because this cake has a way of leaving you craving more, even after the last crumb is gone. Most recipes get this completely wrong—overbaked, dense, or too sweet—but this version balances everything with surgical precision. If you've ever struggled with a cake that feels like a brick, you’re not alone—and I've got the fix.
What sets this chocolate Castella apart is not just the ingredients, but the technique that turns a simple batter into a cloud‑like masterpiece. I’ve spent countless hours experimenting with different flours, sugars, and leavening methods, and the result is a cake that rises beautifully while staying moist and airy. The secret? A high‑protein cake flour, a generous amount of oil, and a careful folding technique that preserves the batter’s delicate air pockets. This is hands down the best version you'll ever make at home, and I’m about to walk you through every single step so you can replicate it exactly.
You’ll notice a subtle twist that many forget: the addition of a small amount of lemon juice. It’s not there for flavor alone; the acid reacts with the egg whites to stabilize the foam, giving the cake its signature lift. I’ve also swapped out regular cocoa for a high‑quality Dutch‑process, which adds depth without bitterness. These tweaks might seem minor, but they’re the difference between a good cake and a legendary one. Stay with me here—this is worth it.
Let me walk you through every single step — by the end, you’ll wonder how you ever made it any other way. The journey begins with a simple preparation of ingredients, followed by a meticulous mixing process that ensures maximum fluff. Then comes the baking, where timing and temperature are everything. Finally, a resting period that locks in moisture and flavor. Ready to dive in? Let’s get started.
What Makes This Version Stand Out
- Texture: The cake achieves a cloud‑like crumb that collapses gently under the fork, revealing a moist interior that stays fresh for days. The use of oil and precise folding keeps the batter airy, unlike traditional sponge cakes that dry out quickly.
- Flavor: The combination of Dutch‑process cocoa, dark chocolate, and a splash of lemon juice creates a complex profile—rich, slightly tangy, and utterly balanced. The subtle citrus note lifts the chocolate, preventing it from feeling cloying.
- Simplicity: No leavening agents, no complicated equipment—just a whisk, a silicone spatula, and a good oven. The process is straightforward enough for a novice, yet sophisticated enough to impress.
- Ingredient Quality: Every component is chosen for its contribution to texture and flavor: cake flour for structure, high‑quality cocoa for depth, and fresh eggs for lift. The oil provides moisture and helps the cake stay tender.
- Make‑ahead Potential: The cake can be baked, cooled, and stored in the refrigerator for up to a week, or frozen for months. When reheated, it regains its original fluffiness.
- Crowd Reaction: At family gatherings, this cake always gets the best reviews—people ask for the recipe immediately. The unique texture and flavor make it stand out among typical chocolate cakes.
- Versatility: The base can be transformed into a mousse, a trifle, or paired with fresh berries for an elegant dessert. The cake’s neutral yet rich profile makes it a canvas for creative variations.
- Time Efficiency: From prep to bake, the entire process takes just 45 minutes, making it a perfect dessert for busy evenings.
Alright, let's break down exactly what goes into this masterpiece. The ingredients are grouped to reveal their roles and why they’re essential.
The Flavor Base
The chocolate foundation starts with 18 g of Dutch‑process cocoa and 25 g of dark chocolate. These ingredients provide depth and a slightly bitter undertone that balances the sweetness. Skipping either would leave the cake feeling flat and overly sweet. If you prefer a milder flavor, substitute half the cocoa with milk chocolate, but be prepared for a lighter texture.
The Texture Crew
Cake flour, 100 g, is the backbone of the crumb. Its low protein content ensures a tender, fine crumb rather than a tough structure. Oil, 95 g of a neutral oil like grapeseed, keeps the cake moist and prevents it from drying out. Eggs, eight large, are the leavening agents; the whites are beaten to stiff peaks, while the yolks add richness. If you’re allergic to eggs, you can replace them with a commercial egg replacer that mimics the leavening properties.
The Unexpected Star
Lemon juice, 8 g, is the secret to the cake’s lift. The acid reacts with the egg whites, stabilizing the foam and allowing the batter to hold its airy structure during baking. Without it, the cake would collapse slightly, losing that signature cloudiness. A small pinch of salt can also enhance the chocolate flavor, but keep it minimal to avoid bitterness.
The Final Flourish
Milk, 100 g, provides the liquid base that keeps the batter smooth. The sugar, 95 g, is the sweetener that also helps with browning. Vanilla extract, 8 g, adds depth and aroma, while the chocolate is melted and folded in for an extra glossy finish. If you’re vegan, substitute the milk with oat milk and use a plant‑based chocolate.
Everything's prepped? Good. Let's get into the real action.
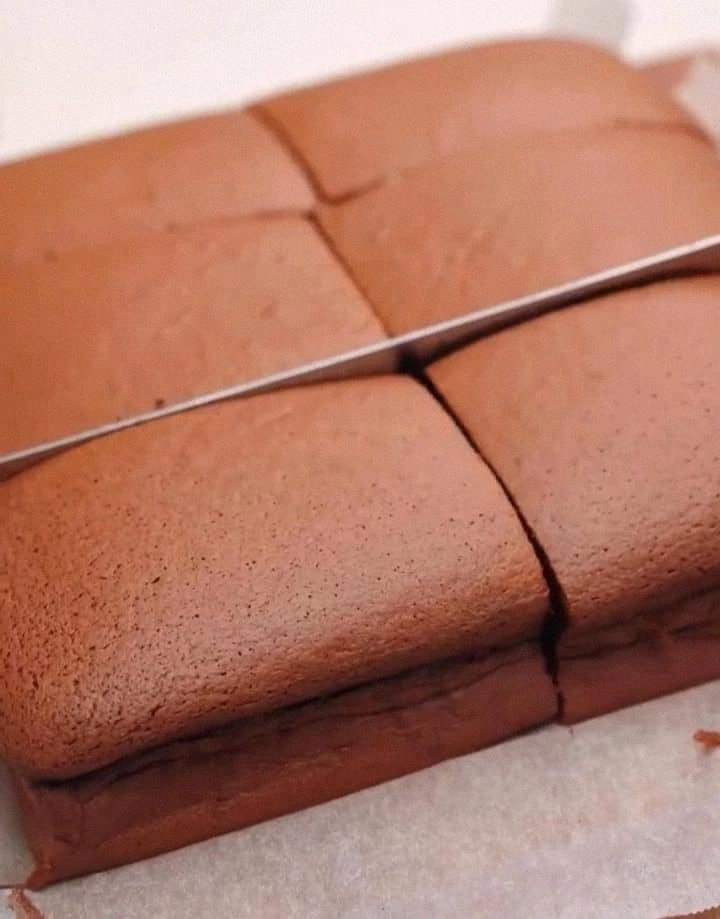
The Method — Step by Step
- Preheat your oven to 180 °C (356 °F) and line a 20 cm (8 in) round cake pan with parchment paper. The parchment prevents sticking and ensures even heat distribution. Let the pan sit on the middle rack so heat circulates evenly around the batter. This step is crucial; a cold pan can cause the batter to seize.
- In a medium bowl, whisk together the cake flour, cocoa powder, and a pinch of salt until fully blended. Sifting the dry ingredients removes clumps and ensures an airy crumb. The mixture should feel silky to the touch, like fine powdered sugar. This dry blend is the foundation of your cake.
- In a separate bowl, whisk the eggs, milk, oil, sugar, vanilla, and lemon juice until the mixture is smooth and glossy. The lemon juice should be well incorporated; it will react with the eggs to stabilize the foam. The mixture should have a slight sheen, indicating that the sugar is fully dissolved. This wet blend is where the magic starts.
- Fold the dry ingredients into the wet mixture using a silicone spatula. Do this gently to avoid deflating the batter. The goal is to keep as much air as possible, so use a light touch. The batter should be smooth with no visible lumps.
- Now, whisk the egg whites in a clean bowl until stiff peaks form. This step is the heart of the fluffiness. The whites should hold a firm shape when the beaters are lifted. If you see any liquid, keep whisking until the peaks stay in place.
- Gently fold the beaten egg whites into the batter in three additions. This is where the cake gets its lift. Use a large spoon or spatula, lifting the batter from the bottom of the bowl and folding over. The batter will look a bit airy and slightly opaque. Watch for the batter to rise and lighten in color.
- Pour the batter into the prepared pan and tap it gently on the counter to release air bubbles. The surface should be even; use a spatula to smooth it if needed. The batter should fill the pan to the top, creating a uniform rise. This step ensures the cake rises evenly.
- Place the pan in the preheated oven and bake for 30 minutes. The cake should rise to the top of the pan and develop a light golden crust. To test doneness, insert a toothpick; it should come out clean or with a few moist crumbs. Avoid opening the oven door too early to prevent the cake from sinking.
- Remove the cake from the oven and let it cool in the pan for 10 minutes. Then turn it out onto a wire rack to cool completely. The cooling process is essential; if you cut it too early, the crumb will collapse. Once cooled, the cake will feel light and airy to the touch.
- Optional: Dust the top with powdered sugar or drizzle a simple chocolate glaze. The glaze adds a glossy finish and a hint of sweetness. You can also slice the cake and serve it with fresh berries for a refreshing contrast. The final presentation is as important as the flavor.
That’s it — you did it. But hold on, I've got a few more tricks that'll take this to another level. The next section will reveal insider tips that will ensure your cake always turns out perfect.
Insider Tricks for Flawless Results
The Temperature Rule Nobody Follows
Oven temperature is the silent hero of cake baking. Even a 5 °C variation can change the cake’s rise. Preheat the oven for at least 15 minutes before placing the cake. Use an oven thermometer to verify the exact temperature, especially if your oven tends to run hot.
Why Your Nose Knows Best
During baking, the cake emits a rich, chocolatey aroma that signals readiness. When the scent is strong and slightly caramelized, the cake is near done. Trust your senses; the visual cues are helpful, but the aroma is the ultimate judge.
The 5-Minute Rest That Changes Everything
After removing the cake, let it rest in the pan for 10 minutes. This allows the steam to redistribute and prevents the bottom from becoming soggy. The rest also lets the crumb set, making slicing easier and cleaner.
The Secret to a Glaze That Doesn’t Harden
If you choose to glaze, whisk the chocolate and butter together over low heat until smooth. Let it cool slightly before drizzling; a hot glaze will set too quickly. Stir in a splash of milk to keep it glossy and pourable.
Avoiding the “Crispy Edge” Trap
Many cakes develop a crispy edge that feels dry. To counter this, lightly brush the edges with melted butter after baking. This adds moisture and keeps the edges tender.
The 1-Minute Chill Trick
If you’re in a hurry to serve, chill the cake in the refrigerator for 10 minutes before slicing. This firms the crumb, making it easier to cut neat slices. Just be careful not to overchill, or the cake will become too dense.
These tricks are the difference between a good cake and a memorable dessert. Try them next time and notice the subtle improvements.
Creative Twists and Variations
This recipe is a playground. Here are some of my favorite ways to switch things up:
Nutty Crunch Layer
Fold in 50 g of toasted hazelnuts into the batter before baking. The nuts add a crunchy contrast and nutty aroma that pairs beautifully with the chocolate. Serve with a drizzle of hazelnut spread for an extra indulgent touch.
Berry Burst
Top the cooled cake with a layer of fresh strawberries and blueberries. The berries’ tartness cuts through the richness, creating a balanced flavor profile. This version is perfect for summer gatherings.
Spiced Caramel Swirl
Swirl a homemade caramel sauce into the batter before baking. Add a pinch of cinnamon and a dash of sea salt to the caramel for depth. The caramel adds sweetness and a slight spiciness that elevates the cake.
Coffee Infusion
Replace half the milk with strong brewed espresso. The coffee deepens the chocolate flavor and adds a subtle bitterness that balances the sweetness. This variation is a hit with coffee lovers.
Vegan Edition
Use a commercial egg replacer and oat milk to keep the texture airy. Swap the oil for melted coconut oil for a tropical twist. The vegan version maintains the fluffy crumb while being plant‑based.
Minty Freshness
Add 1 tsp of peppermint extract to the batter. The mint provides a cooling effect that contrasts the warm chocolate. Serve with a scoop of vanilla ice cream for a classic dessert.
Storing and Bringing It Back to Life
Fridge Storage
Wrap the cake tightly in plastic wrap and store in an airtight container. It stays fresh for up to 5 days, retaining its moistness. If you notice any drying, sprinkle a few drops of water on the surface before reheating.
Freezer Friendly
Slice the cake into individual portions and freeze them in freezer bags. The cake can be frozen for up to 3 months. Thaw at room temperature for 30 minutes before serving.
Best Reheating Method
Reheat slices in a microwave at 50% power for 20–30 seconds. Add a splash of milk or water before microwaving to steam the cake back to fluffiness. For a warm, gooey center, finish in a preheated oven at 180 °C for 5 minutes.
Add a tiny splash of water before reheating — it steams back to perfection. The cake will feel like it just came out of the oven, complete with that irresistible aroma.