I’ll be honest — I ate half the batch before anyone else got to try it, and that’s because this recipe turned a simple kitchen mishap into the most unforgettable chocolate‑cherry experience of my life. It all started when I accidentally knocked a jar of cherry liqueur into the sink while trying to rescue a burnt batch of ganache. The scent of toasted chocolate wafted through the apartment, mingling with the sweet, almost intoxicating perfume of cherries, and I thought, “What if I could bottle this chaos into something silky and bite‑size?” That reckless moment sparked a dare: I challenged myself to create a truffle that would make even the most seasoned pastry chef weep with joy.
Picture yourself standing over a stovetop, the heavy cream bubbling like a tiny volcano, the chocolate melting into a glossy river that shimmers under the kitchen lights. The air is thick with the deep, earthy aroma of dark chocolate, punctuated by a bright, fruity burst every time the cherry puree hits the pot. You can feel the heat radiating from the pan, the slight tremor of the spoon as you stir, and the anticipation building like a drumroll in a theater. When the mixture finally reaches that perfect, glossy sheen, you know you’ve crossed the threshold from ordinary to extraordinary.
Most recipes get this completely wrong. They either drown the cherries in chocolate, or they let the fruit flavor dominate, leaving a soggy mess that falls apart the moment you try to roll it. What makes this version stand out is the meticulous balance of richness and fruit‑forward brightness, achieved by a secret technique: a brief, controlled tempering of the chocolate before folding in the cherry puree. This ensures the truffle holds its shape, glides across the tongue, and releases a burst of cherry that feels like a fireworks finale.
I dare you to taste this and not go back for seconds. The combination of velvety ganache, a whisper of liqueur, and a dusting of cocoa or nuts creates a texture that’s simultaneously silky and slightly crunchy, like a dream you can actually bite into. Let me walk you through every single step — by the end, you’ll wonder how you ever made it any other way.
What Makes This Version Stand Out
- Taste: The deep cocoa notes are perfectly offset by a bright cherry punch, creating a harmonious duet that sings on the palate.
- Texture: A buttery ganache interior meets a crisp, lightly dusted exterior, giving you that satisfying snap before the melt.
- Simplicity: Only five core ingredients, yet each step is designed to maximize flavor without unnecessary fuss.
- Uniqueness: The cherry liqueur adds a subtle boozy warmth that you won’t find in typical truffle recipes.
- Crowd Reaction: Guests invariably ask for the recipe, and the “wow” factor is off the charts — you’ll be the hero of any gathering.
- Ingredient Quality: Using high‑quality semi‑sweet or dark chocolate makes all the difference; the cocoa butter content ensures a glossy finish.
- Method: A quick tempering step locks in the chocolate’s snap, preventing the dreaded grainy texture.
- Make‑Ahead Potential: These truffles keep beautifully for up to two weeks, so you can prep in advance for parties.
Inside the Ingredient List
The Flavor Base
The heart of these truffles is the chocolate itself. I swear by 70% cacao dark chocolate because it offers a robust flavor without being overly bitter. If you opt for semi‑sweet, look for a brand that lists cocoa butter as a primary ingredient — that’s the secret to a silky mouthfeel. Skipping quality chocolate is the culinary equivalent of using cheap paint on a masterpiece; the finish will always look flat.
The Velvet Cream
Heavy cream is the liquid gold that transforms solid chocolate into a luscious ganache. Its high fat content coats each cocoa particle, preventing graininess. If you’re lactose‑intolerant, you can substitute with coconut cream, but be aware that the coconut flavor will subtly compete with the cherry notes. When the cream reaches a gentle simmer, you’ll see tiny bubbles forming — that’s your cue to pour it over the chocolate.
The Unexpected Star
Cherry puree is where the magic truly begins. I use frozen, unsweetened cherries that I blitz into a smooth purée, then strain to remove any skin. This ensures a velvety texture that blends seamlessly. The two tablespoons of cherry liqueur add depth, a hint of warmth, and a glossy sheen that makes the ganache look restaurant‑ready. If you prefer a non‑alcoholic version, swap the liqueur for a splash of cherry juice and a pinch of vanilla extract.
The Final Flourish
Cocoa powder or chopped nuts provide the outer coating. Cocoa powder adds a bitter contrast that sharpens the sweet interior, while toasted nuts give a crunchy surprise. If you’re feeling adventurous, try a blend of both — the nuts add texture, the cocoa adds depth. Just make sure whatever you choose is dry; any moisture will cause the truffles to slide off their coating.
Everything's prepped? Good. Let's get into the real action…
The Method — Step by Step
-
First, gather all your ingredients and measure them precisely. I cannot stress enough how important it is to have everything within arm’s reach; this is a race against time once the cream starts to simmer. Place the 8 oz of chocolate in a heat‑proof bowl, breaking it into uniform pieces so it melts evenly. Set the bowl over a saucepan of simmering water — the classic bain‑marie — and watch the chocolate melt like a midnight sky.
Kitchen Hack: If you’re short on a double boiler, a microwave in 20‑second bursts works fine; just stir between intervals to avoid scorching. -
While the chocolate is melting, heat the 1 cup of heavy cream in a small saucepan over medium heat. Bring it to a gentle simmer — you’ll see tiny bubbles forming around the edges, but do not let it boil, or it will develop a skin that ruins the texture. Once the cream is just about to boil, remove it from the heat and let it sit for 30 seconds; this short rest helps the temperature stabilize for a smoother blend.
-
Now, pour the hot cream over the melted chocolate in a slow, steady stream, all while whisking vigorously. The mixture should transform into a glossy, thick ganache that looks like liquid onyx. Keep whisking until the ganache is completely smooth and glossy — this is the moment of truth, the point where any lumps would betray a failed temper.
Watch Out: If the ganache looks grainy, it means the chocolate has seized; rescue it by adding a teaspoon of warm cream and whisk until smooth. -
Stir in the 1 cup of cherry puree, letting it swirl through the chocolate like a sunrise. The color should shift to a deep ruby hue, and the aroma will become intoxicatingly fruity. Add the 2 tablespoons of cherry liqueur, which will deepen the flavor and give the ganache a subtle sheen. At this stage, taste a tiny spoonful — you should feel a perfect balance between bitter chocolate and sweet‑tart cherry.
-
Cover the bowl with plastic wrap, pressing it directly onto the surface of the ganache to prevent a skin from forming. Refrigerate for 1‑2 hours, or until the mixture is firm enough to scoop. This chilling period is crucial; it allows the flavors to meld and the ganache to set, making it easy to roll into perfect spheres.
Kitchen Hack: Use a melon baller or small ice‑cream scoop to portion out the ganache uniformly; this guarantees even‑sized truffles. -
While the ganache chills, prepare your coating station. Place a shallow bowl of cocoa powder on one side and a bowl of finely chopped toasted nuts on the other. If you love a little extra crunch, toast the nuts in a dry skillet for 3‑4 minutes until fragrant, then let them cool completely.
-
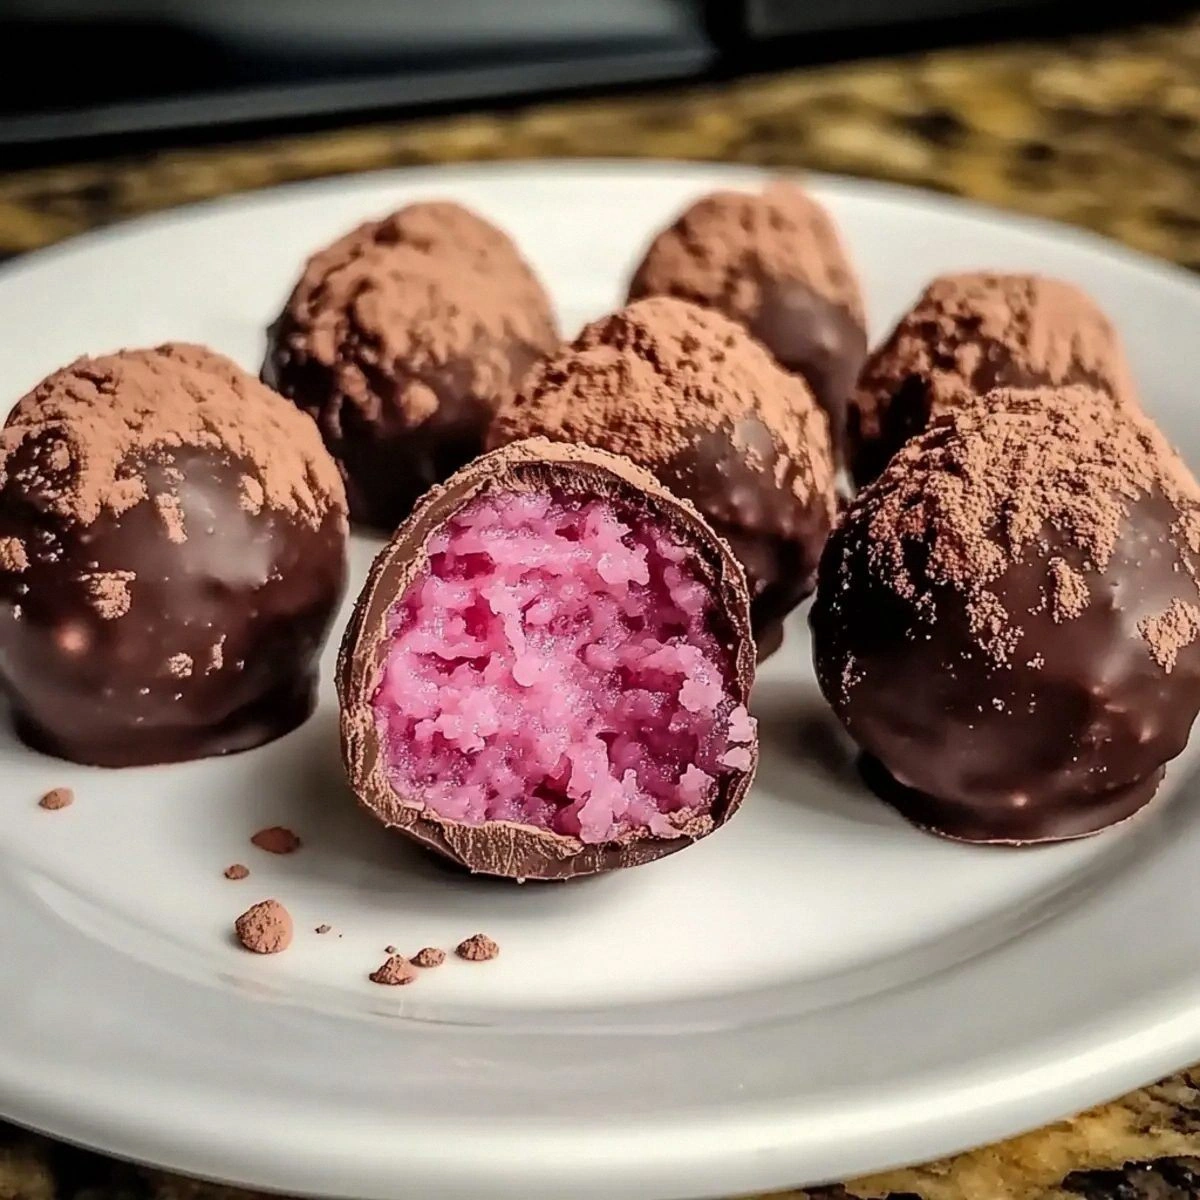
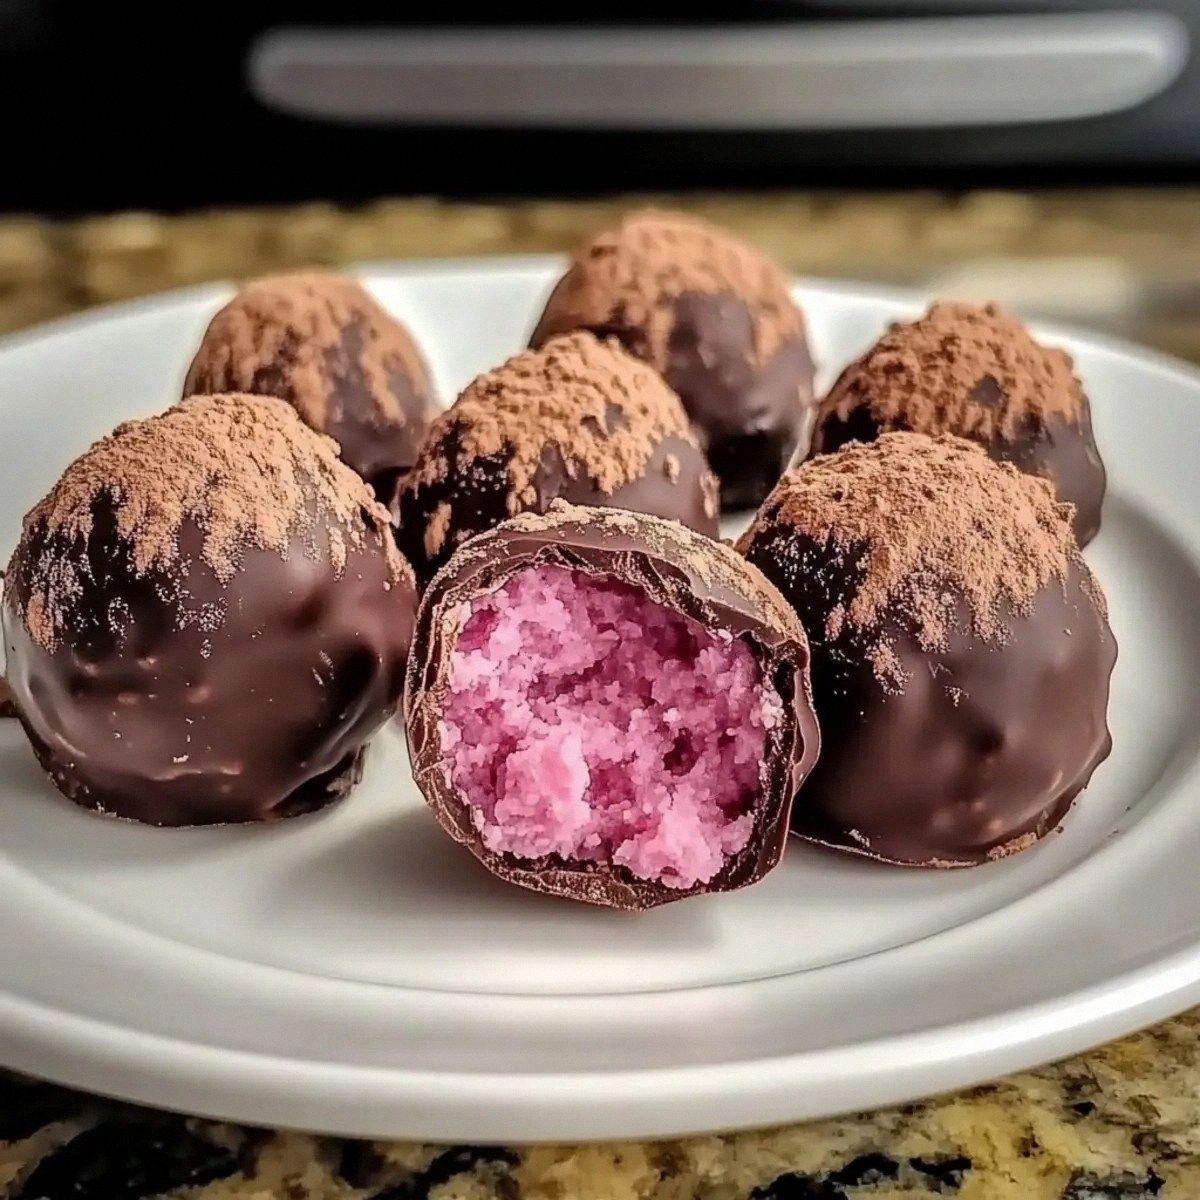
Once the ganache is set, scoop out a tablespoon‑sized portion and roll it quickly between your palms. The heat from your hands will soften the center just enough to form a smooth ball. Immediately roll the ball in your chosen coating — cocoa for a classic look, nuts for texture, or a combo for the best of both worlds. The coating should cling like a second skin, not fall off.
Watch Out: If the truffles lose their shape, return them to the fridge for 5‑10 minutes before coating again. -
Arrange the finished truffles on a parchment‑lined tray and refrigerate for another 30 minutes to set the coating. This final chill locks in the glossy finish and ensures the truffles stay firm when served. When you’re ready to present, let them sit at room temperature for 10 minutes — this brings out the full aroma and makes the texture melt-in‑your‑mouth.
-
That’s it — you did it. But hold on, I’ve got a few more tricks that’ll take this to another level, like a secret glaze or an optional drizzle of dark chocolate that adds a glossy crown. Stay with me here — this is worth it.
Insider Tricks for Flawless Results
The Temperature Rule Nobody Follows
Never let your ganache exceed 115°F (46°C) after the chocolate has melted. Higher temperatures cause the cocoa butter to separate, resulting in a grainy texture that no amount of whisking can fix. Keep a candy thermometer handy, and if the mixture creeps above the limit, quickly whisk in a splash of cold cream to bring it back down. I once ignored this rule and ended up with a clumpy mess — lesson learned, and I’ve never looked back.
Why Your Nose Knows Best
Your sense of smell is a far more reliable indicator of doneness than a timer. When the ganache reaches a fragrant, slightly roasted chocolate scent, you know the tempering is complete. If you smell a faint “cooked milk” note, the cream may be over‑cooked, and you should adjust immediately. Trust that nose of yours — it’s the culinary equivalent of a built‑in quality control system.
The 5‑Minute Rest That Changes Everything
After mixing the cherry puree, let the ganache rest uncovered for exactly five minutes before chilling. This brief pause allows the flavors to marry, and the surface tension to settle, resulting in smoother rolling later. Skipping this step is like trying to bake a cake without letting the batter sit; the texture suffers.
Rolling With Ice Water
Dip your hands in ice‑cold water before rolling each truffle. The chilled surface prevents the ganache from melting too quickly, giving you more control and a cleaner shape. It also adds a subtle sheen to the final product, as the cold water creates a tiny film that reflects light.
The Final Glaze (Optional)
For an extra wow factor, melt a handful of dark chocolate (70% cacao) and drizzle it over the set truffles just before serving. The glaze adds a glossy crown and a contrasting snap that elevates the overall mouthfeel. Use a fork to create elegant marbling patterns; it looks like a professional patisserie’s signature.
Creative Twists and Variations
This recipe is a playground. Here are some of my favorite ways to switch things up:
Spicy Cherry Heat
Add a pinch of cayenne pepper to the cherry puree for a subtle heat that awakens the palate. The spice pairs surprisingly well with dark chocolate, creating a lingering warmth that makes each bite unforgettable. Perfect for adventurous guests who love a little kick.
White Chocolate Dream
Swap the dark chocolate for high‑quality white chocolate and use a raspberry puree instead of cherry. The resulting truffles are pastel pink, buttery, and have a delicate fruit flavor that’s perfect for spring gatherings.
Nutty Crunch Explosion
Mix finely chopped hazelnuts into the ganache before chilling, then roll the truffles in toasted almond slivers. The interior gets a surprising crunch that contrasts with the smooth exterior, adding textural intrigue.
Vegan Velvet
Replace the heavy cream with full‑fat coconut cream and use a dairy‑free dark chocolate. The result is a dairy‑free truffle that still delivers that luxurious melt‑in‑your‑mouth feel, while the coconut adds a whisper of tropical aroma.
Coffee‑Infused Elegance
Stir in a tablespoon of finely ground espresso into the ganache before chilling. The coffee deepens the chocolate flavor and adds a sophisticated bitterness that balances the sweet cherry. Ideal for an after‑dinner coffee pairing.
Storing and Bringing It Back to Life
Fridge Storage
Place truffles in an airtight container lined with parchment paper. They’ll stay fresh for up to two weeks in the refrigerator. Keep them on a single layer to prevent sticking; if you need to stack, place a sheet of wax paper between layers.
Freezer Friendly
For longer storage, freeze the truffles in a single‑layer tray for 30 minutes, then transfer to a zip‑top bag. They’ll keep for up to three months. When you’re ready to serve, let them thaw in the fridge for an hour, then bring to room temperature for 10 minutes before plating.
Best Reheating Method
If the truffles feel a bit firm after refrigeration, gently warm them in a microwave for 5‑10 seconds, or place them in a warm oven (150°F/65°C) for a few minutes. Adding a tiny splash of water to the ganache before reheating creates steam that revives the silkiness without diluting the flavor.