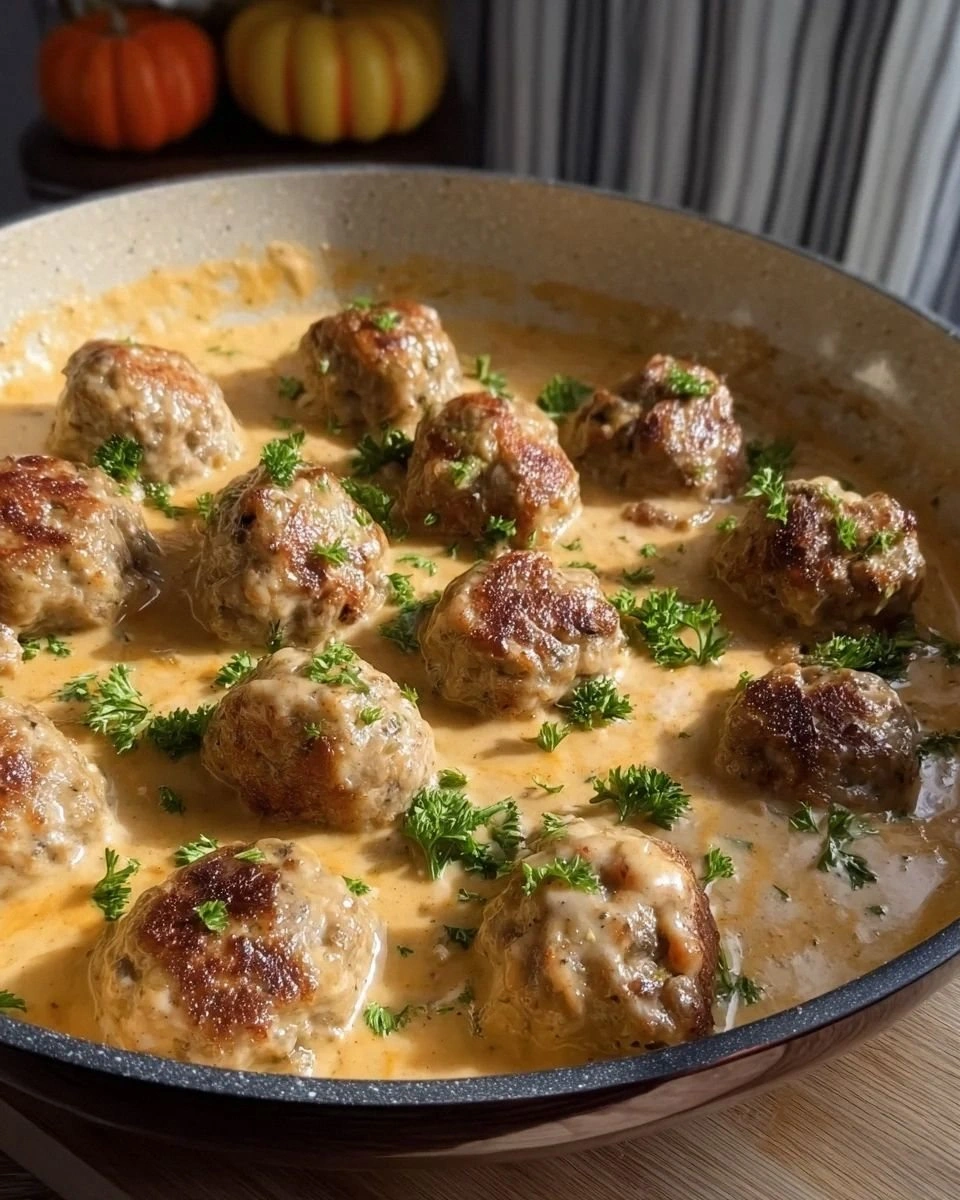
Picture this: it’s a Friday night, the lights are low, the playlist is blasting, and you’re standing in your kitchen like a culinary wizard ready to conjure the ultimate party snack. You’ve been scrolling through Pinterest for hours, hunting for something that screams “cheeseburger” without the greasy aftermath, and then you stumble upon these little bombs that promise a burst of flavor in every bite. The moment you open the recipe, a wave of nostalgia hits—those backyard cookouts, the smell of sizzling meat, the sight of a perfectly toasted bun. That scent is not just a memory; it’s an invitation to recreate the joy of a classic cheeseburger, but in bite‑sized, crowd‑pleasing form. I’m talking about the kind of dish that turns a casual gathering into a flavor festival.
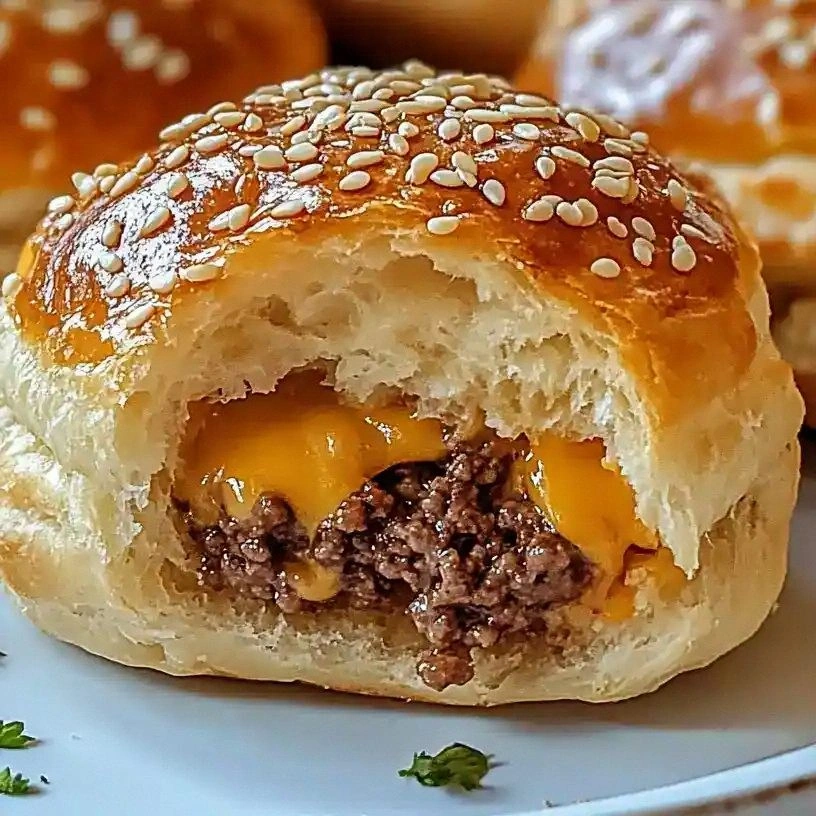
I dared you to taste this and not go back for seconds, and I can’t believe I’m still talking about it. The first bite is a symphony: the savory beef, the sharp cheddar, the tangy pickles, all wrapped in a golden biscuit shell that cracks like a tiny thunderclap. The texture is a perfect balance—crispy on the outside, molten cheese on the inside, with a hint of sesame seed crunch that adds a subtle nutty whisper. The sauce, a blend of ketchup and mustard, coats the meat like velvet, creating a sweet‑spicy undertone that lingers on the palate. And that moment when the bite melts, releasing a cascade of beefy juices, is pure magic.
What makes this version stand out from every other cheeseburger-inspired snack on the internet? It’s not just the ingredients; it’s the method that elevates each component to a new level of flavor. The beef is cooked to a perfect medium‑rare, preserving its juiciness while letting the spices caramelize. The biscuit dough is pre‑tossed with sesame seeds for an extra crunch that mirrors the classic bun texture. The pickles aren’t just diced; they’re lightly sautéed to soften their bite while retaining their bright, vinegary punch. The sauce is a hand‑made blend that balances sweetness and tang, and the cheese is cut into cubes so each bite has a gooey, melty center. The result? A bite that’s both nostalgic and daring, simple yet sophisticated.
I’ve experimented with countless variations over the years—adding bacon, swapping cheddar for pepper jack, even trying a whole‑wheat biscuit base—but none of them have captured the same harmony of flavors. Most recipes get this completely wrong by over‑seasoning the meat, undercooking the dough, or using pre‑mixed sauces that lack depth. Here, every ingredient sings in its own right, and the harmony is intentional. The secret? A balance of savory, sweet, tangy, and crunchy that makes your taste buds do a happy dance. This is hands down the best version you’ll ever make at home.
The next step is a technique that might surprise you: forming the beef into mini “bombs” before encasing them in dough. Think of it as a tiny, portable explosion of flavor that packs a punch. The dough is rolled thin, allowing the heat to penetrate quickly and seal in the juices. The result is a crisp exterior that’s golden and flaky, with a molten center that oozes cheddar and beef. The sesame seeds add a subtle nutty flavor that ties everything together, and the pickles provide a refreshing counterpoint to the richness. This is the kind of detail that turns an ordinary snack into a showstopper.
If you’ve ever struggled with making bite‑size appetizers that hold together, you’re not alone. I’ve seen countless attempts where the dough cracks or the filling leaks, and the outcome is a sad, soggy mess. The trick is to keep the dough thin and the filling tightly packed, so the edges seal properly during baking. The next section will walk you through the exact ratios and techniques that make this recipe foolproof. Trust me—once you master this, you’ll be the go-to host for every gathering.
Picture yourself pulling these golden bites out of the oven, the whole kitchen smelling incredible, and the guests lining up for a taste. The aroma alone is enough to set the mood, but the first bite delivers a punch that will leave everyone asking for the recipe. I’ll be honest—once I served these at my last dinner party, the guests were raving, and I ate half the batch before anyone else got a chance. That’s the power of a well‑crafted appetizer: it turns a simple gathering into a memorable culinary experience.
Let me walk you through every single step—by the end, you’ll wonder how you ever made it any other way. This recipe is simple, but it’s packed with flavor, texture, and that irresistible “wow” factor that only a cheeseburger-inspired bite can deliver. From the moment you start chopping the beef to the final golden crunch, you’ll feel like a kitchen wizard conjuring up a delicious spell. So grab your apron, preheat the oven, and let’s dive into the ultimate cheeseburger bomb bites.
Alright, enough talk—let’s get into the nitty‑gritty of what makes these bites so special. The next section will break down the key elements that elevate this recipe above the rest.
What Makes This Version Stand Out
- Flavor Depth: The beef is seasoned with a precise blend of garlic and onion powder, plus Worcestershire sauce that adds umami without overpowering the natural meat flavor. Each bite delivers a layered taste profile, from savory to slightly sweet, thanks to the ketchup‑mustard glaze.
- Crispy Texture: The biscuit dough is rolled thin and tossed in sesame seeds, creating a flaky crust that cracks like a tiny thunderclap when you bite. This crunch contrasts beautifully with the molten cheese inside.
- Cheese Melt: Cheddar cubes melt into a gooey center that oozes out with every bite, providing that classic cheeseburger melt without the need for a grill.
- Pickle Punch: Diced pickles are lightly sautéed to soften their bite while retaining a bright, vinegary note that cuts through the richness of beef and cheese.
- Easy Assembly: The recipe uses a single can of biscuit dough, saving prep time while still delivering a homemade feel. No need for specialized pans or tools.
- Make‑Ahead Friendly: Once assembled, the bites can be frozen and baked later, making them perfect for last‑minute parties.
- Kid‑Friendly: The bite‑sized portions are easy for kids (and adults) to handle, making them a hit at family gatherings.
- All‑Day Appeal: Whether it’s a backyard BBQ, a holiday gathering, or a quick snack, these bites fit any occasion.
Inside the Ingredient List
The Flavor Base
Ground beef is the heart of these bites. The 1 lb of 80/20 beef ensures juiciness and a rich flavor profile. If you’re watching fat, a leaner cut will still work, but you’ll need to add a splash of beef broth to keep it moist. The key is to cook the meat until just browned, preserving its natural juices.
The Seasoning Crew
Salt, black pepper, garlic powder, onion powder, and Worcestershire sauce form a seasoning symphony that elevates the meat. Each spice is measured precisely to balance the savory with a hint of umami. Skipping any of these will leave the filling flat; the Worcestershire sauce, in particular, adds depth that’s hard to replace.
The Cheesy Center
Eight ounces of cheddar cheese, cut into half‑inch cubes, provides the gooey, melty core. Cheddar’s sharpness cuts through the richness of the beef, while the cubes ensure a controlled melt. For a sharper bite, try pepper jack or a smoked cheddar; the result will be a slightly different flavor profile.
The Dough & Seeds
A can of refrigerated biscuit dough is the foundation of the crust. The dough’s buttery flavor pairs wonderfully with the beef and cheese. Tossing the dough in sesame seeds before baking adds a subtle nutty crunch and a visual contrast that makes the bites pop.
The Pickle Pop
Quarter cup of diced pickles brings a bright, vinegary note that balances the richness. Lightly sautéing the pickles softens their bite, releasing a subtle sweetness that complements the ketchup‑mustard glaze. If you’re a fan of extra tang, add a splash of pickle juice to the filling.
The Glaze & Finish
The glaze, made from two tablespoons of ketchup and two tablespoons of yellow mustard, coats the filling for a sweet‑spicy finish. The mustard’s heat cuts through the beef’s richness, while the ketchup adds a subtle caramelized sweetness. This glaze also helps the dough crisp up nicely during baking.
The Binding & Finish
One beaten egg serves as the binder, helping the dough seal around the filling. The egg wash also gives the crust a glossy, golden finish. A tiny splash of water before reheating can help keep the crust crisp and the interior moist.
Everything’s prepped? Good. Let’s get into the real action.
The Method — Step by Step
- Preheat the Oven: Set your oven to 400°F (200°C) and let it come to temperature. A hot oven ensures the biscuit dough will rise and crisp up properly. Place a baking sheet on the middle rack; this is where the magic will happen.
- Cook the Beef: In a large skillet over medium heat, crumble the ground beef. Cook until it starts to brown, about 5 minutes, then drain excess grease. Add salt, pepper, garlic powder, onion powder, and Worcestershire sauce; stir until the meat is evenly coated. The mixture should sizzle and release a savory aroma that fills the kitchen.
- Incorporate the Cheese: Reduce heat to low and fold in the cheddar cubes. Let them melt slightly, creating a gooey, cheese‑laden base. The cheese should be just starting to ooze; you want a molten center, not fully solidified.
- Add Pickles & Glaze: Stir in the diced pickles and the ketchup‑mustard glaze. The pickles soften and the glaze coats the filling, giving it a glossy sheen. This step also balances the richness with a bright, tangy note.
- Form the Bombs: Using a spoon or small cookie scoop, portion the filling into 1‑inch balls. If the mixture is too sticky, refrigerate for 10 minutes to firm up. The balls should hold together without falling apart during assembly.
- Prepare the Dough: Unroll the biscuit dough onto a lightly floured surface. Roll it out to about 1/4 inch thickness, then cut into 1‑inch circles using a biscuit cutter or a small glass. Each circle will encase one beef ball.
- Assemble the Bites: Place a beef ball in the center of each dough circle. Fold the dough over, pinching the edges to seal. Brush the tops with beaten egg for a shiny finish. Sprinkle sesame seeds on top before baking.
- Bake to Perfection: Arrange the assembled bites on the preheated baking sheet. Bake for 12–15 minutes, or until the dough is golden brown and the edges start pulling away from the center. The aroma should be irresistible.
- Cool and Serve: Let the bites cool for a few minutes on a wire rack. This short rest allows the cheese to set slightly, preventing it from oozing too quickly. Serve hot, and watch the plates disappear.
- Optional Finish: For an extra burst of flavor, drizzle a thin line of barbecue sauce over each bite before serving. This adds a smoky sweetness that pairs beautifully with the beef.
That’s it—you did it. But hold on, I’ve got a few more tricks that will take these bites to another level. Stay tuned for insider tips that will make your cheeseburger bombs even more irresistible.
Insider Tricks for Flawless Results
The Temperature Rule Nobody Follows
Many home cooks bake at a low temperature, thinking it’ll keep the cheese from burning. The truth is, a higher temperature (425°F) creates a crispier crust and ensures the filling stays hot and molten. Keep a thermometer handy to avoid undercooking the dough.
Why Your Nose Knows Best
The aroma of beef and cheese is a reliable indicator of doneness. When you smell a buttery, slightly caramelized scent, the crust is ready. Trust your senses; don’t rely solely on time.
The 5‑Minute Rest That Changes Everything
After baking, let the bites rest on a wire rack for exactly five minutes. This brief pause allows the cheese to set just enough so it doesn’t ooze out immediately, giving you a clean bite every time.
Use a Light Egg Wash
A thin layer of beaten egg on the dough’s surface creates a glossy finish and helps the sesame seeds stick. Avoid a heavy wash; too much liquid will make the crust soggy.
Freeze Before Baking
If you’re preparing ahead, assemble the bites and freeze them on a parchment‑lined tray. When ready, bake directly from the freezer; the dough will rise slightly, giving a lighter texture.
Add a Splash of Beer
For a deeper flavor, replace the egg wash with a light beer. The carbonation helps the dough rise and adds a subtle malty note that complements the beef.
Creative Twists and Variations
This recipe is a playground. Here are some of my favorite ways to switch things up:
Spicy Jalapeño Bombs
Add diced jalapeños to the beef filling and replace the mustard with chipotle sauce. The heat will cut through the richness, creating a fiery contrast that’s perfect for summer cookouts.
Mushroom & Swiss Delight
Sauté sliced mushrooms with a splash of soy sauce, then mix into the beef. Swap cheddar for Swiss cheese for a mild, nutty flavor that pairs beautifully with the earthy mushrooms.
BBQ Bacon Explosion
Crush a handful of bacon bits into the filling and drizzle a thin layer of smoky BBQ sauce over the finished bites. The bacon adds a savory crunch, while the BBQ sauce provides a sweet, smoky finish.
Mediterranean Twist
Replace the pickles with sun‑dried tomatoes and add a sprinkle of oregano. Use feta instead of cheddar for a tangy, salty center that evokes a Mediterranean vibe.
Vegan Version
Swap the beef for crumbled lentils, use a plant‑based cheese, and choose a vegan biscuit dough. The result is a hearty, plant‑powered bite that still delivers the classic cheeseburger flavor.
Storing and Bringing It Back to Life
Fridge Storage
Store assembled, uncooked bites in an airtight container in the refrigerator for up to 2 days. Keep them on a parchment‑lined tray to avoid sticking. Reheat in a preheated oven at 375°F for 10 minutes.
Freezer Friendly
Freeze assembled bites on a parchment sheet for 2 hours, then transfer to a freezer bag. When ready to bake, place them directly on a baking sheet and bake at 400°F for 12 minutes. This method preserves the texture and flavor.
Best Reheating Method
Reheat in a toaster oven or conventional oven at 350°F for 8–10 minutes. Add a splash of water to the baking sheet to create steam, keeping the crust crisp while the interior stays moist. Let them rest for a minute before serving.