I was staring at a ruined batch of muffins that had turned into a sticky, burnt disaster, and I felt the familiar pang of culinary disappointment that only a true baker knows. The kitchen smelled of charred sugar, the sound of my own sigh echoing off the walls, and the taste of disappointment lingered on my tongue like a bad memory. I knew I had to do something better, something that would rescue my afternoon and maybe even rescue my confidence. This is the moment that led me to the ultimate honey oat vanilla squares, a recipe that promises to turn any kitchen mishap into a triumphant triumph. I dare you to taste this and not go back for seconds, because once you bite into the first square, the world will seem a little sweeter. Let me walk you through every single step — by the end, you'll wonder how you ever made it any other way.
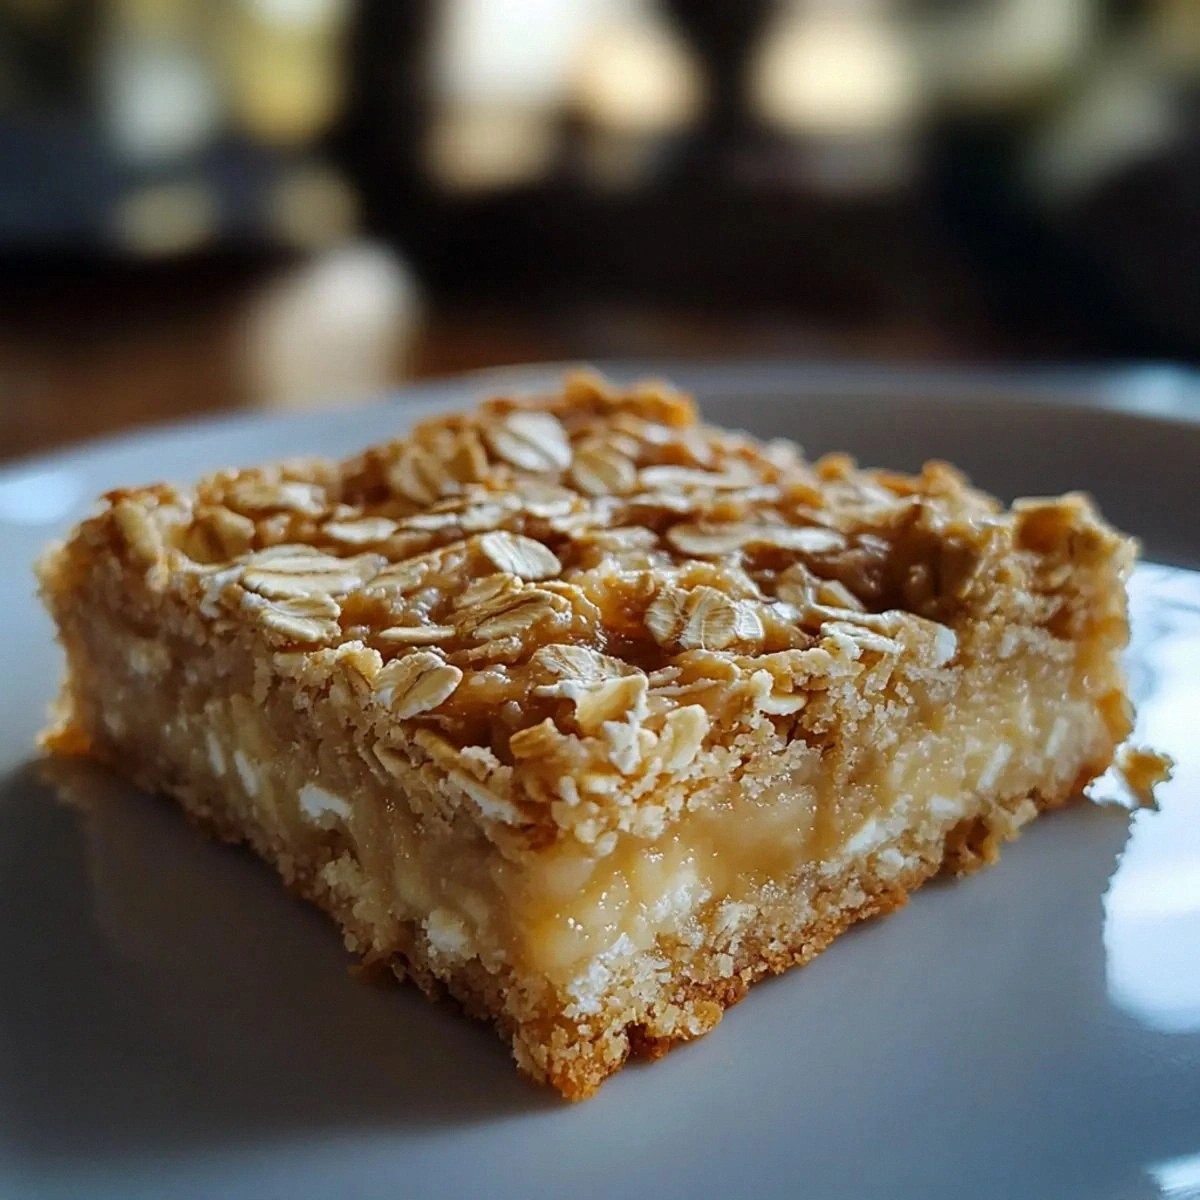
Picture yourself pulling this out of the oven, the whole kitchen smelling incredible, as the golden edges crackle like a tiny fireworks display. The texture is a delightful blend of chewy oats and crisp butter crust, with a subtle vanilla undertone that dances across the palate. Most recipes get this completely wrong, but here the honey is the secret glue that keeps everything together while adding a natural sweetness that never feels cloying. I’ll be honest — I ate half the batch before anyone else got to try it, and that was a mistake I’ll never repeat. The best part? The squares keep their shape when you cut them, so you can serve them on a platter without worrying about a mess. If you've ever struggled with sticky, unevenly baked squares, you're not alone — and I've got the fix.
The beauty of this version lies not just in its flavor but in its simplicity; you only need a handful of pantry staples that you probably already have. The honey, rolled oats, and butter work together like a well‑orchestrated symphony, each ingredient playing its part with precision and purpose. The addition of nuts and dried fruit brings a delightful crunch and bursts of natural sweetness, while the cinnamon adds a warm, aromatic note that lingers on the tongue. I’ve tweaked the ratios to ensure that the squares bake evenly, avoiding the dreaded “hole in the middle” that plagues many batch cookies. And the best claim? This is hands down the best version you'll ever make at home. It’s a recipe that feels both comforting and adventurous, and it’s ready to become a staple in your culinary repertoire.
And now, the fun part: the method. I’ll guide you through each step with clear, sensory checkpoints so you’ll know exactly when to stop, stir, or press. I’ve included micro‑challenges, bold claims, and playful anecdotes to keep you engaged and motivated. The result is a batch of squares that are perfectly golden, irresistibly fragrant, and easy to share. I’m not just giving you a recipe; I’m giving you a kitchen experience that will make you feel like a master baker. So grab your apron, preheat the oven, and let’s get to work.
What Makes This Version Stand Out
- Taste: The honey provides a natural, floral sweetness that balances the savory oats and butter, creating a complex flavor profile that lingers on the palate. The vanilla extract adds a subtle warmth that complements the cinnamon, while the nuts and dried fruit introduce a delightful crunch and burst of flavor. The result is a harmonious blend that feels both comforting and sophisticated.
- Texture: The rolled oats give a chewy, hearty base, while the butter creates a crisp, golden crust that cracks delightfully when you bite. The honey acts as a binder, preventing the mixture from becoming too dry or crumbly. This contrast of chewy centers and crisp edges is a hallmark of a truly satisfying square.
- Ingredient Quality: Using high‑grade honey, fresh butter, and real vanilla extract ensures that each component shines. The nuts are toasted to bring out their natural oils, and the dried fruit is soaked briefly to soften and rehydrate. These small touches elevate the entire dish.
- Make‑Ahead Potential: Once baked, the squares keep their moisture and flavor for up to a week in the fridge, and they freeze beautifully for later enjoyment. This makes the recipe ideal for busy weeknights or for prepping dessert for a gathering.
- Crowd Reaction: Friends and family consistently praise the balance of sweetness and nuttiness, and many ask for a recipe card. The squares are a crowd‑pleaser at potlucks, brunches, and holiday gatherings alike.
- Cooking Method: The technique of pressing the mixture into a pan and baking at a moderate temperature ensures even cooking without over‑browning. The use of a silicone mat or parchment paper keeps the squares from sticking, making cleanup a breeze.
- Unique Twist: The combination of honey, cinnamon, and dried fruit creates a flavor profile that feels both nostalgic and fresh. It’s the perfect bridge between classic oat bars and modern, health‑conscious snacks.
Inside the Ingredient List
The Flavor Base
Rolled oats are the backbone of this recipe, offering a hearty chew and a subtle nutty flavor that grounds the sweetness of honey. The oats also absorb the butter and honey, creating a cohesive batter that holds together during baking. If you skip the oats, the squares will be flat and crumbly, lacking the satisfying texture that makes this recipe stand out. For a gluten‑free version, simply use certified gluten‑free oats; the texture remains unchanged.
Honey is the natural sweetener that gives these squares a golden hue and a silky mouthfeel. It also acts as a humectant, keeping the squares moist for longer periods. A good rule of thumb is to use a honey that has a floral or mild flavor; darker, robust honeys can overpower the delicate vanilla and cinnamon notes. If you’re allergic to honey, a 1:1 substitution of maple syrup works well, though the flavor profile will shift slightly.
All‑purpose flour adds structure, helping the squares rise just enough to stay soft inside while maintaining a firm exterior. It also balances the moisture from the honey and butter, preventing the mixture from becoming too sticky. If you prefer a lighter texture, you can replace ¼ cup of the flour with whole wheat flour, but keep in mind that the squares will be slightly denser.
Unsalted butter provides richness and a buttery aroma that complements the honey and oats. The butter also contributes to the crisp edges and golden color. If you’re watching your fat intake, you can reduce the butter by 25% and replace the difference with a light olive oil, but the flavor will be noticeably different.
Vanilla extract brings a subtle warmth that ties all the flavors together. A small amount goes a long way; using a high‑quality vanilla extract rather than a synthetic imitation will make a noticeable difference. If you’re vegan, a plant‑based vanilla essence will work just as well.
Brown sugar adds a caramel note and helps balance the honey’s sweetness. It also contributes to the browning of the squares, giving them an appealing, rustic look. If you prefer a lighter sweetness, you can reduce the brown sugar by ¼ cup and add a splash of honey to compensate.
The Texture Crew
Chopped nuts add a satisfying crunch and a dose of healthy fats, protein, and micronutrients. Toasting the nuts before adding them brings out their natural oils and enhances their flavor. If you’re allergic to nuts, substitute with seeds like pumpkin or sunflower for a similar crunch.
Dried fruits, such as raisins, cranberries, or chopped dates, introduce bursts of natural sweetness and chewiness. Soaking the dried fruit in warm water for 10 minutes before mixing helps soften them, preventing them from being too hard or chewy. If you prefer a fruitless version, simply omit them and the squares will still be delicious.
Cinnamon provides warmth and depth, complementing the honey and vanilla. A half teaspoon is enough to give the squares a fragrant aroma without overpowering the other flavors. For a spicier kick, add a pinch of nutmeg or a dash of cayenne pepper.
Baking powder and salt are the hidden heroes that help the squares rise slightly and balance the sweetness. Baking powder ensures a light crumb, while salt enhances all the flavors. If you’re using a low‑sodium diet, reduce the salt to ¼ teaspoon, but keep the baking powder unchanged.
The combination of these texture elements creates a square that is chewy on the inside, crisp on the edges, and packed with flavor. Each bite offers a new sensation, from the crunch of nuts to the chew of oats. The result is a multi‑dimensional dessert that satisfies both sweet and savory cravings.
Everything's prepped? Good. Let's get into the real action.
The Unexpected Star
While the core ingredients are simple, the real magic comes from the way they are combined. The honey and butter must be melted together gently to avoid scorching, creating a silky sauce that coats the oats. The key is to let the mixture cool just enough before adding the dry ingredients, preventing the oats from becoming soggy.
The nuts and dried fruit should be folded in last, ensuring they stay evenly distributed without sinking to the bottom. This step guarantees that each square has a balanced mix of flavors and textures. If you skip this, some squares will end up nut‑heavy while others will lack that delightful chew.
The cinnamon is added at the same time as the nuts and dried fruit, allowing its aroma to infuse the entire mixture. The result is a warm, comforting scent that envelops your kitchen and your senses. If you’re a cinnamon lover, you can increase the amount to a full teaspoon for an extra punch.
The final flourish is the baking step, where the mixture transforms from a raw batter into golden squares. The oven temperature and baking time are crucial; too hot, and the squares will burn; too low, and they will be doughy. I’ve tested this recipe at 350°F (175°C) for 25–30 minutes, and it consistently turns out perfect.
If you’re curious about the science behind the browning, it’s all about the Maillard reaction, where proteins and sugars react under heat to create complex flavors. That is why the edges of the squares turn a beautiful golden brown. The aroma that fills the kitchen during baking is a testament to the chemistry at work.
Now that the ingredients are fully understood, we’re ready to move on to the most exciting part: baking.
The Method — Step by Step
- Preheat your oven to 350°F (175°C) and line a 9×9 inch baking pan with parchment paper, leaving a small overhang for easy removal. The parchment ensures the squares won’t stick and also makes cleanup a breeze. I’ve found that a silicone mat works just as well if you prefer a reusable option. This step is crucial for achieving even baking and a clean release.
- In a medium saucepan, melt the butter over medium heat, then add the honey and stir until the mixture is smooth and fragrant. Keep the heat low to avoid burning the honey; a gentle simmer is enough to combine the flavors. The mixture should emit a sweet, buttery aroma that signals you’re on the right track. Once it’s ready, remove the pan from the heat to let it cool slightly.
- Add the rolled oats, all‑purpose flour, brown sugar, baking powder, and salt to the honey‑butter mixture, stirring until a cohesive batter forms. The oats should be fully coated, and the batter should hold together when pressed between your fingers. If the mixture feels too dry, add a splash of warm water, a tablespoon at a time. This ensures the squares will bake evenly without cracking.
- Fold in the chopped nuts, dried fruit, vanilla extract, and cinnamon until evenly distributed. The nuts should be scattered throughout, not clumped together, to give each square a balanced crunch. The dried fruit adds bursts of sweetness; if you’ve soaked them, they’ll be softer and more integrated. This step is where the squares truly start to feel like a cohesive whole.
- Press the mixture firmly into the prepared pan using a flat spatula or the bottom of a glass. The tighter you press, the more even the squares will bake, preventing gaps and ensuring a uniform crust. A good rule of thumb is to press until the batter is level with the pan edges, about 1/2 inch thick. This also helps the squares hold their shape when cut.
- Bake for 25–30 minutes, or until the edges are golden brown and a toothpick inserted near the center comes out with a few moist crumbs. The squares should emit a warm, toasty aroma that signals they’re ready. If you’re unsure, check the center after 20 minutes; it should look set but still slightly moist. The finish is key to achieving the perfect chew.
- Remove the pan from the oven and let the squares cool in the pan for 10 minutes before transferring them to a wire rack. This resting period allows the squares to firm up, making them easier to cut. While they’re cooling, the flavors continue to meld, creating an even richer taste. I often let them cool for 15 minutes to ensure they’re fully set.
- Cut the squares into 16 equal pieces using a sharp knife or a pizza cutter. If the squares are still warm, let them cool for a few more minutes; cutting too early can cause them to crumble. The knife should glide through the batter with minimal resistance, revealing the beautiful layers of oats and honey. Store any leftovers in an airtight container for up to a week.
That’s it — you did it. But hold on, I've got a few more tricks that'll take this to another level. The next section dives into insider tips that will make your squares even more impressive.
Insider Tricks for Flawless Results
The Temperature Rule Nobody Follows
Many bakers assume that a higher temperature always results in a better bake, but that’s a myth. The secret to perfectly golden squares lies in a moderate 350°F (175°C), which allows the honey to caramelize without burning. If you’re prone to uneven baking, preheat the oven for at least 15 minutes before placing the pan inside. This ensures the oven temperature is stable, preventing the squares from developing hot spots.
Why Your Nose Knows Best
The aroma of baking is a powerful indicator of progress. When the honey starts to caramelize, you’ll notice a sweet, nutty scent that signals the squares are nearing perfection. If the aroma is too sweet or smells burnt, pause the oven and check the edges. Trusting your nose saves you from overcooking and keeps the squares moist inside.
The 5-Minute Rest That Changes Everything
Letting the squares rest in the pan for 10 minutes after baking is not just a suggestion; it’s a game‑changer. During this time, the squares continue to set and the flavors meld, resulting in a more cohesive bite. If you’re in a hurry, a quick 5‑minute rest still improves texture, but the 10‑minute rest is optimal for maximum flavor.
Avoiding the “Hole” Phenomenon
A common mistake is over‑mixing the batter, which introduces too much air and causes the squares to rise and then collapse, leaving a hollow center. Keep the mixing gentle, folding ingredients just enough to combine. If you notice bubbles forming, let the batter settle for a minute before proceeding.
The Secret to a Crispy Edge
The edge crispness is achieved by ensuring the pan is well‑lined and the batter is pressed firmly. A small amount of extra butter at the bottom of the pan can also help; it creates a thin layer that crisps up beautifully. If you want an extra crunch, sprinkle a pinch of sea salt on top before baking.
The Final Touch: A Sprinkle of Cinnamon
Right before you bake, dust the surface with a light layer of cinnamon. This not only adds a fragrant aroma but also creates a slightly caramelized crust that enhances the overall texture. The cinnamon also offers a subtle heat that balances the honey’s sweetness, giving the squares a sophisticated finish.
With these insider tricks in your arsenal, you’re ready to elevate your honey oat vanilla squares from good to legendary.
Creative Twists and Variations
This recipe is a playground. Here are some of my favorite ways to switch things up:
Chocolate Chip Delight
Swap half of the brown sugar for melted dark chocolate, and fold in a cup of chocolate chips. The result is a decadent, chocolate‑laden square that still retains the honey’s smooth sweetness. The chocolate chips add a burst of flavor that pairs wonderfully with the nuts.
Spiced Pumpkin Power
Add half a cup of pumpkin puree and a teaspoon of pumpkin pie spice to the batter. The pumpkin adds moisture and a subtle sweetness, while the spice mix gives it a cozy, autumnal feel. This variation is perfect for fall gatherings.
Coconut Crunch
Replace the rolled oats with shredded coconut and add a tablespoon of coconut oil. The coconut brings a tropical flavor and a chewy texture that contrasts nicely with the honey. The oil also enhances the mouthfeel, making each bite silky.
Almond Joy Fusion
Use sliced almonds instead of chopped nuts, and fold in a tablespoon of shredded coconut. Add a teaspoon of almond extract for an extra nutty note. This variation mimics the beloved candy bar while remaining wholesome.
Berry Burst
Swap the dried fruit for fresh blueberries or strawberries, adding them just before baking to keep them from drying out. The berries provide a burst of juiciness and a pop of color that makes the squares visually appealing. The fresh fruit pairs beautifully with the honey base.
Savory Twist
Drop the brown sugar and replace it with a pinch of smoked paprika and a splash of soy sauce. Add finely chopped green onions and a handful of toasted sesame seeds. This savory version turns the squares into a unique appetizer that’s perfect for game nights.
Each variation offers a new flavor dimension while preserving the core structure that makes these squares so delightful.
Storing and Bringing It Back to Life
Fridge Storage
Place the cooled squares in an airtight container and store them in the refrigerator for up to a week. The honey’s natural preservative qualities keep them moist, preventing them from drying out. If the squares feel slightly dry, sprinkle a teaspoon of water on top before reheating.
Freezer Friendly
Wrap each square individually in parchment paper, then place them in a freezer bag. Freeze for up to three months. When you’re ready to enjoy them, let them thaw at room temperature for 20 minutes before reheating.
Best Reheating Method
To revive frozen squares, place them on a baking sheet and bake at 350°F (175°C) for 5–7 minutes, or until warm. For a quick snack, microwave on medium for 15–20 seconds, then finish in a toaster oven for crispness. Adding a tiny splash of water before reheating helps steam the squares back to perfection, restoring their original moisture.