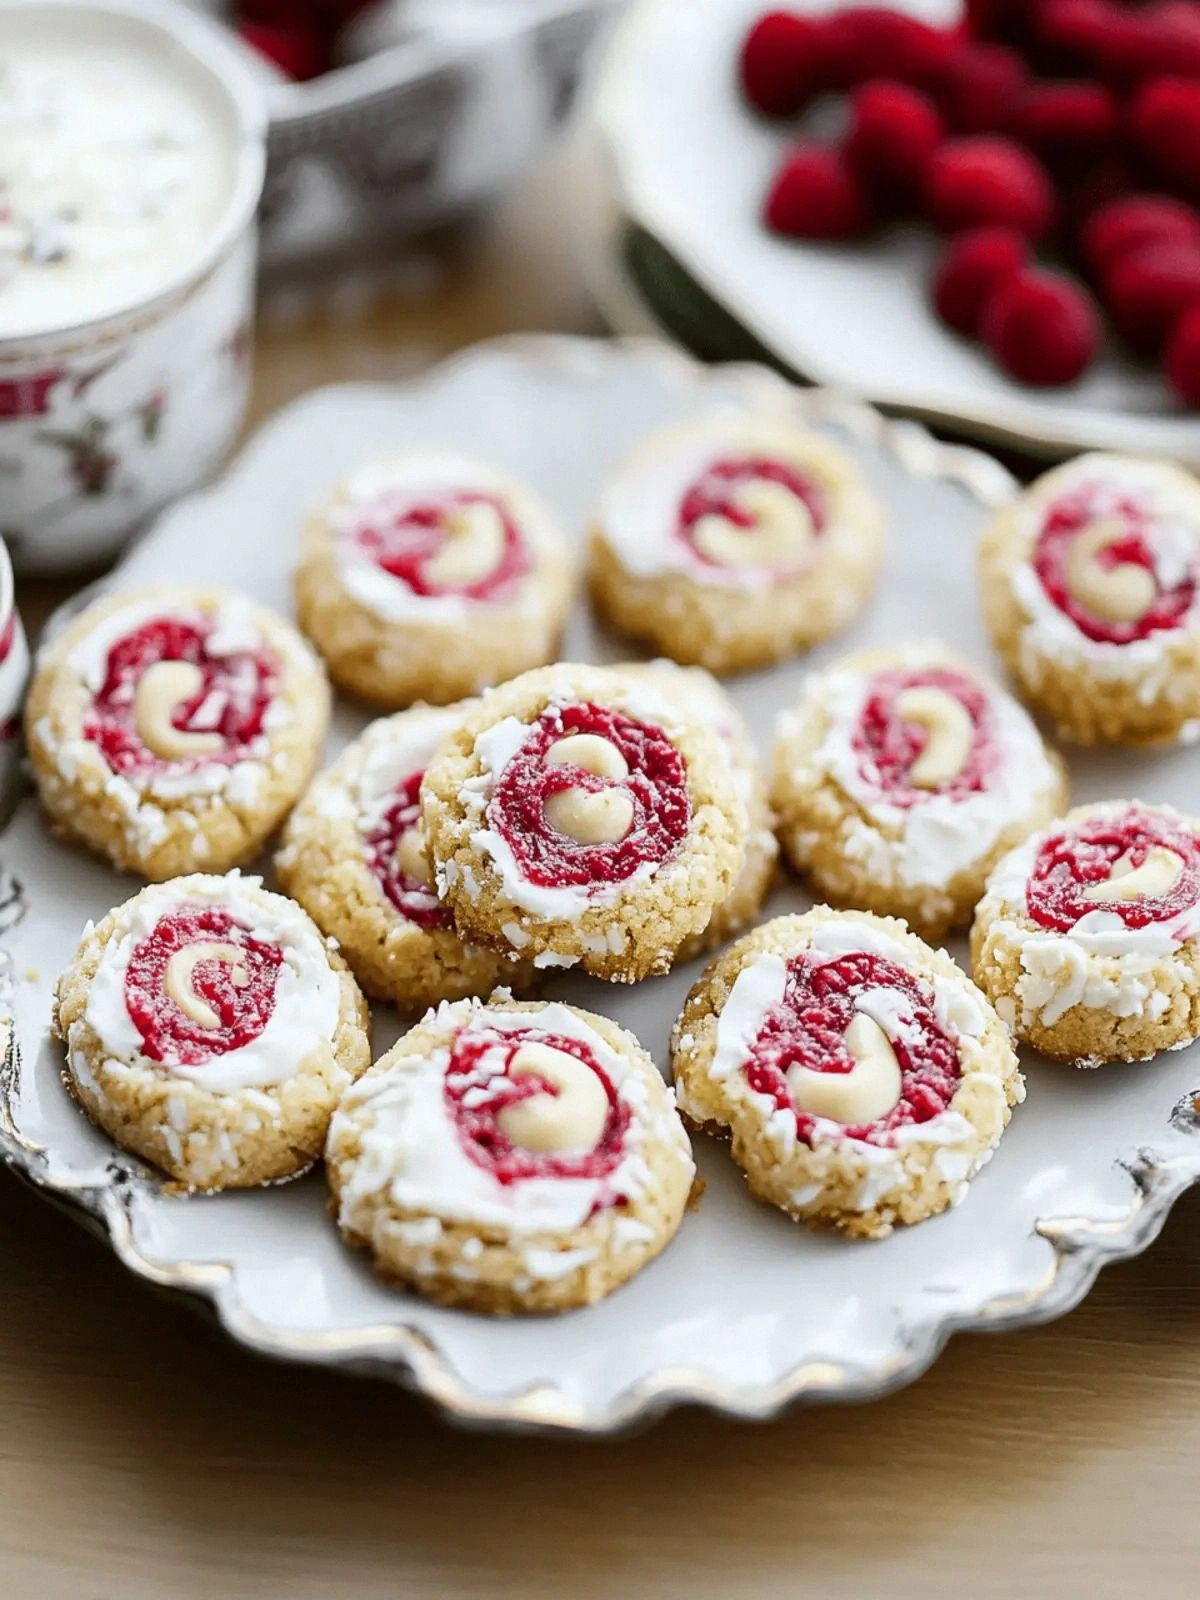
Picture this: a rainy Saturday afternoon, a frantic friend demanding a dessert that’s both impressive and instant, and your kitchen full of ingredients you’d never think to combine. I was staring at a bag of raspberries, a handful of macadamia nuts, and a tub of white chocolate, and I said, “Why not?” The result? A no‑bake creation that feels like a decadent runway show in your mouth. It’s the kind of dessert that turns heads faster than a flash of paparazzi lights. I dare you to taste this and not go back for seconds.
I’ve been a self‑proclaimed dessert connoisseur, but this recipe is a revelation. The moment the raspberries hit the skillet, their perfume rises like a sweet perfume, making the whole kitchen smell like a summer garden. The white chocolate melts into a silky glaze that coats the biscuit crumbs like velvet, while the macadamia nuts provide a subtle crunch that shatters like thin ice. If you’ve ever struggled to balance sweetness and tartness in a no‑bake treat, you’re not alone—and I’ve got the fix. This is hands down the best version you’ll ever make at home.
What sets this apart is the boldness of flavor and texture. The raspberries aren’t just sweet; they’re a bright, acidic counterpoint that cuts through the richness of the chocolate. The Maria biscuits, when crushed, give a buttery, slightly sweet base that feels like a cookie dough you can eat in one bite. The coconut adds a hint of tropical warmth, and the macadamia nuts bring a nutty, buttery finish. Every bite is a layered experience, a symphony of textures that keeps you coming back for more.
And let’s talk technique. Most no‑bake recipes rely on a single chocolate pour, but I’ve introduced a dual‑layer approach: a glossy chocolate coating and a delicate drizzle of white chocolate that creates a visual and textural contrast. It’s a game‑changer that elevates the entire dish. Okay, ready for the game‑changer? Let me walk you through every single step — by the end, you’ll wonder how you ever made it any other way.
What Makes This Version Stand Out
- Flavor: The raspberries burst with natural tartness that cuts through the sweet chocolate, creating a balanced taste that feels both indulgent and refreshing.
- Texture: The combination of buttery biscuit crumbs, crunchy macadamia nuts, and smooth white chocolate creates layers that satisfy both the palate and the senses.
- Simplicity: No oven, no baking, just a handful of ingredients and a few minutes of prep—perfect for spontaneous dessert cravings.
- Uniqueness: The dual‑layer chocolate technique and coconut infusion give this recipe a twist that sets it apart from standard no‑bake cookies.
- Crowd Reaction: Friends who’ve tasted it say the first bite feels like a dessert runway, and they can’t stop asking for more.
- Ingredient Quality: Using premium white chocolate and fresh raspberries elevates the flavor profile, making each bite feel luxurious.
- Cooking Method: A quick stovetop melt and chill process keeps the dish fresh without compromising on texture.
- Make‑Ahead Potential: You can prepare the base a day ahead, refrigerate, and finish with the chocolate drizzle right before serving.
Inside the Ingredient List
The Flavor Base
Raspberries are the star of the show. Their natural tartness is the perfect counterpoint to the sweetness of white chocolate. If you’re using fresh berries, choose ones that are firm and bright; if you’re in season, the flavor is unbeatable. Skipping them would leave the dessert flat and overly sweet—no good.
Granulated sugar is the sweetener that balances the raspberry’s acidity. It also helps the chocolate set into a glossy finish. If you’re watching sugar, you can reduce the amount by a quarter, but you’ll need to increase the raspberries to keep the tartness. A good rule: taste the mixture before you let it cool; it should be sweet enough to complement, not dominate.
The Texture Crew
200 g of Maria biscuits are ground into crumbs that act like a buttery, slightly sweet base. They’re softer than traditional shortbread, giving a pleasant chew that holds the chocolate glaze. If you can’t find Maria biscuits, a buttery shortbread works, but you might need to adjust the amount to match the crumb consistency.
Half a cup of macadamia nuts adds a buttery, nutty crunch that feels luxurious. They’re also high in monounsaturated fats, which help the chocolate set nicely. If you’re allergic or simply don’t have macadamia nuts, chopped pecans or walnuts can be a good substitute, though the flavor profile will shift slightly.
Half a cup of grated coconut introduces a subtle tropical note. It also adds a hint of chewiness that balances the crispness of the nuts. If you prefer a drier texture, use unsweetened shredded coconut; if you like extra sweetness, opt for sweetened coconut.
The Unexpected Star
Half a cup of heavy cream is used to help the chocolate melt evenly and create a silky glaze. The cream’s fat content is crucial for that smooth finish. If you’re lactose intolerant, a splash of coconut milk can work, but the texture may be a touch thinner.
200 g of white chocolate is the core of the coating. It’s essential for that glossy, buttery finish that feels like a luxury dessert. Use a good quality white chocolate that contains at least 30% cocoa butter for the best melt and flavor. If you’re on a budget, a decent store brand will still work, but you may notice a slight difference in richness.
The Final Flourish
A final drizzle of 100 g of white chocolate gives a visual pop and an extra layer of sweetness. This step is optional but highly recommended for that “wow” factor. The drizzle should be thin and spread evenly, almost like a ribbon. If you prefer a thicker glaze, melt the white chocolate with a tablespoon of heavy cream and drizzle it over the cookies.
Everything’s prepped? Good. Let’s get into the real action…
The Method — Step by Step
- Start by crushing the Maria biscuits into fine crumbs. Use a food processor or a sturdy plastic bag and a rolling pin. The crumbs should feel like fine sand but still hold together when pressed. This is the foundation that will carry the chocolate glaze. Keep them in a bowl while you move to the next step.
- In a saucepan, combine the heavy cream and granulated sugar. Heat over medium heat, stirring constantly until the sugar dissolves completely. Watch for the first hint of bubbles; that’s the point where the mixture is ready. This step is crucial for ensuring the chocolate melts smoothly later on. Don’t rush it—sugar needs time to fully dissolve.
- Add the crushed biscuits and macadamia nuts to the saucepan. Stir until everything is coated in the sweet cream mixture. The mixture should look glossy and thick. This is the moment of truth—if the crumbs aren’t fully coated, the final cookies will feel dry. Keep stirring for 2–3 minutes to ensure even distribution.
- Pour in the grated coconut and the white chocolate, stirring until the chocolate melts completely. The mixture should be silky and glossy, like a smooth chocolate sauce. The coconut will add a subtle chewiness and a tropical aroma. If the chocolate doesn’t melt, add a splash more cream to help it along.
- Add the fresh raspberries to the mixture. Gently fold them in so they’re evenly distributed but not crushed. The berries will add a burst of tartness and color to the base. This step also infuses the mixture with a natural sweetness that balances the chocolate’s richness. Be careful not to overmix; you want the berries to stay intact.
- Let the mixture cool to room temperature, then chill in the refrigerator for 30 minutes. During this time, the chocolate will set into a firm yet pliable layer. The chilled mixture should still be slightly pliable when you press it—if it’s too hard, let it sit a bit longer. This step ensures the cookies hold their shape when you form them.
- Using a spoon or a small cookie scoop, drop spoonfuls of the mixture onto a parchment‑lined tray. Press each mound gently to flatten into a cookie shape. The cookies should be about 2 cm thick and evenly shaped. If you’re making a large batch, consider using a cookie cutter for uniformity.
- Return the tray to the refrigerator for another 30 minutes, or until the cookies are firm and set. They should feel like a firm brownie when you press them. Once set, carefully remove them from the tray and place them on a wire rack to cool completely.
- While the cookies cool, melt the additional 100 g of white chocolate in a double boiler or microwave, stirring every 20 seconds until smooth. The drizzle should be thin and glossy. Drizzle the melted chocolate over each cookie, letting it pool slightly at the edges. The final glaze will give the cookies a glossy finish and an extra layer of sweetness. Let the drizzle set before serving.
That’s it—you did it. But hold on, I’ve got a few more tricks that will take this to another level…
Insider Tricks for Flawless Results
The Temperature Rule Nobody Follows
Temperature is everything. The heavy cream should be at room temperature, not cold, to ensure the sugar dissolves quickly. If the cream is too cold, the chocolate will seize and become grainy. Keep the mixture at a steady medium heat; if it starts to boil, reduce the flame immediately. This small adjustment can mean the difference between a silky glaze and a gritty mess.
Why Your Nose Knows Best
Before you set the cookies in the fridge, give them a quick sniff. If you notice a faint burnt aroma, the mixture is overcooked. The scent should be sweet, buttery, and slightly fruity. Trust your nose; it’s a reliable indicator of the right flavor profile.
The 5-Minute Rest That Changes Everything
After adding the raspberries, let the mixture rest for 5 minutes before chilling. This allows the berries to release their juices and infuse the base with natural sweetness. Skipping this step can result in a flat taste that lacks depth. I’ve seen people lose the vibrant berry flavor when they rush straight to the fridge.
Keep the Drizzle Flowing
When melting the additional white chocolate, add a teaspoon of heavy cream to create a thinner glaze. This trick ensures the drizzle coats the cookies smoothly and doesn’t pool excessively. A thicker glaze can look uneven and may not set properly. The key is a glossy, even finish.
Serve Immediately, or Chill
These cookies are best served fresh, but if you need to store them, keep them in an airtight container at room temperature for up to 2 days. If you’re storing them for longer, refrigerate; the chocolate will firm up but will still taste great. Just bring them to room temperature before serving for the best texture.
Make-Ahead Magic
You can prepare the base up to a day ahead. Once the mixture is set, cover it tightly and refrigerate. When you’re ready to serve, simply drizzle the final chocolate layer and let it set. This prep method saves time on the day of the event and keeps the flavors fresh.
Creative Twists and Variations
This recipe is a playground. Here are some of my favorite ways to switch things up:
Chocolate‑Berry Fusion
Swap the white chocolate for dark chocolate in the glaze. The bittersweet flavor pairs wonderfully with the tart raspberries. The result is a richer, slightly more adult dessert that still feels playful.
Almond Crunch
Replace macadamia nuts with toasted almonds for a different nutty profile. The almonds add a subtle crunch and a nutty aroma that complements the berries. This version works well for nut‑allergy friendly gatherings.
Minty Freshness
Add a few drops of peppermint extract to the chocolate glaze. The mint gives a refreshing aftertaste that pairs beautifully with the sweet, buttery base. Serve with a sprig of fresh mint for a decorative touch.
Spiced Coconut
Incorporate a pinch of cardamom or cinnamon into the coconut. The warm spice adds depth and complexity, making the cookies feel like a holiday treat. This variation is perfect for autumn or winter gatherings.
Vegan Version
Use dairy‑free white chocolate and coconut milk instead of heavy cream. The texture may be slightly lighter, but the flavor remains indulgent. This version is great for vegan friends who want a sweet treat.
Chocolate Drizzle Swirl
Instead of a simple drizzle, create a swirl by piping the melted chocolate in a zig‑zag pattern. The swirl adds visual appeal and a fun textural element. It’s a simple trick that turns an ordinary cookie into a showstopper.
Storing and Bringing It Back to Life
Fridge Storage
Keep the cookies in an airtight container in the refrigerator for up to 3 days. The chocolate glaze will stay firm, and the biscuits will retain their texture. Before serving, let them sit at room temperature for 10–15 minutes to soften slightly.
Freezer Friendly
For longer storage, freeze the cookies on a parchment‑lined tray until solid, then transfer to a freezer bag. They’ll keep well for up to 2 weeks. Thaw at room temperature for 30 minutes before serving to allow the chocolate to soften.
Best Reheating Method
If the cookies have become too firm, reheat them in a 150°C oven for 2–3 minutes. This gentle heat will revive the chocolate glaze without melting it. Add a tiny splash of water before reheating to create steam, which helps the chocolate return to its silky texture.