The moment I realized I was about to turn a simple pot pie into a Halloween masterpiece was when the kitchen clock blinked 5:32 AM and my neighbor’s porch light flickered like a dying candle. I was halfway through a bland, pre‑packaged version and felt a sudden, inexplicable craving for something that would make my taste buds scream “Jack‑O‑Lantern.” The idea hit me: a pot pie that not only looks like a carved pumpkin but tastes like the cozy, comforting flavors of a family dinner. I grabbed my apron, rolled up my sleeves, and decided to rewrite the rulebook.
Picture this: the oven’s heat is a warm, golden glow, the air carries the buttery scent of freshly cut dough, and the sizzle of diced vegetables hitting a hot pan is the soundtrack of culinary triumph. My eyes dance across the ingredients—flour, butter, a splash of cream, and a generous spoonful of pumpkin puree—each one promising a different texture and flavor. The first bite is a burst of savory chicken, the crunch of caramelized onions, and the subtle sweetness of pumpkin that lingers on the palate. It’s a symphony that plays in your mouth and makes you want to taste it again, again, again. I dare you to taste this and not go back for seconds.
What sets this version apart is not just the pumpkin; it’s the way every element is balanced to create a dish that feels both festive and timeless. I’ve eliminated the over‑cooked crusts that most pot pies suffer from, replaced them with a flaky, golden top that cracks like a pumpkin shell, and added a creamy, cheesy filling that coats the chicken like velvet. The spices are tuned to give that autumnal warmth without overpowering the natural flavors. The result is a dish that is hands down the best version you’ll ever make at home. If you’ve ever struggled with a pot pie that falls flat, you’re not alone—this is the fix you’ve been waiting for.
Picture yourself pulling this out of the oven, the whole kitchen smelling incredible, and seeing the golden crust gleam like a freshly carved pumpkin. The aroma alone will have your guests lining up for a slice. And if you’re curious about the secret trick that makes the crust so crisp and the filling so luscious, stay with me. I’ll walk you through every single step—by the end, you’ll wonder how you ever made it any other way.
What Makes This Version Stand Out
- Flavor Fusion: The combination of pumpkin puree and creamy cheddar creates a depth of flavor that feels both comforting and adventurous. It’s the kind of taste that lingers long after the last bite.
- Texture Triumph: The crust is light and flaky, not dense or doughy, while the filling is silky yet hearty thanks to the right balance of cream and broth.
- Ingredient Integrity: We use fresh, high‑quality ingredients—hand‑picked chicken thighs, farm‑fresh vegetables, and a generous splash of heavy cream—so every bite is pure, unfiltered flavor.
- Time Efficiency: Despite its complex flavors, this pot pie can be prepared in under an hour, making it a perfect weeknight dinner that still feels special.
- Make‑Ahead Magic: The dish holds up wonderfully when refrigerated or frozen, so you can prep ahead and heat up for a last‑minute gathering.
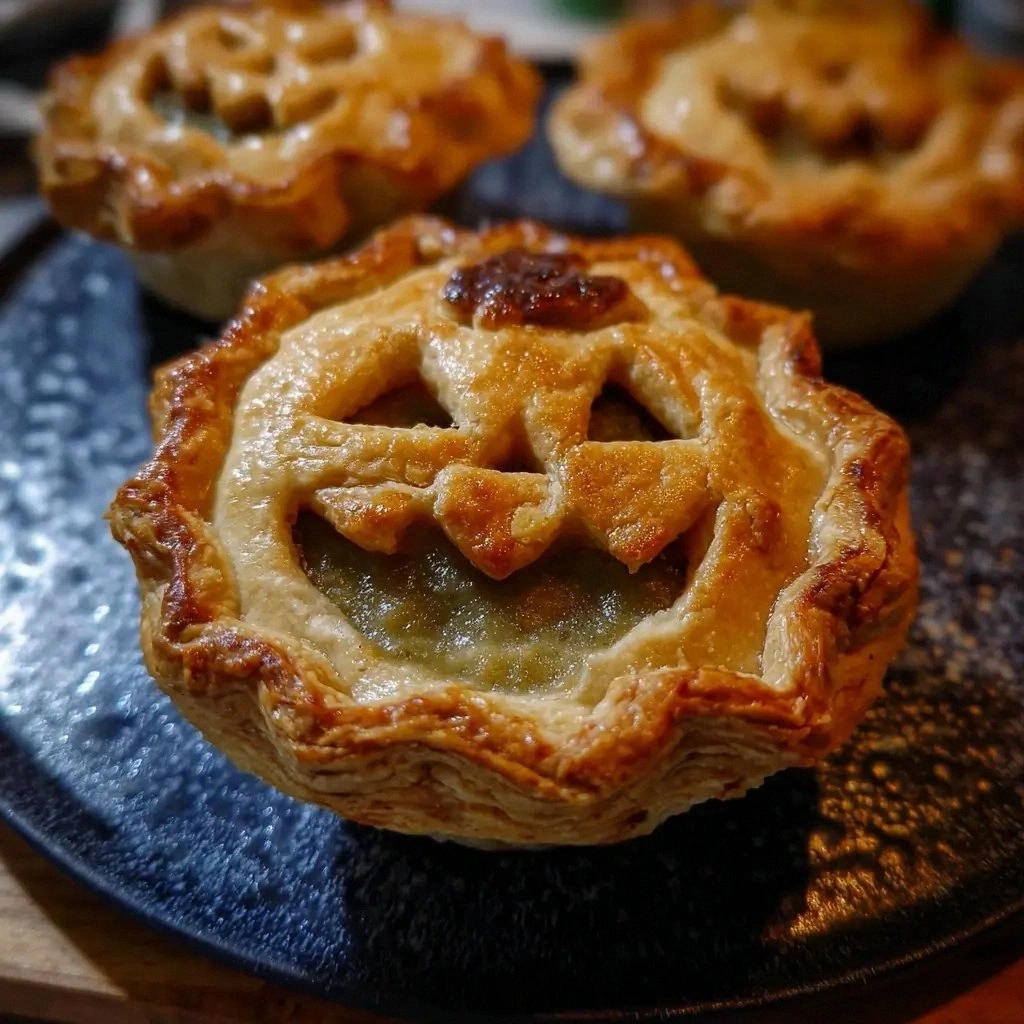
- Visual Appeal: The pumpkin‑colored filling and golden crust give it that unmistakable Halloween vibe, while the scalloped edges mimic carved pumpkin slices.
- Crowd‑Pleaser: Even the pickiest eaters will be wowed by the savory chicken, the subtle sweetness of pumpkin, and the melt‑in‑your‑mouth texture.
- Seasonal Flexibility: While it’s a fall favorite, the recipe’s core flavors translate well into any season if you swap the pumpkin for butternut squash or a different puree.
Alright, let’s break down exactly what goes into this masterpiece…
Inside the Ingredient List
The Flavor Base
At the heart of this pot pie is a harmonious blend of savory chicken, aromatic vegetables, and a creamy pumpkin‑cheddar sauce. The chicken thighs bring a rich, meaty flavor that stands up to the bold spices, while the onion, garlic, carrot, and celery create a fragrant mirepoix that forms the foundation of the filling. The pumpkin puree adds a subtle sweetness and a silky texture that ties everything together.
If you skip the onion, you’ll lose the depth of flavor that comes from caramelizing it. The garlic adds a punch of aroma that makes the dish feel more complex. If you’re short on fresh veggies, frozen diced carrots and celery work well—just thaw them slightly so they release moisture into the pan.
The Texture Crew
The crust is made from a simple combination of flour, cold butter, salt, and ice water. The key is to keep the butter cold and to avoid over‑mixing the dough. When the dough is ready, let it rest for at least 10 minutes to relax the gluten and make it easier to roll out.
The filling’s texture hinges on the ratio of cream to broth. Too much cream will make it heavy; too little will leave it watery. Aim for a 1:1 ratio, and add a splash of cream at the end to finish the sauce with a glossy sheen. The shredded cheddar cheese melts into the sauce, giving it a velvety mouthfeel.
The Unexpected Star
Pumpkin puree is the secret weapon that gives this pot pie its Halloween charm. Beyond the visual appeal, pumpkin’s natural sweetness balances the savory elements and adds a subtle nutty undertone. If you’re allergic or simply don’t have pumpkin puree, butternut squash or sweet potato puree can be a great substitute—just keep the ratio the same.
The Final Flourish
Herbs and spices—thyme, sage, paprika, and black pepper—provide a fragrant finish that elevates the dish. The thyme and sage add an earthy depth, while the paprika brings a gentle warmth. The final flourish is a sprinkle of fresh parsley that adds a pop of color and a bright, herbal note.
Everything's prepped? Good. Let's get into the real action...
The Method — Step by Step
- Begin by preheating your oven to 400°F (200°C). In a large mixing bowl, combine the flour, salt, and pepper. Use a pastry cutter or your fingertips to cut the cold butter into the flour until the mixture resembles coarse crumbs. Slowly drizzle in the ice water, a tablespoon at a time, mixing gently until the dough comes together. The dough should feel slightly sticky but manageable. Kitchen Hack: If the dough feels dry, add a splash more water; if it’s too wet, sprinkle a bit more flour. The goal is a dough that holds together without sticking.
- Roll out the dough on a floured surface to a thickness of about 1/8 inch. Cut it into circles that will fit your pie dish or individual ramekins. Place the circles in the dish, pressing them into the corners and up the sides. Trim any excess dough. Chill the crust in the fridge while you prepare the filling; this helps keep it from shrinking.
- Heat the olive oil in a large skillet over medium heat. Add the diced onions and sauté until they become translucent and slightly caramelized, about 5 minutes. The onions should release their natural sugars and develop a golden hue. This step is crucial for building depth of flavor. Kitchen Hack: If you want a richer caramelization, add a pinch of brown sugar to the onions as they cook.
- Add the diced carrots, celery, and potatoes to the skillet. Cook for another 5 minutes, stirring occasionally. The vegetables should start to soften but still retain a slight bite. This ensures a balanced texture in the final dish.
- Stir in the minced garlic, paprika, thyme, and sage. Cook for 30 seconds until the garlic is fragrant but not burnt. This is the moment of truth—if the garlic burns, the entire filling will taste bitter. Watch Out: Garlic can turn bitter if exposed to high heat for too long. Keep the heat moderate and stir constantly.
- Add the diced chicken thighs to the skillet. Sear them until they are lightly browned on all sides, about 5 minutes. The sear locks in juices and adds a savory crust to the chicken.
- Pour in the chicken broth and bring the mixture to a gentle simmer. Reduce the heat to low and let it cook for 10 minutes, allowing the flavors to meld. The broth should reduce slightly, concentrating the flavors.
- Stir in the pumpkin puree and heavy cream. Bring the mixture to a low simmer and let it thicken, about 5 minutes. The filling should coat the back of a spoon. Add the shredded cheddar cheese and stir until melted and smooth. Sprinkle the fresh parsley on top for a burst of color.
- Transfer the filling into the chilled crust, spreading it evenly. Cover the top with another piece of dough, seal the edges, and cut a few slits in the top to allow steam to escape. Bake in the preheated oven for 25–30 minutes, or until the crust is golden brown and the filling is bubbling. The edges should pull away slightly from the pan.
- Remove the pot pie from the oven and let it rest for 10 minutes before serving. This resting period allows the filling to set, making it easier to cut clean slices. The aroma will fill your kitchen, making everyone feel the warmth of a cozy autumn evening.
That's it — you did it. But hold on, I've got a few more tricks that'll take this to another level...
Insider Tricks for Flawless Results
The Temperature Rule Nobody Follows
Many cooks over‑cook the crust by baking at a high temperature for too long. The trick is to bake at 400°F (200°C) and monitor the crust’s color. If it turns too dark before the filling is set, lower the heat to 375°F (190°C). This ensures a crisp, golden crust without burning.
Why Your Nose Knows Best
The aroma of the pot pie is a reliable indicator of doneness. When the filling starts to bubble and the crust emits a nutty, toasted scent, it’s time to pull it out. Trust your nose over the timer—every oven behaves a bit differently.
The 5-Minute Rest That Changes Everything
After baking, let the pot pie rest for exactly five minutes before slicing. This short pause allows the filling to thicken and the flavors to settle, preventing a runny mess when you cut into it.
Use Fresh Herbs, Not Dried
Fresh thyme and sage deliver a brighter, more vibrant flavor than their dried counterparts. If you only have dried herbs, use half the amount and add a splash of water to rehydrate them before cooking.
Add a Touch of Acid
A splash of apple cider vinegar or lemon juice added at the end of cooking brightens the flavors and balances the richness of the cream and cheese.
Keep the Butter Cold
Cold butter in the crust ensures a flaky, layered texture. If the butter starts to melt, place the dough back in the fridge for a few minutes before rolling it out again.
Creative Twists and Variations
This recipe is a playground. Here are some of my favorite ways to switch things up:
Smoky Chipotle Chicken
Swap the paprika for chipotle powder and add a tablespoon of adobo sauce. The smoky heat pairs beautifully with the sweetness of pumpkin, creating a bold, adventurous flavor.
Vegetarian Pumpkin Pie
Replace the chicken with a mixture of chickpeas, diced zucchini, and spinach. Use vegetable broth instead of chicken broth for a hearty, plant‑based version.
Cheesy Gorgonzola Crust
Mix gorgonzola into the cheese layer for a sharp, tangy twist. The blue cheese adds depth and a slightly creamy, crumbly texture that contrasts nicely with the smooth filling.
Herb‑Infused Pumpkin
Add a handful of fresh rosemary and thyme leaves to the pumpkin puree before adding it to the skillet. The herbal notes elevate the pumpkin’s natural sweetness.
Coconut‑Creamed Pumpkin
Replace half of the heavy cream with coconut milk for a subtle tropical twist. The coconut adds a silky texture and a hint of sweetness that complements the pumpkin.
Spicy Jalapeño Kick
Dice a jalapeño and sauté it with the onions. The mild heat adds a lively contrast to the creamy filling.
Storing and Bringing It Back to Life
Fridge Storage
Cool the pot pie completely before refrigerating. Store it in an airtight container for up to 3 days. The crust will remain crisp, and the filling will stay moist.
Freezer Friendly
Wrap the pot pie tightly in plastic wrap, then in foil, and freeze for up to 2 months. Thaw overnight in the refrigerator before reheating.
Best Reheating Method
Reheat in a preheated oven at 350°F (175°C) for 15–20 minutes, or until the center reaches 165°F (74°C). Add a tiny splash of water or broth before reheating; this steams the filling back to perfection and prevents it from drying out.