I remember the night I tried to make a batch of brownies that ended up looking like a chocolatey disaster zone. The oven was overcooked, the edges were dry, and the center was a gooey, unappealing mess. I stared at the ruined batch, feeling both defeated and oddly hungry for something sweet. Then, a friend dared me to “make a brownie that actually tastes like a brownie” and add a kick of espresso for that extra depth. That dare sparked a quest that led me to this version—Irresistible Salted Espresso B, a cookie that feels like a brownie, a coffee shop treat, and a party hit all in one bite.
Picture this: the kitchen light flickers as you pour the butter into a pan, the scent of dark chocolate filling the air, the faint hiss of butter melting. You hear the gentle clink of measuring spoons, the soft thud of eggs into the bowl, and the rhythmic stir of the batter. The surface gleams with glossy chocolate chips, and the espresso powder releases a subtle, almost metallic aroma that hints at a bold flavor. Your taste buds already anticipate the first bite, and you’re ready to feel the cookie’s chewy center give way to a crisp edge. That sensory orchestra is what makes this recipe feel like a symphony rather than a simple cookie.
What sets this version apart is that it doesn’t just add espresso; it integrates it into the chocolate matrix, creating a deep, almost velvety flavor that lingers on the palate. The salted finish balances the sweetness without overpowering it, giving a subtle brine that elevates the chocolate’s richness. The batter is thicker than a typical cookie, yielding a brownie-like chew that’s hard to resist. It’s not just a cookie; it’s a handheld dessert that satisfies both the sweet tooth and the coffee craving. And the best part? The recipe is simple enough for a novice but sophisticated enough to wow any crowd.
I’m about to walk you through every single step, from the first whisk to the final sprinkle of sea salt. By the end, you’ll wonder how you ever made it any other way. I dare you to taste this and not go back for seconds. Let’s dive in.
What Makes This Version Stand Out
- Flavor Depth: The combination of espresso, dark chocolate, and sea salt creates a layered taste that feels both bold and balanced. The espresso enhances the chocolate’s bitterness, while the salt tames the sweetness.
- Texture: These cookies have a chewy center that holds a slight fudgy feel, while the edges crisp up just enough to give satisfying bite. It’s the best of both worlds—brownie-like chew and cookie-like snap.
- Ingredient Quality: Using 60%+ cocoa chips and real espresso powder gives a richer flavor than instant coffee or chocolate chips alone. The high cocoa content also means less sugar is needed.
- Make‑Ahead Friendly: Once baked, these cookies stay fresh for up to a week in an airtight container. They also freeze well, making them perfect for batch baking.
- Crowd Reaction: Friends and family often comment that the cookies taste like a brownie topped with a coffee shop drizzle. They’re a hit at potlucks, brunches, and even as a dessert after dinner.
- Minimal Steps: The recipe requires no fancy techniques—just whisk, fold, bake, and sprinkle. It’s a quick win for busy evenings.
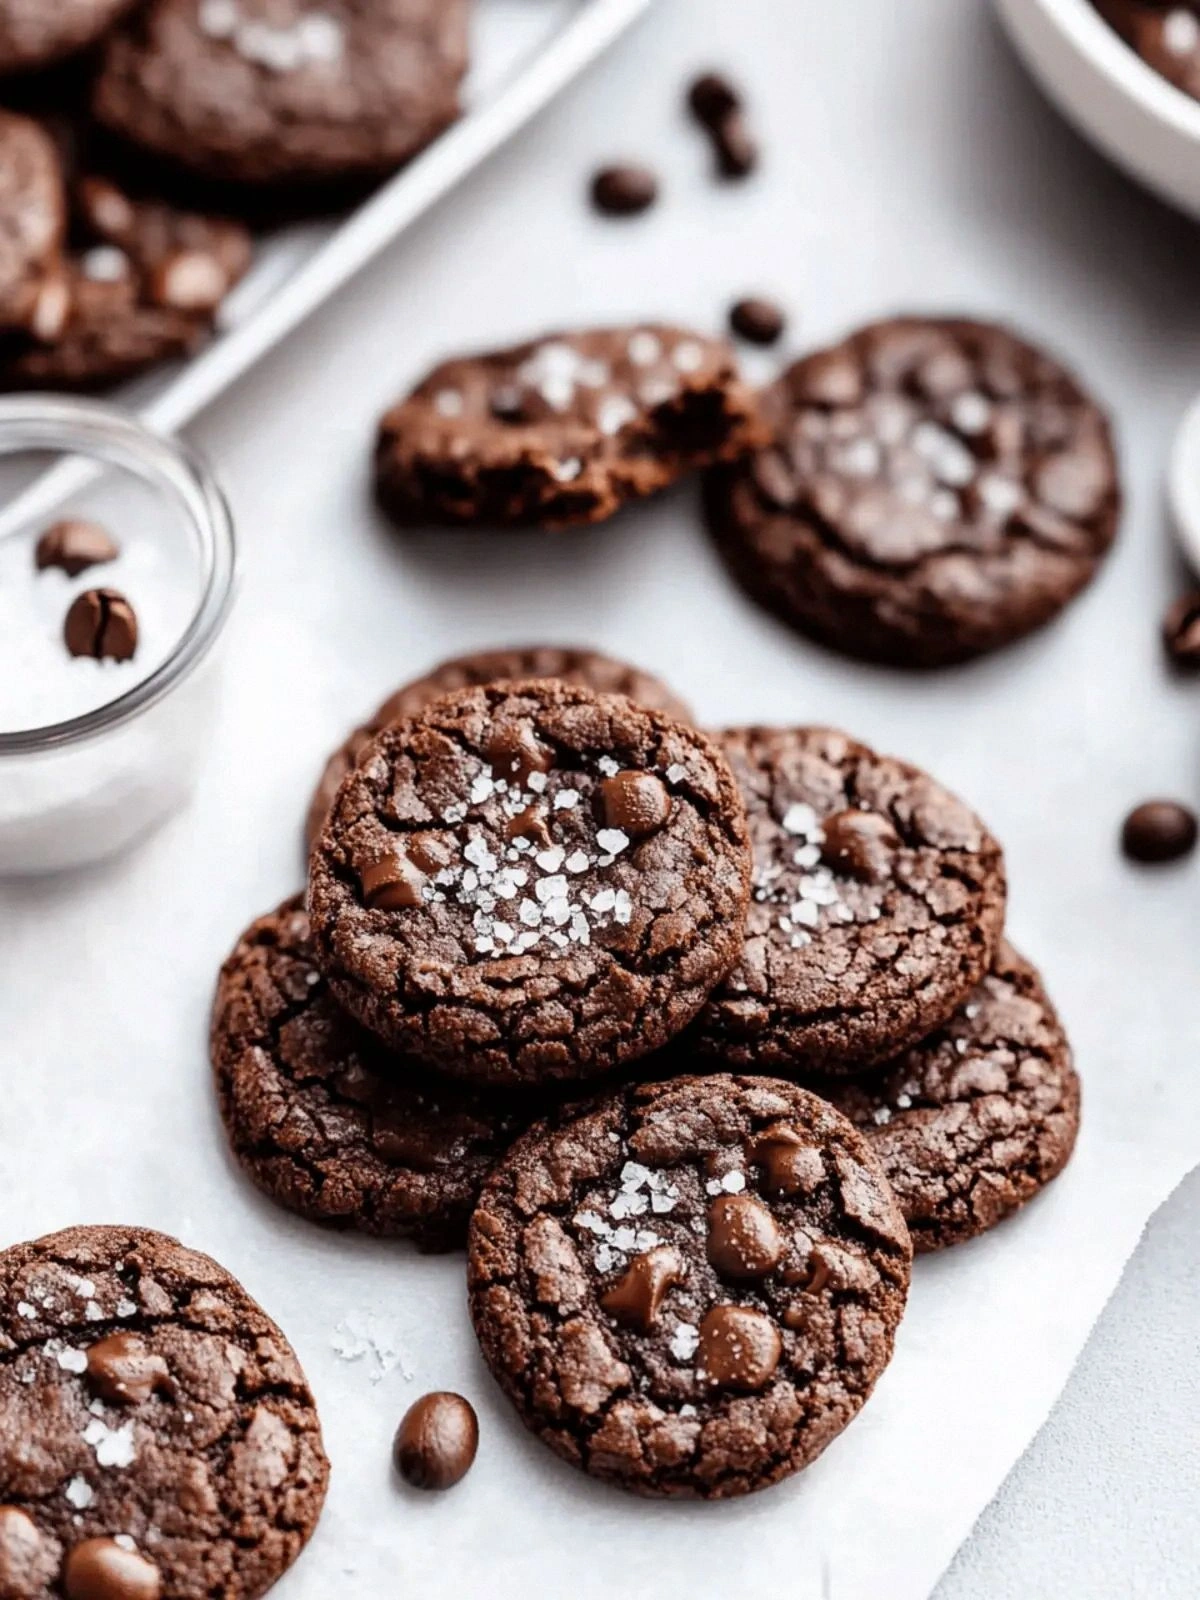
- Visual Appeal: The glossy chocolate chips and the hint of espresso powder give the cookies a professional look that’s Instagram‑ready.
Alright, let’s break down exactly what goes into this masterpiece. If you’re ready for the game‑changer, keep reading.
Inside the Ingredient List
The Flavor Base
At the heart of these cookies is the chocolate base. The unsweetened cocoa powder and the dark chocolate chips work together to create a rich, deep chocolate flavor. If you skip the cocoa powder, the chocolate chips alone won’t provide enough bitterness, and the espresso will taste flat. For a slightly sweeter version, you can replace half the dark chips with milk chocolate, but the espresso will be less pronounced.
The espresso powder is the secret weapon. It doesn’t add a strong coffee flavor; instead, it amplifies the chocolate’s natural bitterness, giving the cookie a sophisticated, almost espresso‑bar quality. If you don’t have espresso powder on hand, a shot of cold brewed coffee can work, but it will dilute the texture slightly. When choosing espresso, aim for a medium roast to avoid a harsh aftertaste.
The Texture Crew
The unsalted butter, granulated sugar, and light brown sugar are the texture engineers. Butter melts into the batter, creating a glossy, tender crumb. Granulated sugar provides sweetness and helps the cookies spread, while the brown sugar adds moisture and a subtle molasses note that complements the espresso. If you prefer a drier cookie, reduce the brown sugar by a tablespoon.
Eggs bind everything together and add structure. They also give the cookies that slight rise, preventing them from becoming flat. If you’re vegan, you can replace the eggs with flaxseed meal or mashed banana, but the texture will shift slightly toward a denser cookie.
The Unexpected Star
The finishing sea salt is the final flourish that turns a sweet cookie into a balanced flavor experience. A pinch of sea salt on top enhances the chocolate’s depth and balances the espresso’s bitterness. If you prefer a milder finish, use a fine sea salt or even a flavored salt, such as smoked sea salt, for a unique twist. Too much salt, however, will overpower the sweetness; keep it to a single pinch.
The Final Flourish
The baking powder and kosher salt are small but vital. Baking powder helps the cookies rise slightly, creating a lighter crumb. Kosher salt adds a subtle mineral note that enhances the overall flavor profile. If you’re watching sodium intake, reduce the kosher salt to 1/8 teaspoon, but keep the finishing sea salt to preserve the flavor balance.
Everything’s prepped? Good. Let’s get into the real action.
The Method — Step by Step
- Preheat your oven to 350°F (175°C). Line a baking sheet with parchment paper or a silicone mat. This step is crucial because the parchment prevents sticking and ensures even baking. A clean sheet also helps you gauge the cookies’ thickness as they bake.
- In a medium bowl, whisk together the flour, cocoa powder, baking powder, and kosher salt until well combined. The whisking aerates the dry mix, ensuring a consistent texture. This is the moment of truth—if the dry ingredients aren’t evenly distributed, you’ll end up with uneven chocolate pockets.
- Melt the butter in a saucepan over low heat until it’s liquid but not browned. Pour the melted butter into the dry ingredients and stir until a rough dough forms. The butter should coat the flour, creating a crumbly mixture that will bind when the wet ingredients are added.
- Beat the eggs in a separate bowl until the whites are slightly frothy. Add the granulated sugar, brown sugar, vanilla extract, and espresso powder. Whisk until the mixture is smooth and the sugars are fully dissolved. The espresso powder should be fully dispersed to avoid clumps that could affect texture.
- Pour the wet mixture into the dry mixture and stir with a wooden spoon until just combined. The batter will be thick and slightly sticky—do not overmix, or the cookies will become tough. The right consistency is like thick pancake batter.
- Fold in the chocolate chips, ensuring they’re evenly distributed. The chips should be scattered throughout the dough so every bite gets a chocolate hit. This step is where the cookie’s visual appeal is created—the glossy chips will shine as they bake.
- Drop tablespoon‑sized dough onto the prepared sheet, spacing them about 2 inches apart. The dough will spread slightly, so give them enough room. As the cookies bake, they’ll develop a slightly domed center that flattens into a crisp edge.
- Bake for 12–15 minutes, or until the edges are set but the centers are still soft. The cookies should smell toasty, with a faint espresso aroma. If you prefer a chewier center, bake for the lower end of the time range. If you like it more firm, add a minute or two.
- Remove the sheet from the oven and let the cookies rest on it for 5 minutes. This resting period allows the cookies to set fully, preventing them from breaking when you transfer them to a wire rack. The rest is also when the espresso flavor fully integrates with the chocolate.
- Transfer the cookies to a wire rack and sprinkle each with a pinch of sea salt. The salt will caramelize slightly on the surface, adding a subtle crunch. Let them cool completely before serving. The final crunch of the salt is the finishing touch that turns these cookies into a memorable treat.
That’s it— you did it. But hold on, I’ve got a few more tricks that’ll take this to another level. Let’s dig into insider knowledge.
Insider Tricks for Flawless Results
The Temperature Rule Nobody Follows
Many bakers bake at the highest temperature they can, but a lower, steady heat produces a better texture. Baking at 350°F instead of 375°F gives the cookies a chance to rise slowly, creating a chewy center while still crisping the edges. If you’re using a convection oven, reduce the temperature by 25°F to compensate for the fan.
Why Your Nose Knows Best
Smell is a powerful indicator of doneness. When the cookies emit a sweet, chocolatey aroma with a hint of coffee, they’re ready. If the scent is more like raw butter, they need more time. Trusting your nose saves you from overbaking.
The 5‑Minute Rest That Changes Everything
Resting the cookies on the sheet for 5 minutes after baking allows the steam to redistribute, preventing a hollow center. It also lets the chocolate chips melt slightly, creating a gooey interior. Skipping this step can result in cookies that feel dry on the outside and undercooked inside.
Use a Lightly Floured Work Surface
When shaping the dough into balls, dust your hands and surface with a light dusting of flour. This prevents the dough from sticking and makes handling easier. Over‑flouring, however, can dry out the cookies; a pinch is enough.
Add a Splash of Milk for Moisture
If your kitchen is dry or you’re baking during winter, add a tablespoon of milk to the wet mix. It increases moisture and keeps the cookies tender. This tweak works best with low‑fat chocolate chips.
Creative Twists and Variations
This recipe is a playground. Here are some of my favorite ways to switch things up:
Nutty Espresso Crunch
Add 1/4 cup chopped walnuts or pecans to the batter. The nuts add a satisfying crunch and a buttery flavor that pairs beautifully with the espresso. They also provide a protein boost, making the cookies a more balanced snack.
Coconut Espresso Delight
Replace 1/4 cup of the flour with shredded coconut. The coconut adds a tropical note and a subtle chew. Pair this version with a glass of coconut milk for a full‑body experience.
Minty Espresso Surprise
Add 1 teaspoon of peppermint extract to the wet mix. The mint sharpens the espresso’s bite and gives a refreshing finish. This twist is perfect for holiday gatherings.
Chocolate‑Covered Espresso Bites
Dip the cooled cookies in melted dark chocolate and sprinkle with sea salt. The chocolate coating adds a glossy finish and intensifies the chocolate flavor. Let them set on parchment before serving.
Spiced Espresso Cookies
Stir in 1/4 teaspoon of cinnamon and a pinch of cayenne pepper. The cinnamon adds warmth, while the cayenne gives a subtle heat that balances the sweetness. This version is a crowd‑pleaser during cooler months.
Storing and Bringing It Back to Life
Fridge Storage
Store cookies in an airtight container at room temperature for up to 5 days. If you want to keep them fresher longer, place them in the fridge. The cold environment slows down moisture loss, keeping the cookies chewy.
Freezer Friendly
Wrap the cookies tightly in plastic wrap and then in foil before freezing. They’ll stay fresh for up to 3 months. Thaw at room temperature for 30 minutes before serving to regain their original texture.
Best Reheating Method
To revive frozen cookies, preheat your oven to 350°F (175°C) and bake for 5 minutes. For a quick snack, microwave on low power for 15–20 seconds. Add a tiny splash of water before reheating—this steams the cookies back to perfection, restoring their chewiness.
If you’re a perfectionist, you’ll notice the subtle difference between freshly baked and reheated cookies. The fresh batch has that first bite of crispness that melts into a soft center, while the reheated version feels a bit denser but still delicious. The key is to keep them wrapped tightly and not overheat.
Now that you know how to make, store, and reheat these cookies, you can enjoy them anytime. Whether you’re treating yourself or sharing with friends, these cookies are guaranteed to impress. I’ve baked dozens, and each one has been a hit. I’ll be honest—I ate half the batch before anyone else got to try it. So go ahead, bake, and enjoy the magic.