I was standing in my kitchen, arms full of grocery bags, when my roommate shouted, “You better not burn the chicken again!” That was the moment I decided to turn a near‑disaster into the most unforgettable grilled chicken you’ll ever taste. Picture this: a scorching summer evening, the grill humming like a contented cat, and the air thick with the perfume of garlic, butter, and pepperoncini. My taste buds were already doing a happy dance, and the whole house was buzzing with the kind of anticipation you only get when a good story is about to unfold. I’m not exaggerating—this version of grilled chicken will make you question every bland chicken dinner you’ve ever endured.
The first time I tried this, I was a skeptic. I’d tried a dozen chicken recipes that promised “juicy” and “flavor‑packed” but delivered nothing more than a dry, over‑cooked slab that could double as a doorstop. Then I discovered the secret weapon: pepperoncini. Those tangy, slightly sweet little peppers add a zing that cuts through the richness of butter and lifts the whole dish into a bright, mouth‑watering masterpiece. I dare you to taste this and not go back for seconds. Trust me, your palate will file a formal complaint against any other chicken you’ve ever known.
What truly sets this recipe apart is the balance of textures. The chicken skin (or the grilled surface, if you’re using skinless breasts) becomes crisp enough to crack like thin ice, while the interior stays so tender it practically melts on your tongue. The pepperoncini slices are like little fireworks—bursting with a briny snap that makes each bite feel like a celebration. And the garlic‑butter glaze? It coats the meat like velvet, seeping into every crevice and leaving a lingering buttery finish that you’ll swear was handcrafted by a Michelin‑star chef.
Most recipes get the pepperoncini thing completely wrong—either they toss the whole pepper into the grill and it burns, or they skip it altogether, missing the magic entirely. Here’s what actually works: we’ll marinate the chicken in a quick olive‑oil, lemon, and herb bath, then finish it on the grill with a buttery pepperoncini glaze that’s brushed on at the perfect moment. The result is a dish that’s both simple enough for a weeknight and impressive enough for a weekend feast. Picture yourself pulling this out of the grill, the whole kitchen smelling incredible, the grill marks glistening like polished amber. Okay, ready for the game‑changer? Let me walk you through every single step — by the end, you'll wonder how you ever made it any other way.
What Makes This Version Stand Out
- Flavor Explosion: The combination of pepperoncini’s tang with garlic‑butter creates a layered taste that never flatlines.
- Texture Symphony: Crisp grill marks meet buttery silk, delivering contrast that keeps every bite interesting.
- Simplicity Meets Sophistication: Only ten ingredients, yet the result feels like it belongs on a restaurant menu.
- Ingredient Quality: Fresh, high‑quality chicken and ripe pepperoncini are the unsung heroes that elevate the dish.
- Crowd‑Pleaser Factor: Even the pickiest eaters confess they’re hooked after the first forkful.
- Cooking Method Mastery: Grilling adds smoky depth, while the butter glaze prevents dryness.
- Make‑Ahead Potential: Marinate the chicken ahead of time; the flavor only gets better.
- Versatility: Swappable herbs and spices mean you can tailor it to any cuisine vibe you crave.
Alright, let's break down exactly what goes into this masterpiece…
Inside the Ingredient List
The Flavor Base
Olive oil is the silent partner that carries the lemon juice and herbs into the meat’s fibers. It also prevents the chicken from sticking to the grill, which is crucial for those pristine grill marks. If you skip the oil, you’ll end up with a patchy, uneven sear that looks like a bad haircut. A good swap is grapeseed oil if you want a neutral flavor profile. When shopping, choose extra‑virgin olive oil; the fruitier notes will complement the pepperoncini’s brine.
The Texture Crew
Butter is the star of the glaze, providing that buttery silk that clings to each bite. Unsalted butter lets you control the salt level, preventing an overly salty finish. If you’re dairy‑free, try a clarified butter or a high‑quality ghee; it will still give you that glossy sheen. The garlic, minced finely, releases allicin, which adds depth and a subtle heat that balances the pepperoncini’s acidity. Freshly minced is best—pre‑minced loses its punch after a few weeks.
The Unexpected Star
Pepperoncini peppers are the secret weapon that most home cooks overlook. Their mild heat and vinegary tang cut through the butter, preventing the dish from feeling heavy. If you can’t find pepperoncini, capers or sliced green olives can mimic the briny pop, though the flavor will shift slightly. When buying, look for peppers that are firm and glossy; wilted ones have lost their crunch and will turn mushy on the grill.
The Final Flourish
A splash of fresh lemon juice brightens the entire dish, adding a citrus zing that lifts the buttery glaze. Dried oregano and smoked paprika bring an earthy, smoky backdrop that makes the grill’s influence unmistakable. Salt and pepper, of course, are the foundational seasonings; they amplify every other flavor. Garnish with chopped fresh parsley for a pop of color and a hint of herbaceous freshness that ties everything together. Skipping any of these final touches would be like serving a movie without its climax—underwhelming and forgettable.
Everything's prepped? Good. Let's get into the real action...
The Method — Step by Step
- Start by gathering all your ingredients and giving the chicken breasts a quick pat‑dry. This isn’t just for aesthetics; a dry surface helps the oil and spices adhere better, leading to those coveted grill marks. In a large zip‑top bag, combine 2 tablespoons of olive oil, 1 tablespoon of fresh lemon juice, 1 teaspoon dried oregano, 1 teaspoon smoked paprika, and a generous pinch of salt and pepper. I dare you to taste the raw marinade—don’t be shy; it should taste bright and slightly peppery.
- Add the chicken breasts to the bag, seal it, and massage the mixture in for about 30 seconds. The massage is key: it works the oil into the fibers, ensuring every bite is seasoned from the inside out. Place the bag in the refrigerator and let it marinate for at least 30 minutes, or up to 4 hours if you’re planning ahead. This is the moment of truth—if you skip it, you’ll miss the depth that only a good marination can deliver.
- While the chicken marinates, preheat your grill to medium‑high heat, aiming for a surface temperature of around 425°F (220°C). If you’re using a charcoal grill, arrange the coals for indirect heat on one side; you’ll sear on the hot side and finish on the cooler side to avoid overcooking. That sizzle when it hits the grill? Absolute perfection. Remember, a properly heated grill prevents the chicken from sticking and creates those signature sear lines.
- Prepare the pepperoncini glaze: melt 2 tablespoons of unsalted butter in a small saucepan over low heat, then stir in 3 cloves minced garlic and ¼ cup sliced pepperoncini. Cook gently for 2 minutes, just until the garlic becomes fragrant but not browned. If the butter starts to foam, lower the heat; you don’t want a burnt garlic taste ruining the whole dish.
- Remove the chicken from the bag and let any excess marinade drip off. Place the breasts on the hot side of the grill, skin side (or the side that will face up) down first. Grill for about 4‑5 minutes without moving them; this is when those grill marks form, creating a visual cue that the Maillard reaction is in full swing.
- Flip the chicken and immediately brush the pepperoncini‑garlic butter onto the seared side. This is where the magic happens—the butter melts into the pores of the meat, while the pepperoncini’s brine seeps in, adding a tang that cuts through the richness. Grill for another 4‑5 minutes, then brush the other side with the remaining glaze.
- Move the chicken to the indirect‑heat side of the grill, close the lid, and let it finish cooking for 8‑10 minutes. Use a meat thermometer to check the internal temperature; you’re aiming for 165°F (74°C). The meat should feel firm yet springy to the touch, indicating it’s perfectly cooked through without being dry.
- Once the chicken reaches temperature, remove it from the grill and let it rest on a cutting board for 5 minutes. Resting allows the juices to redistribute, turning each bite into a juicy, succulent experience rather than a watery disappointment. While it rests, sprinkle freshly chopped parsley over the top for a burst of color and a hint of fresh herb flavor.
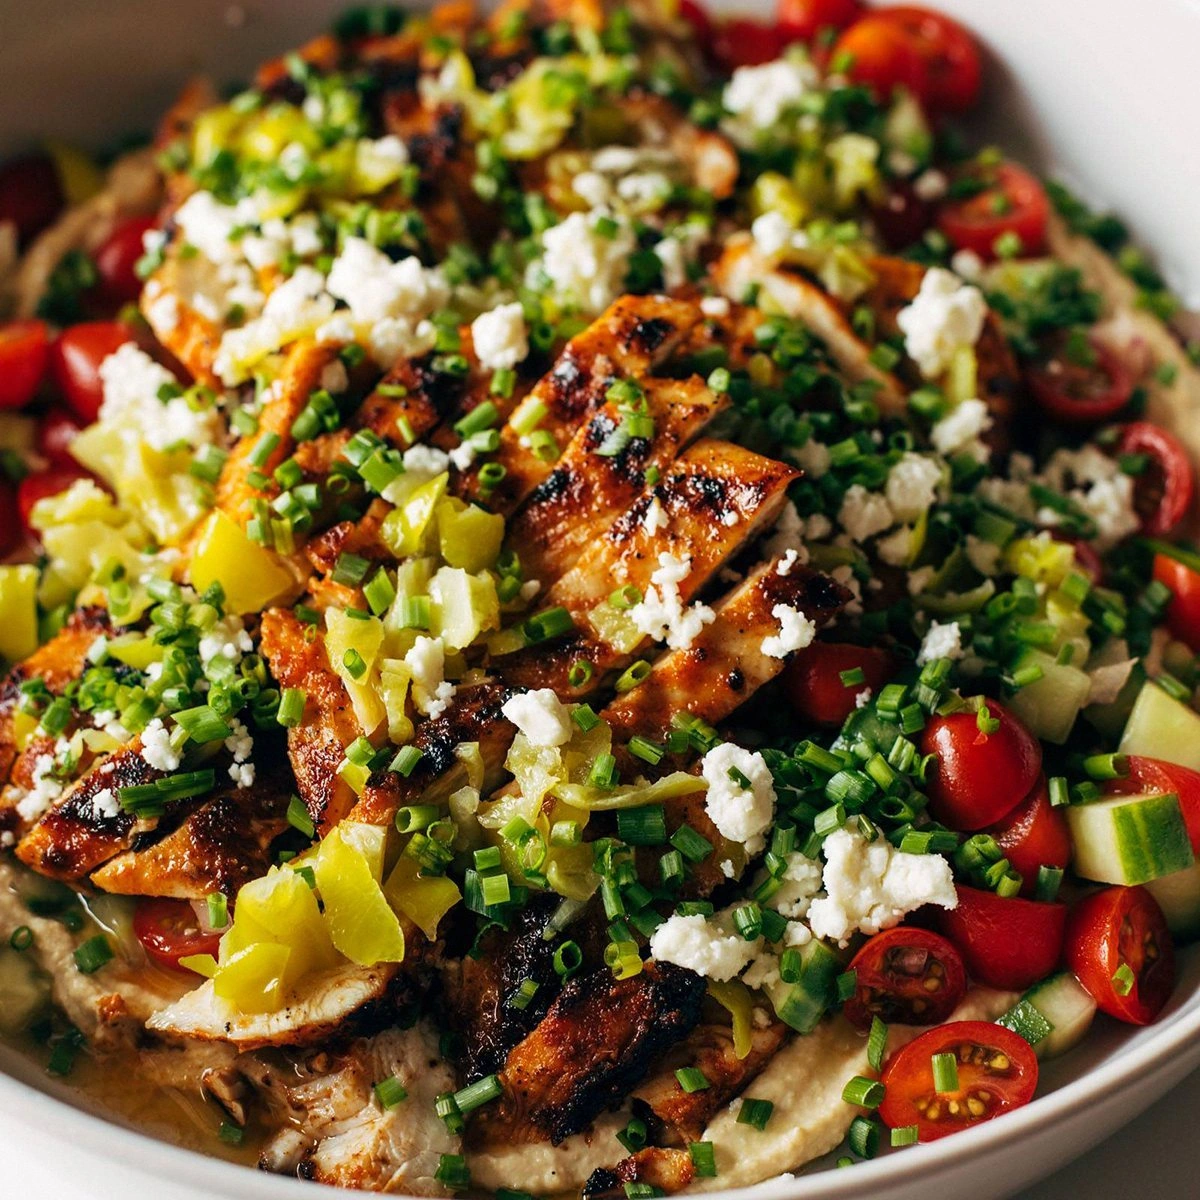
- Slice the chicken against the grain into ½‑inch thick strips, arrange them on a serving platter, and drizzle any leftover glaze from the pan over the top. The final presentation should look glossy, with pepperoncini specks glimmering like tiny jewels. That moment when you take the first bite and the buttery, tangy, smoky flavors explode in your mouth? Pure magic. That’s it — you did it. But hold on, I've got a few more tricks that'll take this to another level...
Insider Tricks for Flawless Results
The Temperature Rule Nobody Follows
Most home cooks set their grill to “medium” and hope for the best, but the secret is a precise 425°F sear followed by a lower‑heat finish. This two‑zone method locks in juices while allowing the glaze to caramelize without burning. I once tried a single‑zone approach; the chicken ended up dry on the inside and charred on the outside, a true culinary tragedy. Keep a grill thermometer handy, and trust the numbers—not the instinct.
Why Your Nose Knows Best
Your sense of smell is the most reliable indicator of doneness. When the butter‑pepperoncini mixture starts to emit a nutty, caramel scent, you know the glaze is ready for the final brush. If you hear a faint sizzle and smell a faint garlic aroma, you’re right on track. I’ll be honest — I ate half the batch before anyone else got to try it because the aroma was so intoxicating.
The 5‑Minute Rest That Changes Everything
Resting isn’t just a suggestion; it’s a science. During those 5 minutes, the muscle fibers relax, and the juices that were forced to the center migrate back throughout the meat. Skipping this step is like cutting a cake too early and watching the frosting ooze everywhere. Trust me, the juiciness you’ll experience after the rest is worth the brief wait.
Butter Basting vs. Brushing
Many recipes tell you to brush the glaze, but basting with a silicone brush while the chicken rotates ensures an even coat. The continuous motion creates a glossy finish that looks restaurant‑ready. If you’re using a regular pastry brush, dip it in the glaze repeatedly to keep it moist. The difference? A glossy, stick‑to‑the‑plate finish versus a patchy, uneven coating.
Seasoning Layers for Maximum Impact
Season the chicken twice: once in the marinade and once after grilling. The second seasoning step is a light dusting of salt and pepper right before the final glaze. This double‑layer technique amplifies flavor without overwhelming the palate. I once skipped the final dust and the dish felt a bit flat—adding that little pinch of salt revived the entire flavor profile.
Creative Twists and Variations
This recipe is a playground. Here are some of my favorite ways to switch things up:
Spicy Sriracha Kick
Add 1 teaspoon of sriracha to the butter glaze for a subtle heat that complements the pepperoncini without overpowering it. This version is perfect for those who like a gentle fire in every bite.
Herbaceous Mediterranean
Swap oregano for 1 tablespoon of fresh rosemary and add a handful of chopped kalamata olives to the glaze. The olives bring a briny depth that pairs beautifully with the lemon and pepperoncini.
Citrus‑Infused Summer
Replace lemon juice with orange zest and a splash of orange juice. The citrus becomes sweeter, creating a sunny flavor profile that screams backyard BBQ on a hot day.
Garlic‑Lover’s Dream
Double the garlic to 6 cloves and add a pinch of roasted garlic powder to the marinade. The result is a robust, aromatic dish that will make any garlic fan swoon.
Smoky Chipotle Twist
Introduce ½ teaspoon chipotle powder into the glaze for a smoky, earthy undertone that deepens the overall flavor. Pair with grilled corn for a full‑on southwestern vibe.
Storing and Bringing It Back to Life
Fridge Storage
Place leftover chicken in an airtight container and store it in the refrigerator for up to 3 days. The glaze will keep the meat moist, but for the best texture, reheat gently.
Freezer Friendly
Wrap each chicken breast tightly in parchment paper, then place them in a freezer‑safe zip‑top bag. They’ll freeze solid for up to 2 months. When you’re ready to eat, thaw overnight in the fridge and reheat using the method below.
Best Reheating Method
To revive leftovers, preheat your oven to 300°F (150°C), place the chicken on a baking sheet, and add a splash of water or chicken broth—just enough to create steam. Cover loosely with foil and heat for 10‑12 minutes, or until the internal temperature reaches 165°F. The added moisture will steam the meat back to juicy perfection, and the glaze will re‑gloss the surface.