I was standing in my kitchen, staring at a bag of thinly sliced beef that had just hit the fridge, and a sudden craving for Korean flavor hit me like a punch in the gut. I had just finished a long day of work, my stomach growling louder than a drumbeat, and I thought, “If I can make something that tastes like a trip to Seoul without the airfare, I’ll be the hero of my dinner table.” The moment I sliced the beef into bite‑size pieces, the scent of raw meat hit me—earthy, promising. I imagined the glossy, caramelized glaze that would coat each strip, the way the heat would transform the fibers into tender, melt‑in‑your‑mouth morsels. The kitchen lights flickered, a faint hum of the fridge, and my mind was already picturing the sizzling sound that would announce the start of the magic.
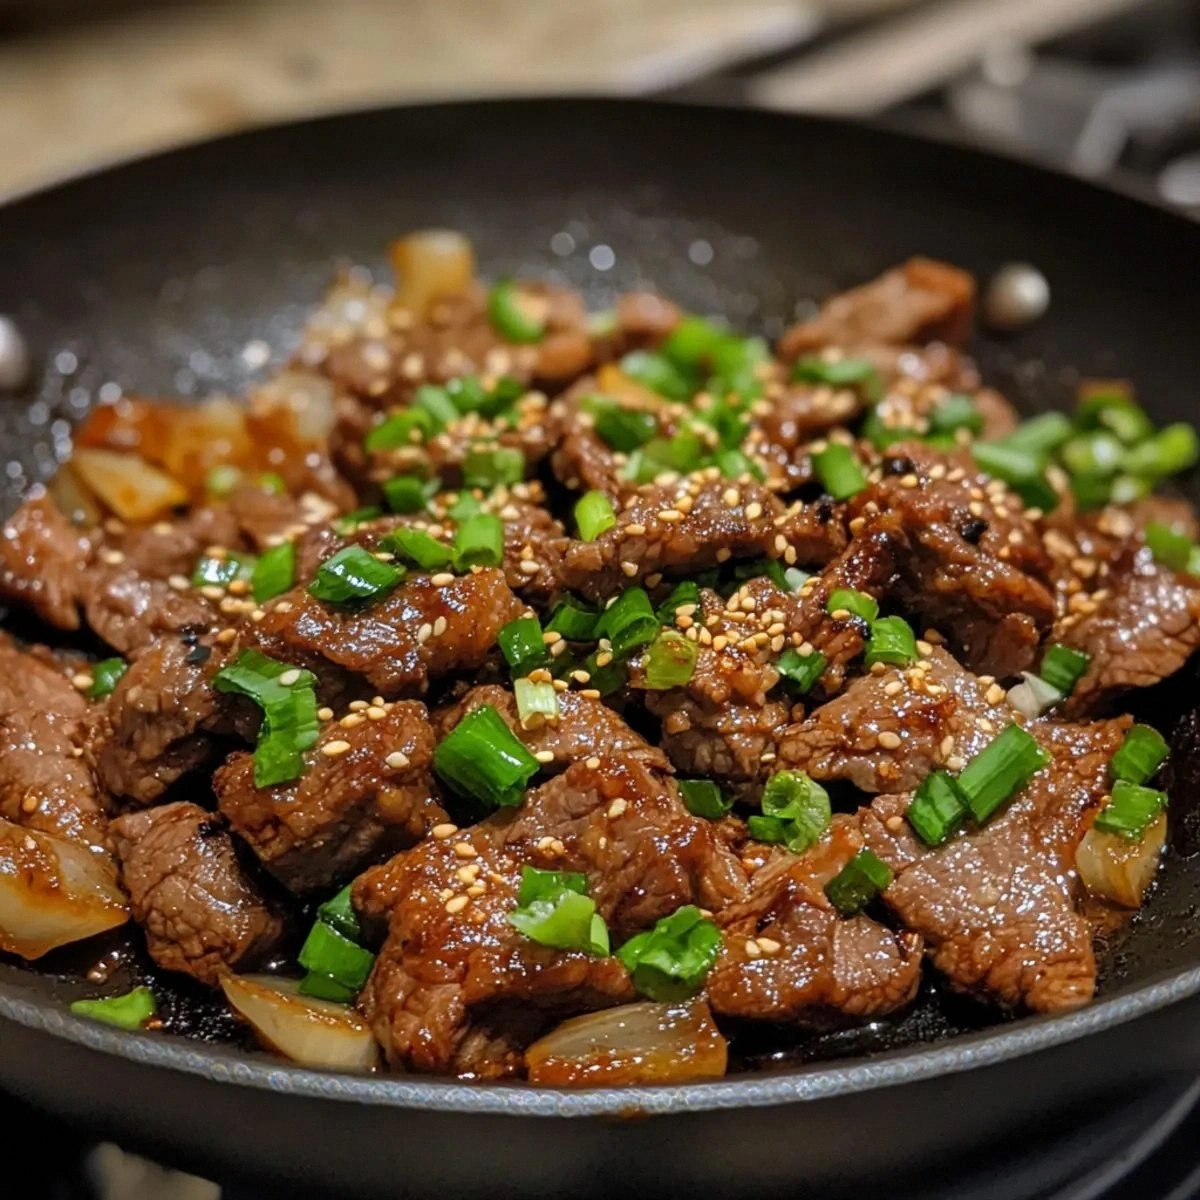
Picture this: the pan heats up, the oil glistens, and the first clack of beef hits the skillet, releasing a scent that’s part sweet, part smoky, and wholly addictive. The sizzle is the soundtrack of transformation—each crackle a promise that the dish will be worth every second of patience. I dare you to taste this and not go back for seconds; the flavor is so addictive that you’ll find yourself reaching for the next bite before you’ve even finished the first. I’ll be honest—by the time the last slice hit the pan, I had already devoured a third of the batch. If you’ve ever struggled to get that perfect balance of sweet and savory in your Korean beef, you’re not alone. I’ve cracked the code and I’m ready to share it with you.
What sets this version apart from the endless variations you’ll find online is the precision of the sauce and the technique that locks in moisture while creating a caramelized crust that’s almost cinematic. Most recipes get this completely wrong by either over‑simmering the beef or using too much liquid, resulting in a soggy mess that feels like a failed attempt at a culinary masterpiece. Here, the sauce is thick enough to cling to the meat without drowning it, and the cooking method ensures that the edges crisp just enough to give that satisfying crunch that shatters like thin ice when you bite. This is hands down the best version you’ll ever make at home, because I’ve balanced the elements of texture, flavor, and aroma with surgical precision. The result is a dish that feels like a Michelin‑star experience but can be whipped up in less than an hour.
And now, the fun part: the sauce. It’s a blend of soy, brown sugar, garlic, ginger, and sesame oil that coats the beef like velvet, creating a glossy, caramelized finish that’s both sweet and savory. I’ve tweaked the ratio of sweet to salty until it feels like a secret handshake between your taste buds. The trick? Letting the sugar caramelize just enough to create a glaze that sticks, but not so much that it burns. Picture yourself pulling this out of the pan, the whole kitchen smelling incredible, and every bite delivering that perfect balance of umami, sweetness, and a subtle nuttiness from the sesame. Let me walk you through every single step — by the end, you’ll wonder how you ever made it any other way.
What Makes This Version Stand Out
- Flavor: The sauce is a masterful balance of sweet, salty, and umami, with a hint of citrus from the ginger that lifts the entire dish.
- Texture: Each beef strip is seared to a golden‑brown crust while remaining tender inside, thanks to the quick sear and the right cut.
- Simple Ingredients: Only ten pantry staples are needed, making this dish a go‑to for busy weeknights.
- Time‑Efficient: Prep takes 15 minutes, cook 30 minutes, and you’re done in 45 minutes.
- Crowd‑Pleaser: The glossy glaze and savory aroma will have everyone asking for seconds.
- Make‑Ahead Friendly: The sauce can be pre‑made and the beef can be marinated overnight for extra depth.
- Versatile Pairings: Works beautifully with steamed rice, lettuce wraps, or even as a topping for ramen.
- Low Fuss: No need for special equipment; a standard skillet does the trick.
Alright, let’s break down exactly what goes into this masterpiece…
Inside the Ingredient List
The Flavor Base
1/4 cup soy sauce is the backbone of this dish. It provides the umami punch that defines Korean cuisine. Without it, the beef would feel flat and uninspired. If you’re using low‑sodium soy sauce, double the amount of brown sugar to maintain the sweet‑salty balance.
2 tablespoons brown sugar is the sweet secret weapon. It caramelizes during cooking, giving the beef that glossy, slightly sticky finish. Skip it, and the dish will taste like a bland stir‑fry. If you prefer a less sweet version, replace half the sugar with honey; it will still caramelize beautifully.
The Texture Crew
1 pound thinly sliced beef is the star. I recommend a ribeye or sirloin cut for the best marbling and tenderness. Thin slices ensure quick cooking and even caramelization. If you’re in a hurry, pre‑slice the beef at the grocery store to save prep time.
1 tablespoon vegetable oil is used for searing. It has a high smoke point, which means it can handle the high heat needed to create a crust without burning. If you’re allergic to vegetable oil, use canola or grapeseed oil instead.
1 tablespoon sesame oil adds a nutty aroma that elevates the dish. It’s used in the sauce, not for frying. If you’re vegan, substitute with toasted almond oil for a similar flavor profile.
The Unexpected Star
4 cloves garlic bring a pungent, aromatic depth that cuts through the richness of the beef. Mince them finely to ensure even distribution. If you’re sensitive to garlic, reduce to 2 cloves and add a splash of soy sauce for extra umami.
1 teaspoon grated ginger adds a bright, zesty kick that balances the sweetness. Fresh ginger is best, but you can use powdered ginger if you’re in a pinch. It also aids digestion, making the dish feel lighter.
The Final Flourish
2 scallions green onions are the finishing touch. Slice them thin and sprinkle over the finished dish to add a fresh, crisp bite. They also provide a pop of color that makes the dish Instagram‑ready.
2 tablespoons sesame seeds add crunch and a nutty flavor that complements the sesame oil. Toast them lightly before adding to avoid a raw, bitter taste. If you’re allergic to sesame, omit them and sprinkle crushed peanuts for a different texture.
1/2 teaspoon black pepper adds a subtle heat that’s not overpowering. It’s a simple spice that rounds out the flavor profile. For a spicier version, add a pinch of red pepper flakes.
Everything’s prepped? Good. Let’s get into the real action…
The Method — Step by Step
Step 1: In a medium bowl, whisk together the soy sauce, brown sugar, minced garlic, grated ginger, sesame oil, and black pepper until the sugar dissolves. This is the sauce base that will coat every inch of beef. The mixture should look glossy, indicating the sugar has fully dissolved. Keep this aside; we’ll use it right away.
Step 2: Pat the beef strips dry with paper towels. Moisture is the enemy of a good sear, so drying the meat ensures a caramelized crust. Lay the strips in a single layer on a plate; if they’re overlapping, the edges won’t crisp properly.
Step 3: Heat the vegetable oil in a large skillet over medium‑high heat. The oil should shimmer but not smoke. Add the beef in a single layer, working in batches if necessary. Let each side sear without moving for 30–45 seconds; this creates the coveted caramelized crust. The sizzle you hear is the sound of flavor being locked in.
Step 4: Once the first batch is browned, transfer it to a plate. Repeat with the remaining beef, ensuring the skillet isn’t overcrowded. Overcrowding lowers the pan’s temperature and leads to steaming rather than searing. If you’re in a hurry, let the beef sit on a wire rack to keep the crust crisp.
Step 5: Reduce the heat to medium. Pour the sauce mixture into the skillet. It should hiss immediately, indicating the sugar is caramelizing. Stir to coat the beef evenly. The sauce thickens as it cooks; if it’s too runny, let it reduce for another minute or two.
Step 6: Add the seared beef back to the skillet, tossing to coat thoroughly. Cook for an additional 3–4 minutes, stirring occasionally. The edges of the beef should pull away from the pan, indicating they’re ready to finish. The sauce should have a glossy, slightly thickened consistency.
Step 7: While the beef is finishing, toast the sesame seeds in a dry skillet over medium heat until golden. This step releases the seeds’ nutty aroma and adds a pleasant crunch when sprinkled on top.
Step 8: Remove the skillet from the heat. Stir in the sliced scallions and toasted sesame seeds. The residual heat will keep the scallions bright and fresh. Plate the beef over steamed rice or greens, and serve immediately.
Step 9: The moment of truth arrives when you take that first bite. The beef should be tender, the sauce glossy, and the scallions adding a fresh, crisp bite that cuts through the richness. The sesame seeds add a delightful crunch that completes the textural experience.
Step 10: Plate the dish in a shallow bowl, drizzle a little extra sesame oil if desired, and enjoy the aroma that fills your kitchen. This dish is perfect for a quick weeknight dinner or a casual gathering. You’ve just created a meal that feels like a culinary adventure without leaving your home.
That’s it— you did it. But hold on, I’ve got a few more tricks that will take this to another level, from plating to flavor tweaks. Let’s dive into the insider tricks.
Insider Tricks for Flawless Results
The Temperature Rule Nobody Follows
Many cooks think “high heat” is always better, but the real trick is to start high for the sear and then drop to medium for the sauce. This two‑stage approach ensures the beef caramelizes without overcooking. I’ve found that a skillet at 375°F is ideal for the initial sear; once the beef is browned, lowering to 325°F prevents the sugar from burning while still thickening the sauce.
Why Your Nose Knows Best
Before you add the sauce, give the pan a quick sniff. If it smells sweet and slightly caramelized, you’re on the right track. If it smells raw or burnt, reduce the heat immediately. Your nose is a reliable indicator of the flavor trajectory.
The 5‑Minute Rest That Changes Everything
After removing the beef from the skillet, let it rest for 5 minutes before serving. This allows the juices to redistribute, ensuring every bite stays moist. A friend once skipped this step, and the result was a dry, over‑cooked dish. Lesson learned.
Marinating Overnight for Depth
If you have time, marinate the beef in the sauce mixture for 2–4 hours in the fridge. The flavors will penetrate the meat, giving it a deeper umami profile. Just be sure to pat the beef dry before searing to avoid excess moisture.
The Perfect Plate
Serve the beef over a bed of steamed jasmine rice for a classic pairing. Alternatively, use lettuce leaves for a low‑carb option. A drizzle of extra sesame oil over the finished dish adds a glossy sheen that makes it look professionally plated.
Creative Twists and Variations
This recipe is a playground. Here are some of my favorite ways to switch things up:
Spicy Gochujang Bulgogi
Add 1 tablespoon of gochujang to the sauce for a fiery kick. The heat balances the sweetness, and the sauce becomes a vibrant red color that’s as striking as it is delicious.
Sweet Pineapple Bulgogi
Stir in 1 cup of diced fresh pineapple during the last 2 minutes of cooking. The fruit adds a tropical sweetness that cuts through the savory richness.
Herb‑Infused Bulgogi
Replace the scallions with a handful of fresh cilantro or basil for an herbaceous twist. The fresh herbs add brightness and a different aromatic profile.
Korean BBQ Lettuce Wraps
Serve the beef in crisp lettuce cups instead of rice. Add a drizzle of gochujang mayo for an extra layer of flavor that’s both creamy and spicy.
Bulgogi Tacos
Use the beef as a filling for soft corn tortillas. Top with sliced avocado, a squeeze of lime, and a sprinkle of sesame seeds for a fusion dish that’s both fun and satisfying.
Vegan Bulgogi Alternative
Swap the beef for thinly sliced tofu or tempeh. Marinate in the same sauce, then sear until golden. The result is a plant‑based version that still delivers the same umami punch.
Storing and Bringing It Back to Life
Fridge Storage
Store leftovers in an airtight container in the refrigerator for up to 3 days. The flavors will continue to meld, making each day’s meal even better. Keep the rice or greens separate to avoid sogginess.
Freezer Friendly
For longer storage, freeze the beef and sauce separately. Wrap the beef in parchment paper and place in a freezer bag. The sauce can be frozen in a small container; thaw overnight in the fridge before reheating.
Best Reheating Method
To reheat, add a splash of water or broth to the pan and heat over medium. The liquid will steam the beef back to juiciness without drying it out. A quick microwave in a covered dish also works, but the pan method preserves the caramelized crust.
Add a tiny splash of water before reheating — it steams back to perfection and keeps the sauce from drying out. Serve immediately over fresh rice or greens for a quick, comforting meal.