I was staring at the pile of soggy apple slices in my fridge, the kind that had been left overnight and turned into a sticky, mushy mess. My friend dared me to turn that disaster into something edible, and I knew I had to prove the challenge right. I grabbed two firm apples—Granny Smith for that tart bite and Fuji for the natural sweetness—and a bottle of caramel sauce that glistened like liquid gold. The kitchen smelled of apples and caramel, a scent that instantly pulled me into the world of crunch and decadence.
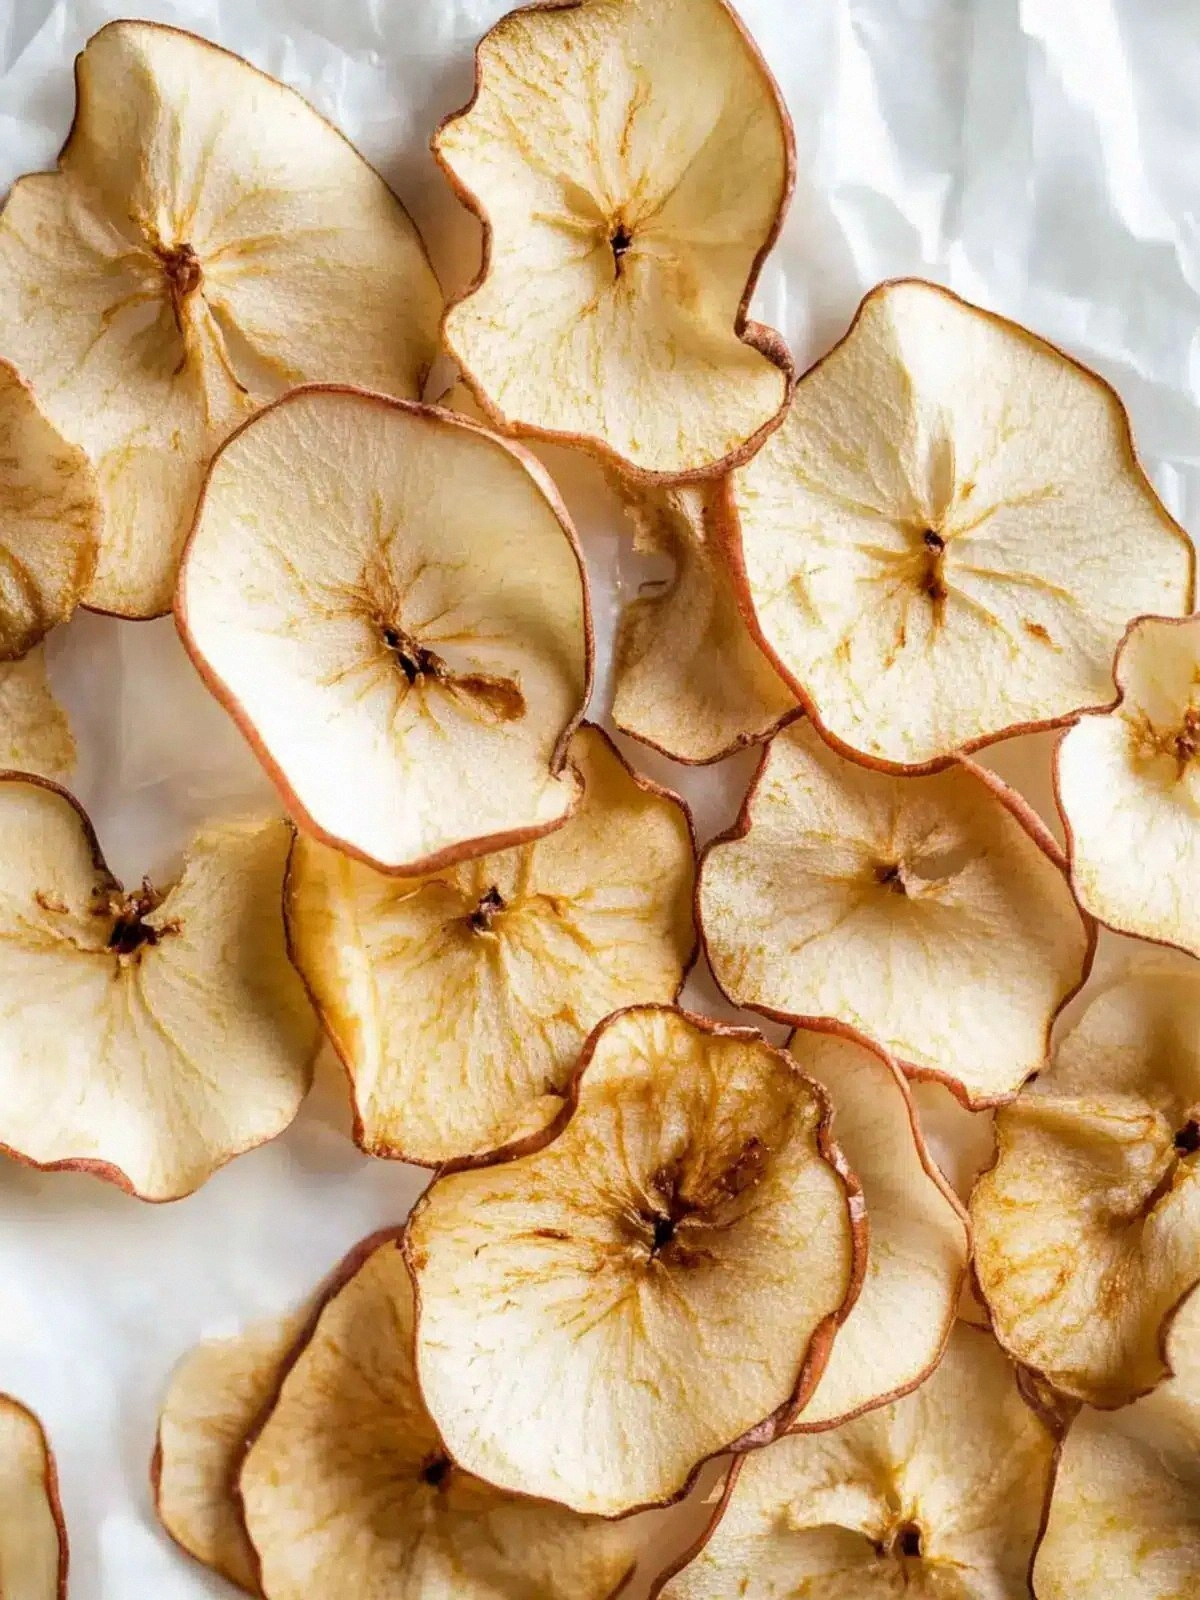
Picture this: thin, crisp apple slices that crackle like a fresh snowfall when you bite into them, followed by a glossy caramel glaze that coats each piece like velvet. The texture is a dance of brittle and buttery, a contrast that makes your tongue sing. I swear that sizzle when the caramel hits the pan is absolute perfection—like a tiny fireworks show on your skillet. That moment of transformation from raw fruit to caramelized snack feels almost ceremonial, and it’s the reason I’m so excited to share this recipe with you.
What sets this version apart from every other caramel apple chip recipe you’ve seen? First, the apples are pre‑cut into uniform slices, ensuring even cooking. Second, the caramel sauce is reduced to a thick, glossy glaze that clings without dripping. Third, a subtle sprinkle of sea salt lifts the sweetness just enough to create a flavor profile that feels both indulgent and sophisticated. Finally, the entire process takes less than an hour from prep to plate, making it a perfect quick treat for parties, movie nights, or a sweet snack that won’t leave you feeling guilty.
I’m about to walk you through every single step—by the end, you’ll wonder how you ever made caramel apple chips any other way. Let’s dive in, and I dare you to taste this and not go back for seconds.
What Makes This Version Stand Out
- Taste: The caramel glaze is sweet, buttery, and slightly buttery, with a hint of sea salt that balances the fruit’s natural tartness. Each bite delivers a burst of flavor that lingers on the palate.
- Texture: The apple slices achieve a crisp, almost cracker‑like exterior while remaining tender inside. The caramel coating adds a glossy, slightly chewy layer that melts in your mouth.
- Simplicity: No fancy equipment or complicated steps—just a knife, a skillet, and a little patience. Even a novice can master this.
- Uniqueness: The use of a reduced caramel sauce instead of a commercial glaze gives the chips an authentic, homemade feel that’s hard to find in store‑bought snacks.
- Crowd Reaction: Friends who’ve tasted these chips report “I can’t stop snacking” and “they’re so addictive.” The combination of sweet, salty, and crunchy makes them a hit at gatherings.
- Ingredient Quality: Choosing firm apples and high‑quality caramel sauce ensures the best flavor and texture. The apples should be crisp, not watery, to avoid sogginess.
- Cooking Method: Sautéing the slices in a pan allows for even caramelization and crisping, while reducing the sauce in advance prevents a greasy mess.
- Make‑Ahead Potential: Once cooled, the chips keep well in an airtight container for up to a week. Reheat briefly in the oven for a fresh bite.
Alright, let's break down exactly what goes into this masterpiece...
Inside the Ingredient List
The Flavor Base
The apples are the star of this dish. A firm variety like Granny Smith or Fuji provides the necessary crunch and a natural tartness that balances the sweetness of the caramel. If you use a softer apple, the chips will steam rather than crisp, resulting in a soggy texture. Choosing apples that are crisp and slightly firm ensures that the slices hold their shape during cooking.
The Texture Crew
The caramel sauce is the second key player. It’s not just any caramel; it’s a thick, buttery glaze that coats the apple slices like a glossy coat of lacquer. If you skip this step and use a thin sauce, the chips will become greasy and lose that satisfying snap. The sauce should be reduced in a saucepan over medium heat until it reaches a syrupy consistency, just before it starts to thicken and darken slightly.
The Unexpected Star
A pinch of sea salt is the unexpected star that elevates the entire flavor profile. It cuts through the sweetness, adding depth and complexity. Without it, the caramel can taste cloying. If you’re watching sodium, a light sprinkle of Himalayan pink salt works just as well, giving a subtle mineral finish.
The Final Flourish
A quick drizzle of extra‑virgin olive oil or a light spray of cooking spray before pan‑searing helps the slices brown evenly and prevents sticking. This final flourish also adds a subtle nutty aroma that complements the caramel glaze. If you’re vegan or prefer a dairy‑free version, use a plant‑based oil; the flavor difference is negligible.
Everything's prepped? Good. Let's get into the real action...
The Method — Step by Step
- Prep the Apples: Wash, core, and slice the apples into 1/8‑inch thick rounds. The thinner the slice, the crispier the final chip. Lay them out on a clean towel to absorb excess moisture. I swear, a dry surface is the secret to that perfect crunch.
- Reduce the Caramel: Pour the caramel sauce into a small saucepan and heat over medium heat. Stir constantly until it thickens to a syrupy consistency, about 5–7 minutes. Watch the color deepen slightly; it’s the cue that it’s ready. If it gets too thick, add a splash of water to thin it just enough.
- Heat the Skillet: Place a non‑stick skillet over medium heat and add a light drizzle of oil. Let the oil heat until it shimmers—this indicates the pan is ready for the apples.
- Cook the Apple Slices: Arrange the apple slices in a single layer, ensuring they don’t overlap. Cook for 2–3 minutes on each side or until golden brown and crisp. Flip carefully with a spatula; you’re aiming for a uniform crunch, not a char.
- Apply the Caramel Glaze: Remove the skillet from heat and drizzle the thickened caramel sauce over the warm apple chips. Use a spoon or a brush to spread the glaze evenly, ensuring every slice is coated. The caramel will cling beautifully to the hot surface.
- Season: Immediately sprinkle a pinch of sea salt over the glazed slices. The salt should be lightly dusted—too much can overwhelm the delicate flavor. This step is crucial; it transforms the sweet into a balanced, savory-sweet snack.
- Cool and Store: Transfer the glazed chips onto a wire rack to cool completely. As they cool, the caramel sets into a crisp shell. Once cooled, store them in an airtight container. They’ll stay crisp for up to a week.
- Reheat (Optional): If you want that freshly‑made crunch, place the chips in a preheated oven at 350°F for 5 minutes. A quick burst of heat restores the crispness without melting the caramel.
That's it — you did it. But hold on, I've got a few more tricks that'll take this to another level...
Insider Tricks for Flawless Results
The Temperature Rule Nobody Follows
Most people cook apple chips at a high heat, hoping for instant crispness. The trick is to start at medium heat and let the apple slices slowly caramelize. This controlled heat ensures even cooking and prevents the caramel from scorching. I’ve learned that a steady 350°F in a preheated oven yields the best balance of crispness and sweetness.
Why Your Nose Knows Best
Before you even taste a chip, you can tell if it’s done by its aroma. A sweet, buttery scent with a hint of caramelized sugar signals that the glaze has set. If you smell a faint burnt note, the caramel is over‑cooked. Trust your nose; it’s a reliable judge of flavor.
The 5‑Minute Rest That Changes Everything
After glazing, let the chips rest on the rack for exactly five minutes. This brief pause allows the caramel to firm up into a glossy shell. Skipping this step results in a tacky surface that won’t hold its shape when you bite.
Use a Non‑Stick Skillet
A good non‑stick skillet is essential. If you use a regular pan, the apple slices might stick and tear, ruining the crisp edges. The non‑stick surface also requires less oil, keeping the dish lighter.
Add a Splash of Lemon Juice
Before you slice the apples, squeeze a few drops of lemon juice over them. The acid slows down oxidation, keeping the slices bright green and preventing them from turning brown. It also adds a subtle zing that balances the sweetness.
Creative Twists and Variations
This recipe is a playground. Here are some of my favorite ways to switch things up:
Nutty Crunch
Sprinkle toasted almond slivers over the caramel glaze before the final salt dusting. The nuts add a delightful crunch and a nutty undertone that pairs beautifully with the caramel.
Spiced Caramel
Add a pinch of cinnamon or nutmeg to the caramel sauce before reduction. The warm spices elevate the flavor profile and give the chips a holiday vibe.
Coconut Twist
After glazing, roll the chips in toasted shredded coconut. The coconut adds a tropical flair and a subtle sweetness that complements the caramel.
Savory Sweet Combo
Instead of sea salt, sprinkle a light dusting of smoked paprika. The smoky flavor contrasts with the sweet caramel, creating a complex, savory-sweet snack.
Dark Chocolate Drizzle
Finish the chips with a drizzle of melted dark chocolate. The bittersweet chocolate pairs with the caramel for an indulgent treat that’s perfect for dessert.
Berry Boost
Top the caramelized apple chips with a handful of fresh berries, such as blueberries or raspberries, for a burst of freshness and color. The berries add juiciness and a contrasting sweet‑tart flavor.
Storing and Bringing It Back to Life
Fridge Storage
Place the cooled chips in an airtight container or zip‑top bag. Store in the refrigerator for up to 5 days. The caramel will maintain its crispness, and the apple flavor will stay fresh.
Freezer Friendly
For longer storage, lay the chips on a parchment‑lined tray and freeze them for up to 3 months. Once frozen, transfer them to a freezer bag. Thaw at room temperature for 10 minutes before serving.
Best Reheating Method
To revive the crispness, preheat your oven to 350°F and bake the chips on a parchment sheet for 5 minutes. If you prefer a quick fix, microwave them on high for 15–20 seconds, but be careful not to overcook or they’ll become chewy.