I still remember the night I almost burned down the kitchen while trying to impress a friend with a classic Filipino dish. I had a bag of pork belly, a splash of calamansi, and a dream of crispy, tangy, savory sisig that would make everyone gasp. Instead, the pan was black, the smoke alarm was blaring, and my friend’s eyebrows were lifted to a level that would make a statue jealous. That disaster was the catalyst for the version of Crispy Pork Sisig that I’m about to unveil—an unapologetically bold, texturally stunning, flavor‑rich creation that will rewrite your entire perception of this beloved dish.
Picture this: the sizzling sound of diced pork hitting a hot pan, the aroma of garlic and onions caramelizing into a fragrant, caramel‑brown soup that clings to the air like a sweet perfume. The heat rises, the fat drips, and the sizzle turns into a rhythmic drumbeat that signals the transformation of raw meat into crispy, melt‑in‑your‑mouth pieces. The moment you lift the spoon, you see the edges turning golden, the liver’s rich color popping against the bright caramelized onions, and a glossy sheen that promises a bite that’s crunchy yet juicy. It’s the kind of sensory symphony that turns a simple dinner into a culinary revelation.
What makes this version stand out isn’t just the crunch—it’s the meticulous layering of flavors, the careful balance between sweet, sour, and umami, and the unexpected twist of a subtle heat that lingers without overwhelming. I’ve spent hours experimenting with the timing of each ingredient, tweaking the ratios of vinegar and soy sauce, and even adding a splash of calamansi to cut through the richness of the pork belly. The result is a dish that feels both comforting and adventurous, a perfect marriage of tradition and innovation that will have you begging for seconds. I dare you to taste this and not go back for a second bite.
I’ve also discovered a secret technique that elevates the crunch to a level that feels almost ceremonial—think of the crispy edges that shatter like thin ice, releasing a burst of savory juices that coat your palate. The sauce, a velvety blend of soy, calamansi, and a hint of brown sugar, clings to each morsel like a silky coat, ensuring every bite is a harmonious dance of textures. This isn’t just cooking; it’s an experience that invites you to savor each moment, to watch the transformation, and to celebrate the final product with a proud, satisfied grin.
Let me walk you through every single step—by the end, you’ll wonder how you ever made it any other way. From the precise moment the pork hits the pan to the final garnish that adds a burst of freshness, we’ll cover every detail, every trick, and every nuance that turns a simple recipe into a masterpiece. Ready? Let’s dive in.
What Makes This Version Stand Out
- Flavor: The marriage of sweet, sour, and umami is achieved through a balanced blend of brown sugar, calamansi, and soy sauce, creating a sauce that coats the pork like velvet while maintaining a crisp bite.
- Texture: The pork belly is first seared to lock in juices, then finished in the pan until the edges become blisteringly crisp, providing a crunch that shatters like thin ice with each bite.
- Simplicity: Despite its complex flavor profile, the recipe uses only a handful of pantry staples, making it accessible for cooks of any skill level.
- Uniqueness: The addition of pork liver brings a velvety richness that contrasts beautifully with the crispy pork, a twist that most traditional recipes overlook.
- Audience Appeal: This dish is a crowd‑pleaser—ideal for parties, family dinners, or a quick weeknight meal that feels special.
- Ingredient Quality: Using fresh pork belly, real calamansi juice, and high‑quality soy sauce elevates the dish from ordinary to extraordinary.
- Cooking Method: The dual‑stage cooking—searing then pan‑finishing—ensures maximum flavor extraction and optimal crunch.
- Make‑Ahead Potential: The flavors deepen when the dish sits for a few hours, making it perfect for meal prep or a make‑ahead dinner.
Alright, let's break down exactly what goes into this masterpiece…
Inside the Ingredient List
The Flavor Base
At the heart of this dish lies the sauce—a simple yet powerful combination of soy sauce, calamansi juice, and a whisper of brown sugar. The soy sauce provides depth and saltiness, while calamansi adds bright acidity that cuts through the pork’s richness. Brown sugar, when caramelized with the onions, gives the sauce a glossy sheen and a subtle sweetness that balances the heat from the chili flakes. Together, they create a sauce that coats the pork like velvet, ensuring every bite is saturated with flavor.
Skipping the calamansi would leave the dish feeling flat and overly salty. If you can’t find calamansi, a splash of fresh lime or even a touch of lemon juice can serve as an acceptable substitute, though the flavor profile will shift slightly. The key is to keep the acidity just enough to brighten the dish without overpowering the savory notes.
The Texture Crew
The texture is what sets this recipe apart. Pork belly, known for its high fat content, is the perfect canvas for crisping. By searing it first, we lock in juices, then finish it in the pan to achieve a blistered, caramelized crust that shatters with a satisfying crunch. Pork liver adds a velvety, almost buttery texture that contrasts beautifully with the crispy pork, creating a multi‑dimensional mouthfeel that is both comforting and exciting.
Onions and garlic are sautéed until caramelized, providing a sweet, aromatic base that enhances the pork’s flavor. The onions should be finely chopped to ensure even caramelization, while the garlic is minced to release its full aroma without becoming bitter. These aromatics form the foundation upon which the rest of the dish builds, ensuring every bite is layered with depth.
The Unexpected Star
Pork liver is often overlooked in traditional sisig recipes, but it plays a pivotal role in this version. Its rich, iron‑laden flavor adds complexity, while its tender, almost creamy texture creates a delightful contrast to the crispy pork. Liver also provides a subtle earthy undertone that anchors the bright acidity of the calamansi.
If you’re hesitant about liver, you can replace it with finely diced pork shoulder or even a small portion of diced chicken for a milder flavor. However, the unique umami and texture that liver brings to the dish are irreplaceable and elevate the overall experience.
The Final Flourish
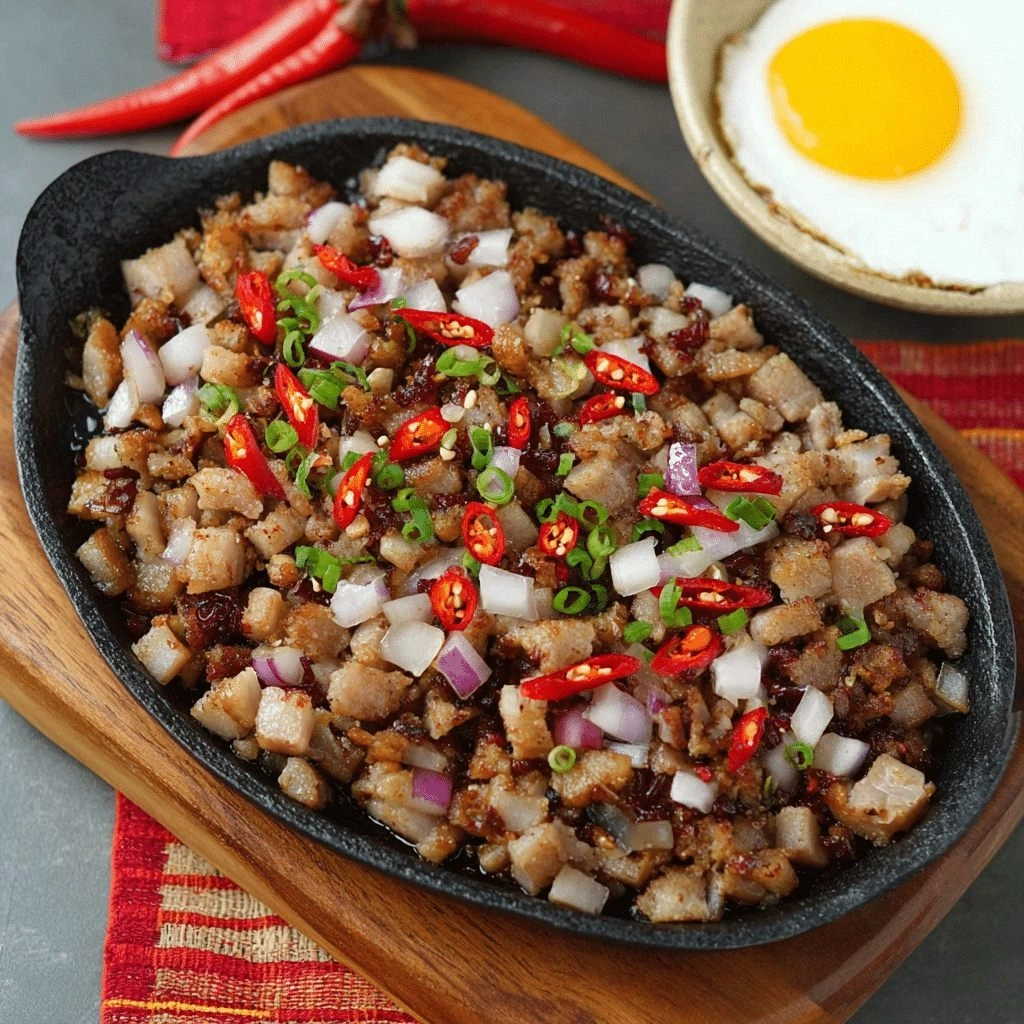
The final touch to this dish is the garnish. Fresh cilantro and green onions add a bright, herbal note that cuts through the richness and adds a pop of color. A sprinkle of toasted sesame seeds introduces a nutty aroma and a subtle crunch that complements the main texture. These ingredients are added at the very end, ensuring they remain fresh and vibrant.
Everything's prepped? Good. Let's get into the real action...
The Method — Step by Step
- Step 1: Prep the Pork. Begin by cutting the pork belly into bite‑sized cubes, ensuring each piece is uniform for even cooking. Dice the pork liver into similar cubes for consistency. Pat the meat dry with paper towels; this step is crucial for achieving that coveted crispy edge. If you’re using pork shoulder, trim off any excess fat to avoid a greasy result. This step sets the foundation for a dish that balances crunch with juicy tenderness.
- Step 2: Sear the Meat. Heat a large skillet over medium‑high heat and add 1 tablespoon of oil. Once the oil shimmers, add the pork belly cubes in a single layer. Let them sear untouched for 2–3 minutes until the bottom is golden brown; do not stir yet. This “no‑move” technique allows the fat to render and the surface to develop a crisp crust. Flip the pieces and sear the other side for another 2 minutes. The result should smell toasty, like a caramelized sugar glaze.
- Step 3: Add Aromatics. Reduce the heat to medium, then add the minced garlic and finely chopped onions. Sauté until the onions become translucent and begin to brown, about 4–5 minutes. The garlic should release its aroma without burning; watch the color change to a golden amber. This caramelization brings out natural sugars that deepen the flavor profile and add a subtle sweetness to the dish.
- Step 4: Introduce the Liver. Toss in the diced pork liver, stirring gently to mix with the aromatics. The liver will cook quickly—about 2 minutes—so keep an eye on it. If you notice any excess liquid, let it evaporate to prevent a soggy texture. The liver should remain tender and slightly pink, adding a velvety richness to the overall dish.
- Step 5: Build the Sauce. Pour in the soy sauce, calamansi juice, and brown sugar. Stir until the sugar dissolves and the mixture begins to thicken slightly. Add the vinegar to cut through the richness; the combination should form a glossy, slightly caramelized sauce that clings to the meat. Taste and adjust the seasoning—if it’s too salty, add a splash of water; if it’s too tart, a pinch more sugar can balance it out.
- Step 6: Add Heat. Sprinkle in the chili flakes or minced fresh chili. The heat should be noticeable but not overpowering; you want a gentle warmth that lingers on the palate. Stir to combine, ensuring the chili is evenly distributed. This step introduces a subtle kick that elevates the dish from ordinary to unforgettable.
- Step 7: Finish the Crispy. Increase the heat back to medium‑high, allowing the sauce to reduce until it coats the pork and liver. The edges of the pork should start to blister and become crisp, releasing a satisfying crackle when you stir. Watch for the moment when the sauce thickens to a syrupy glaze; this is the sweet spot where flavor and texture converge. Let the mixture simmer for 3–4 minutes, stirring occasionally to prevent sticking.
- Step 8: Final Touches. Remove the skillet from heat and stir in the fresh cilantro, green onions, and toasted sesame seeds. The herbs add a burst of freshness that cuts through the richness, while the sesame seeds provide a nutty crunch. Taste one final time; the dish should have a balanced harmony of sweet, salty, sour, and spicy notes. Serve immediately over steamed rice or as a standalone appetizer for a dramatic presentation.
That's it— you did it. But hold on, I've got a few more tricks that'll take this to another level…
Insider Tricks for Flawless Results
The Temperature Rule Nobody Follows
Many cooks believe that a lower heat is best for searing, but this dish thrives on medium‑high heat. The higher temperature ensures the pork fat renders quickly, creating a crispy exterior while keeping the interior juicy. If your stove runs hot, keep the pan uncovered to allow excess moisture to evaporate; this prevents steaming and guarantees a crisp finish.
Why Your Nose Knows Best
Before you add the final splash of calamansi, pause and sniff the sauce. If it smells like sweet caramel and slightly sour citrus, you’re on the right track. Your nose can detect when the balance is off—too much salt, too little acidity—and you can adjust in real time. This sensory check saves you from a dish that might otherwise feel flat or overpowering.
The 5‑Minute Rest That Changes Everything
Once you’ve finished cooking, let the sisig rest for five minutes off the heat. This brief pause allows the flavors to meld, and the residual heat continues to crisp the edges. During this time, the sauce thickens slightly, creating a richer coating that sticks to each bite. Skipping this step often results in a dish that feels underdeveloped.
The Quick Chill for Make‑Ahead
If you’re preparing the dish in advance, let it cool to room temperature, then refrigerate in an airtight container. When reheating, add a splash of water or broth and gently steam it over low heat; this restores moisture and prevents the pork from drying out. The result is a dish that tastes as fresh as the day it was made.
The Secret of the Final Crunch
To achieve the ultimate crunch, finish the pork in the pan for an extra 2 minutes after the sauce has thickened. This second sear allows the exterior to become blistered and golden while the interior remains tender. If you prefer a less intense crunch, simply skip this step and enjoy a more tender texture.
Creative Twists and Variations
This recipe is a playground. Here are some of my favorite ways to switch things up:
Spicy Kimchi Sisig
Swap the fresh chili for a tablespoon of chopped kimchi. The fermented tang adds depth and a subtle heat that pairs beautifully with the pork. Garnish with extra green onions for an authentic Korean twist.
Coconut‑Infused Sisig
Add a splash of coconut milk to the sauce for a creamy, tropical flavor profile. The coconut balances the sharpness of the calamansi, creating a silky sauce that coats the pork with a subtle sweetness.
Smoky BBQ Sisig
Incorporate a tablespoon of smoky BBQ sauce into the sauce mixture. The smoky undertone complements the pork’s natural richness and adds a new layer of complexity that feels like a backyard cookout.
Vegetarian Version
Replace pork with marinated tofu cubes and use soy sauce, tamari, and a splash of rice vinegar. The tofu will absorb the sauce, delivering a hearty, plant‑based alternative that still delivers the same crispy, savory experience.
Herb‑Infused Sisig
Add fresh rosemary or thyme to the aromatics. The herbal notes elevate the dish’s aroma and add a fragrant, earthy dimension that pairs wonderfully with the pork.
Sweet‑and‑Sour Twist
Introduce a tablespoon of pineapple juice and a pinch of ginger. The sweet pineapple balances the heat, while the ginger adds a bright, zesty kick that transforms the dish into a tropical delight.
Storing and Bringing It Back to Life
Fridge Storage
Store leftover sisig in an airtight container in the refrigerator for up to 3 days. The crispness may diminish slightly, but the flavor remains robust. When ready to reheat, place the sisig in a skillet over medium heat, stirring until warmed through.
Freezer Friendly
For longer storage, freeze the sisig in a freezer‑safe container for up to 2 months. Thaw overnight in the refrigerator, then reheat in a skillet as described above. The texture may be slightly softer, but the taste stays true to the original.
Best Reheating Method
Add a splash of water or broth before reheating to create steam that restores moisture. Cover the skillet for a minute to trap the steam, then remove the lid to allow the sauce to thicken again. This technique brings the dish back to its original, mouth‑watering state.