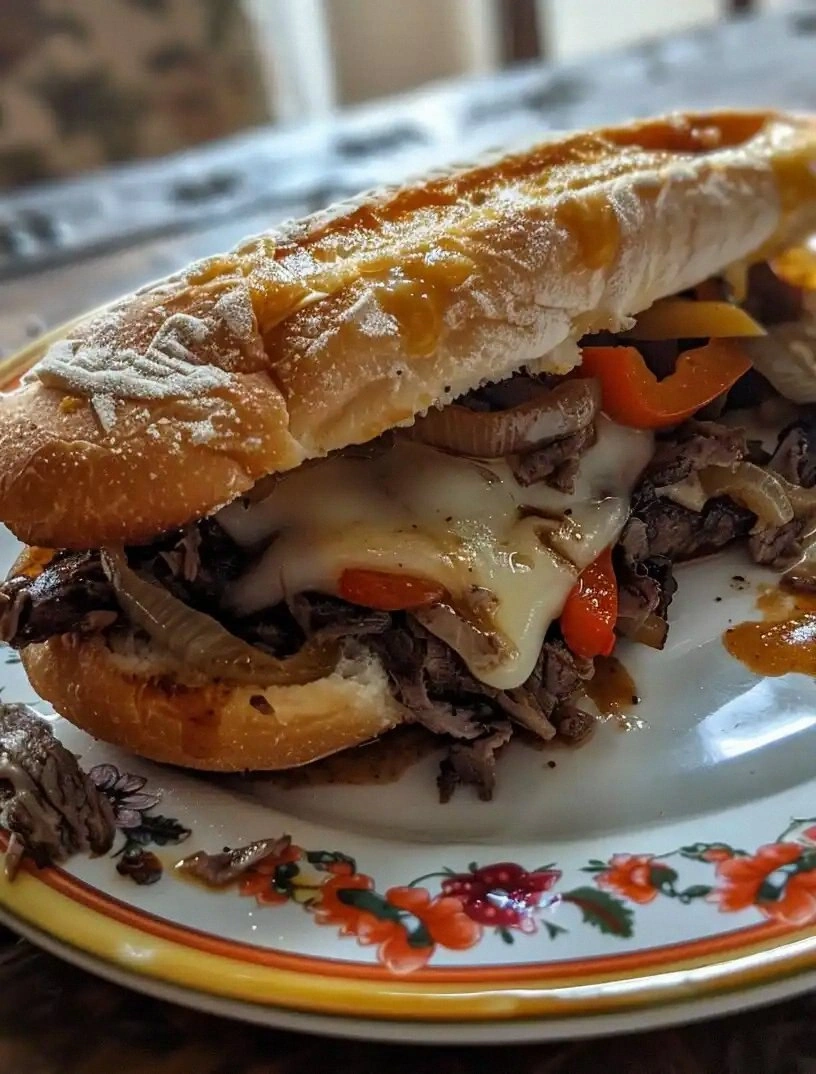
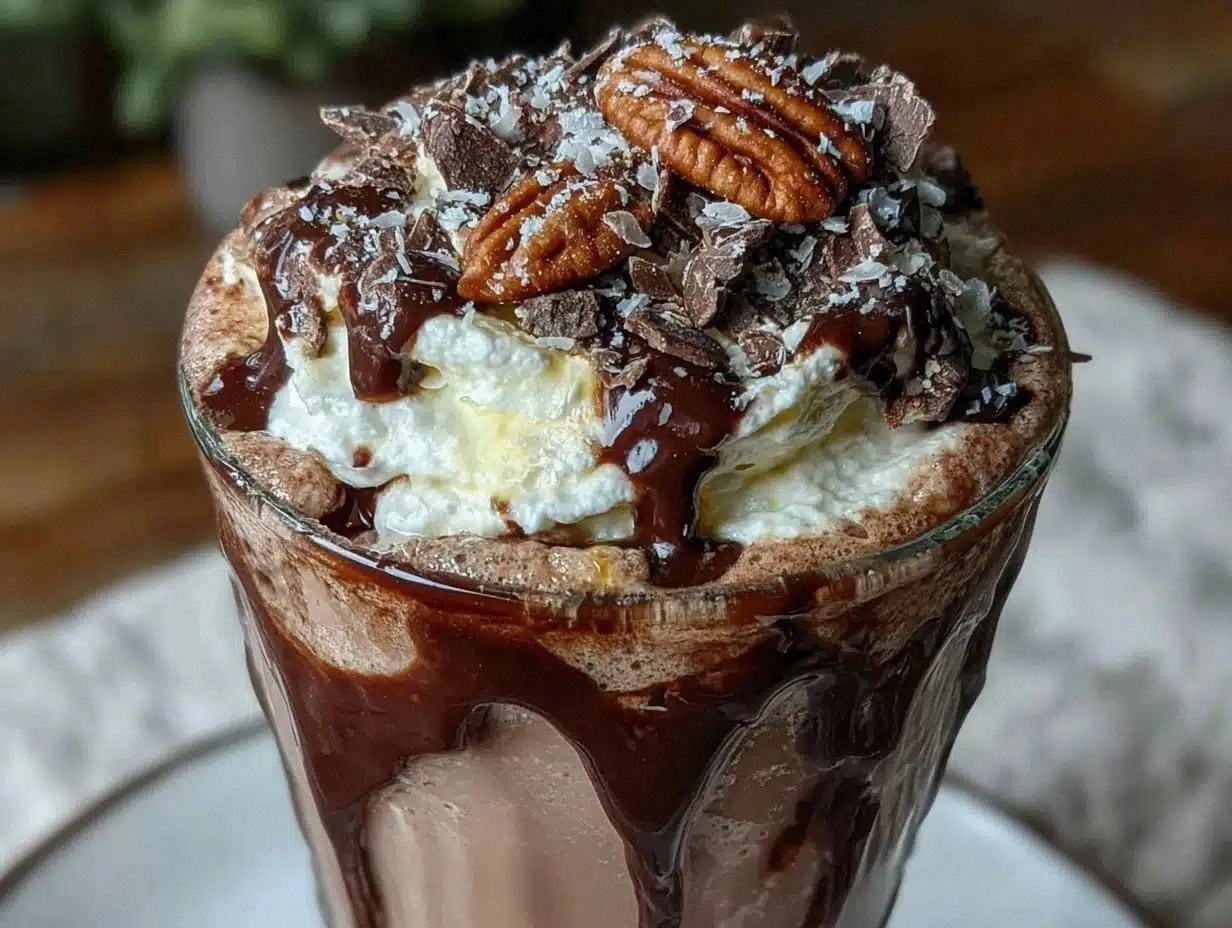
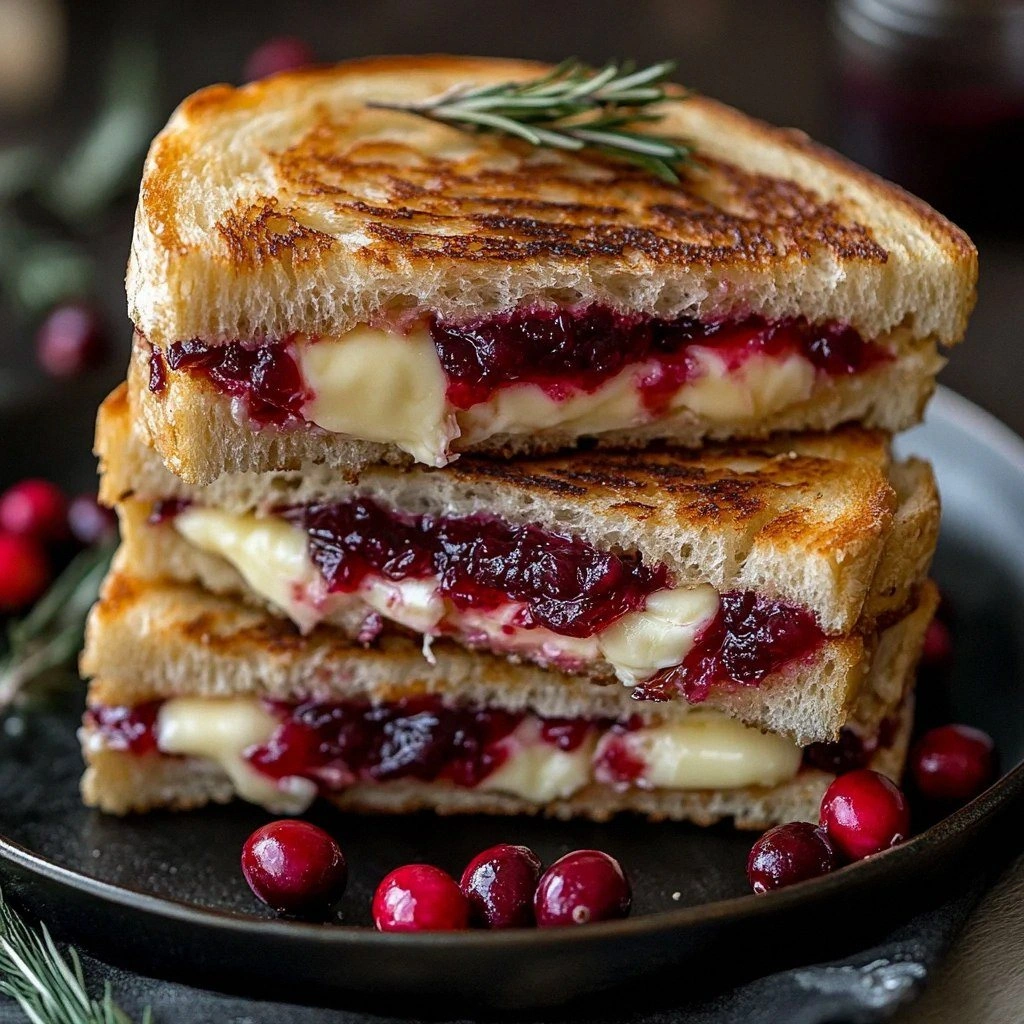
I burned my first attempt at this sandwich so badly that the smoke alarm became my unofficial kitchen timer. There I was, standing in a cloud of charred bread smoke, waving a dish towel like a maniac while my cat glared at me from the hallway. But here's the thing — that disastrous first try taught me exactly what not to do, and led me to create what might be the most addictive grilled cheese variation known to humanity. The combination of tangy cranberry sauce melting into creamy brie and stretchy mozzarella, all tucked between perfectly golden, buttery bread, creates something that defies all grilled cheese logic.
Picture this: it's 11:47 PM on a Tuesday, you're in your pajamas, and suddenly you need something that hits every comfort food note simultaneously. Not just cheese, but the right cheese. Not just bread, but the perfect vehicle for catching every drip of molten goodness. This sandwich was born from those late-night cravings that refuse to be ignored, the ones that send you rummaging through the refrigerator like a raccoon with a gourmet palate. The first time I nailed this recipe, I stood over the stove eating it straight from the pan, burning my tongue because patience is apparently not my strong suit when faced with cheese pulls that could stretch to the moon.
What makes this version different from every other cranberry grilled cheese floating around the internet? I started with the cheese ratio — most recipes get this completely wrong, using either too much brie (which turns into a puddle of oil) or not enough mozzarella (missing those Instagram-worthy cheese pulls). Then there's the cranberry component — we're not just slapping on some jelly here. We're creating a balanced layer that cuts through the richness while adding a bright pop of flavor that makes your taste buds do a happy dance. The bread choice matters more than you'd think, and the cooking method? Pure magic once you understand the science.
Stay with me here — this is worth it. By the time we're done, you'll understand exactly why that first bite makes people close their eyes involuntarily, why the combination of these specific cheeses creates a flavor profile that's somehow both sophisticated and completely approachable, and why this might just become your new favorite way to impress dinner guests without breaking a sweat. Let me walk you through every single step — by the end, you'll wonder how you ever made it any other way.
What Makes This Version Stand Out
The Cheese Trinity: Most recipes throw random cheeses together and hope for the best. This combination uses brie for its luxurious creaminess, mozzarella for those impossible cheese stretches, and a touch of aged cheddar in the mix for depth. The ratio is 2:1:1 — mozzarella for structure, brie for richness, cheddar for character. Get this wrong and you've got either a greasy mess or a rubbery disappointment.
Temperature Precision: Here's what actually works — low and slow melting, not the high-heat panic method that leaves you with burnt bread and cold cheese centers. We're talking medium-low heat for 6-8 minutes per side, creating an even melt that transforms the interior into molten gold. Most people rush this part and wonder why their cheese hasn't melted while their bread resembles charcoal.
The Cranberry Layer Technique: Instead of just spreading sauce, we create a cranberry "butter" by mixing it with a touch of cream cheese. This prevents the bread from getting soggy while distributing the tart-sweet flavor evenly throughout each bite. It's a game-changer that prevents those disappointing cranberry-less corners.
Butter vs. Mayo Debate Settled: I tested both extensively — butter gives better flavor, mayo gives better browning. The solution? A 70/30 mix of butter to mayo on the exterior creates the ultimate golden crust with rich flavor. This next part? Pure magic.
The Compression Method: Using a cast-iron skillet with another heavy pan on top creates the perfect press, ensuring maximum surface contact and even cooking. Without this, you're gambling with hot spots and uneven melting. Picture yourself pulling this out of the pan, the whole kitchen smelling incredible, that first cut revealing the cheese cascade.
Make-Ahead Marvel: These sandwiches can be assembled up to 24 hours ahead and stored between parchment paper in the refrigerator. When you're ready to cook, they go straight from fridge to pan with just an extra minute of cooking time. Future pacing at its finest — imagine having these ready for a party without any last-minute stress.
The Crowd Reaction Factor: I dare you to taste this and not go back for seconds. Every time I serve these at gatherings, people hover around the kitchen asking when the next batch will be ready. The combination feels fancy enough for adult palates but familiar enough for picky eaters. I'll be honest — I ate half the batch before anyone else got to try it during my last dinner party.
Inside the Ingredient List
The Flavor Base
The cranberry sauce is where most people go wrong — they grab the jellied can stuff and wonder why their sandwich tastes like Thanksgiving leftovers. You need whole berry cranberry sauce, the kind with actual fruit pieces that provide pops of tart brightness against the rich cheese. The quality matters here because it's carrying a lot of flavor weight. If you can't find good whole berry sauce, grab some fresh or frozen cranberries and make a quick compote with orange zest and a touch of honey. The difference between decent and mind-blowing lives in this one ingredient choice.
Brie selection trips up even experienced cooks — too young and it melts into oil, too ripe and it overpowers everything with ammonia notes. Look for a brie that's got some give when pressed but isn't bulging at the sides. The rind should be white and fuzzy, not brown or slimy. If you've ever struggled with brie that tastes like you're licking a barnyard, you're not alone — and I've got the fix. Buy it a week before you need it, let it ripen in your fridge, and bring it to room temperature before using.
The Texture Crew
Mozzarella is the unsung hero here — not the fresh water-packed variety that'll make your bread soggy, but low-moisture part-skim that gives structure and those impossible cheese stretches. The part-skim version has better melting properties than whole milk mozzarella, creating that perfect gooey texture without excess oil. Cube it small so it distributes evenly and melts quickly, preventing the dreaded cheese core surrounded by unmelted shreds. This is the temperature rule nobody follows — cold cheese won't melt properly in the time it takes to toast bread.
The bread choice will make or break your sandwich structure. You need something sturdy enough to hold molten cheese without falling apart, but not so dense that it overpowers the filling. Sourdough provides the perfect tangy counterpoint to rich cheese, while its open crumb structure creates pockets for the cranberry sauce to nestle into. Avoid soft sandwich bread — it'll turn to mush and make you question your life choices. If you've ever had a grilled cheese fall apart in your hands, you know exactly why structural integrity matters.
The Unexpected Star
Here's where we get a little wild — a whisper of fresh thyme between the cheese layers adds an herbal note that makes people ask "what is that amazing flavor?" without being able to place it. The trick is using just enough to intrigue, not overwhelm. One sprig, leaves stripped and scattered, is all you need. This next part? Pure magic. The thyme's earthiness bridges the gap between the sweet-tart cranberry and the rich cheese, creating a three-part harmony that tastes like it took hours to achieve.
Butter quality matters more than you'd think — European-style butter with higher fat content creates a richer flavor and better browning. The cultured butter adds a slight tang that complements the brie beautifully. If you're using standard American butter, add a pinch of salt to compensate for the lower sodium content. Salted butter gives better flavor than unsalted here because the salt helps develop the Maillard reaction that creates golden-brown deliciousness.
The Final Flourish
Aged cheddar might seem like overkill with brie and mozzarella already in play, but hear me out — just a whisper of sharp cheddar adds depth and prevents the sandwich from tasting one-dimensional. Use a good quality white cheddar, aged at least 12 months, and grate it fine so it melts seamlessly into the mix. Without this, you've got a very good grilled cheese. With it, you've got something that makes grown adults close their eyes when they take the first bite.
Everything's prepped? Good. Let's get into the real action...
The Method — Step by Step
- Start with room temperature ingredients — this is the temperature rule nobody follows, but it makes all the difference. Pull your cheeses out 30 minutes before you start cooking. Cold cheese won't melt evenly, leaving you with hot bread and a cold, rubbery center. While you're waiting, mix your cranberry sauce with one tablespoon of cream cheese until it forms a spreadable consistency. This prevents the bread from getting soggy and helps the cranberry flavor distribute evenly instead of pooling in one spot.
- Now watch this part closely — we're building layers strategically, not just throwing stuff together. Lay out four slices of sourdough and spread a thin layer of the cranberry cream cheese mixture on each. You want coverage but not thickness, think of it like applying paint to a wall. Too much and it'll squeeze out the sides when you press the sandwich, too little and you'll miss that bright contrast we're after. The layer should be just thick enough that you can't see the bread through it but thin enough that it doesn't overwhelm the cheese.
- Time for the cheese architecture — and this next part? Pure magic. Tear the brie into small pieces and distribute it evenly over the cranberry layer, keeping it about 1/4 inch from the edges. The brie will act as your melting base, creating that luxurious texture we're after. Follow with a light sprinkle of the aged cheddar — just enough to add depth without competing with the brie. Finally, add your mozzarella cubes, spreading them so they'll melt into every nook and cranny. This layering technique ensures every bite has the perfect ratio of flavors.
- Top with the remaining bread slices and press gently — you're not making panini here, just encouraging everything to stick together. The 5-minute rest that changes everything happens now. Let the assembled sandwiches sit while you prepare your cooking surface. This brief rest allows the bread to absorb just enough moisture from the fillings to prevent it from drying out, but not so much that it gets soggy. Most recipes get this completely wrong and have you cooking immediately, which is why their sandwiches fall apart.
- Heat your cast-iron skillet over medium-low heat — and now the fun part begins. While it's heating, mix your softened butter with the mayonnaise until completely combined. This 70/30 ratio gives you the flavor of butter with the superior browning properties of mayo. Spread this mixture on the outside of your sandwiches, going all the way to the edges. Don't walk away from the stove here — cast iron holds heat so well that it can go from perfect to burnt in the time it takes to check your phone.
- Place your sandwiches in the preheated pan and immediately cover with another heavy pan or a sheet of foil topped with a cast-iron weight. This compression method ensures maximum surface contact and even cooking. You should hear a gentle sizzle, not an aggressive hiss — if it's sizzling too loudly, your heat is too high and you'll burn the outside before the inside melts. That sizzle when it hits the pan? Absolute perfection. Cook for 6-8 minutes on the first side, resisting the urge to peek too often.
- The moment of truth comes when you check the underside — it should be golden brown with darker caramelized patches where the cheese has melted against the bread. Flip carefully using a wide spatula and your hand for support, keeping everything together. Press down gently with your spatula to ensure good contact, then cover again. This side usually cooks faster, so start checking after 5 minutes. The cheese should be visibly melted through the bread, and the sandwich should feel soft and yielding when pressed.
- Remove to a cutting board and here's what actually works — let it rest for exactly 2 minutes before cutting. I know, I know, you want to dive in immediately. But this brief rest allows the cheese to set slightly, preventing it from oozing out completely when you cut. The contrast between the crispy exterior and the molten interior is what makes this sandwich legendary. Cut on a diagonal because we're not monsters, and serve immediately while the cheese is still lava-hot and stretchy.
- The final flourish happens tableside — a light sprinkle of fresh thyme leaves over the cut surface adds color and that mysterious flavor that makes people ask for your secret. Serve with extra cranberry sauce on the side for those who like it fruitier, and watch as everyone experiences that moment of silence that comes when something is too good for words. That's it — you did it. But hold on, I've got a few more tricks that'll take this to another level...
Insider Tricks for Flawless Results
The Temperature Rule Nobody Follows
Room temperature isn't just a suggestion — it's the difference between success and a cheese disaster that'll have you ordering pizza in defeat. When cheese is cold, the proteins are tight and won't melt smoothly, leaving you with hot bread and a rubbery cheese center. But here's the thing that'll blow your mind: different cheeses need different approaches. Brie should be soft and yielding, mozzarella should be cool but not cold, and your cheddar should be just slightly warmer than fridge temp. A friend tried skipping this step once — let's just say it didn't end well, and she ended up with what we now call "deconstructed grilled cheese soup."
Why Your Nose Knows Best
Your sense of smell is your most underrated kitchen tool for this recipe. When the sandwich is perfectly cooked, you'll smell butter turning nutty and the sweet-tart aroma of cranberry caramelizing. If you smell burning, you've gone too far. If you don't smell anything, your heat is too low and you're essentially steaming your sandwich. The 5-minute rest that changes everything also applies to your nose — step away for a moment and when you return, the aroma should hit you like a warm hug. This sensory checkpoint prevents more overcooked sandwiches than any timer ever could.
The 5-Minute Rest That Changes Everything
After cooking but before cutting, this rest period is where the magic happens. The cheese, which has been molten and unstable, begins to set just enough to stay in place when you cut. But here's what actually works — place it on a wire rack instead of a plate. A plate traps steam underneath, making the bottom soggy. A wire rack allows air circulation, keeping that crispy crust you worked so hard to achieve. The sandwich will still be hot and melty inside, but the structure will be sound. Skip this rest and you'll have cheese lava all over your cutting board instead of in your sandwich where it belongs.
The Compression Secret
That second pan on top isn't just for show — it's creating the perfect environment for even melting. The weight should be substantial enough to compress the sandwich but not so heavy that it squeezes all the filling out. I use another cast-iron skillet, but a heavy Dutch oven lid works too. The key is consistent, gentle pressure that ensures every part of the bread touches the pan surface. Without this, you get hot spots and unmelted cheese corners that'll make you weep with frustration. The compression also creates those gorgeous crispy edges that shatter like thin ice when you bite into them.
Timing Is Everything
Start your second sandwich when the first one is resting, not when you're still cooking the first. The pan will be perfectly heated and seasoned from the first sandwich, creating an even better crust on subsequent batches. If you're making multiple sandwiches for a crowd, keep the finished ones on a wire rack in a 200°F oven. This keeps them warm and crispy without steaming them soft. Most recipes get this completely wrong and have you stacking them on plates, creating a pile of soggy disappointment that nobody wants to eat.
Creative Twists and Variations
This recipe is a playground. Here are some of my favorite ways to switch things up:
The Thanksgiving Leftover
Add a thin layer of sliced turkey and a whisper of sage to transform this into the ultimate post-holiday sandwich. The turkey adds protein and a savory note that makes this feel like a complete meal instead of just indulgence. Use leftover cranberry sauce from your holiday meal — the spices already in it add depth you can't get from the canned stuff. This variation became so popular in my house that we now make extra cranberry sauce just for these sandwiches throughout the year.
The French Onion Upgrade
Caramelize some onions until they're jammy and sweet, then layer them between the brie and mozzarella. The onions add a savory-sweet complexity that makes this taste like French onion soup in sandwich form. Add a splash of sherry to the onions while they're cooking for extra sophistication. I dare you to taste this version and not go back for thirds — yes, thirds, because seconds will disappear before you know what happened.
The Breakfast of Champions
Add a fried egg with a runny yolk to the center before the final compression. When you cut into the sandwich, the yolk creates a sauce that takes everything to another level. The key is frying the egg until the whites are set but the yolk is still jiggly — it'll finish cooking from the residual heat. Serve this with strong coffee and prepare for the best morning of your life. If you've ever struggled with breakfast sandwiches that are either too dry or fall apart, this technique solves both problems.
The Spicy Sweet Heat
Add a thin layer of jalapeño jelly or a few slices of fresh jalapeño to create a sweet-heat combination that's completely addictive. The spice cuts through the richness while complementing the sweet-tart cranberry. Remove the seeds and membranes if you want flavor without the fire, or leave them in if you're feeling brave. This version pairs beautifully with a cold beer and has become my go-to for game day gatherings where people expect the usual boring snacks.
The Apple Orchard
Thin slices of crisp apple add texture and a fresh sweetness that brightens the whole sandwich. Use a tart variety like Granny Smith or Honeycrisp — sweet apples make the sandwich too sugary. Cut them paper-thin so they warm through but stay crisp. The apple's acidity works with the cranberry to create a bright counterpoint to all that rich cheese. This variation feels surprisingly light despite being loaded with dairy.
The Truffle Shuffle
A few drops of truffle oil mixed into your butter spread elevates this from comfort food to restaurant-quality indulgence. Use white truffle oil sparingly — a little goes a long way and too much will overpower everything. Mix it with the butter before spreading so it distributes evenly. This version is perfect for when you want to impress dinner guests but don't want to spend hours cooking. The truffle aroma as it melts will have people asking if you hired a private chef.
Storing and Bringing It Back to Life
Fridge Storage
Assembled but uncooked sandwiches keep beautifully for up to 24 hours when wrapped tightly in plastic wrap and stored between sheets of parchment paper. The key is preventing air exposure that can dry out the bread and make the cheese rubbery. Layer them in a single layer if possible — stacking creates pressure that can squeeze out the filling. If you need to store cooked sandwiches, let them cool completely before wrapping, then refrigerate for up to 3 days. The texture won't be quite the same, but they reheat better than you'd expect with the right technique.
Freezer Friendly
These sandwiches freeze remarkably well when assembled but not cooked. Wrap each one individually in plastic wrap, then aluminum foil, and freeze for up to 2 months. The trick is letting them thaw in the refrigerator overnight before cooking — don't try to cook from frozen or you'll have burnt bread and cold cheese centers. Add a tiny splash of water before reheating — it steams back to perfection. Frozen sandwiches actually work great for camping trips or quick weeknight dinners when you want something special without the effort.
Best Reheating Method
Forget the microwave — it turns the bread to rubber and the cheese to oil. Instead, use a dry skillet over medium-low heat, covering with a lid to trap steam and help the cheese remelt. Add a teaspoon of water to the pan before covering to create a gentle steaming effect that refreshes the bread while melting the cheese. This method takes about 5 minutes per side and gives you results remarkably close to fresh. If you're reheating multiple sandwiches, the oven works too — 350°F for 8-10 minutes on a wire rack, covered loosely with foil to prevent over-browning.