Picture this: I’m standing in my kitchen, a half‑finished batch of cookie dough clinging to the counter, the smoke alarm chirping like an over‑enthusiastic cheerleader, and a sudden craving for something that could make a grown‑up weep with joy. I’d just tried to “improve” a classic cheesecake by swapping the graham cracker crust for a pretzel‑infused version, and the result was, well, a crunchy disappointment. In that chaotic moment, a friend dared me to create a dessert that could tame the wildest sweet tooth while still feeling sophisticated enough for a dinner party. I laughed, I accepted, and the universe responded with a box of Biscoff cookies that smelled like a Belgian bakery on a rainy day.
The moment those spiced, caramel‑kissed cookies hit the floor, I knew I was onto something. The scent of cinnamon, nutmeg, and a whisper of ginger swirled around the kitchen, making my nose do a little happy dance. I could already hear the faint crackle of the crust forming, the silky whisper of cream cheese meeting sugar, and the soft sigh of heavy cream as it folded into the mixture. My hands tingled with anticipation, and the whole room seemed to pulse with the promise of a dessert that would be both comforting and unforgettable. I could almost taste the buttery crunch of the crust melting into the velvety filling, and then—boom—a rush of salted caramel that would hit the palate like a perfectly timed drumroll.
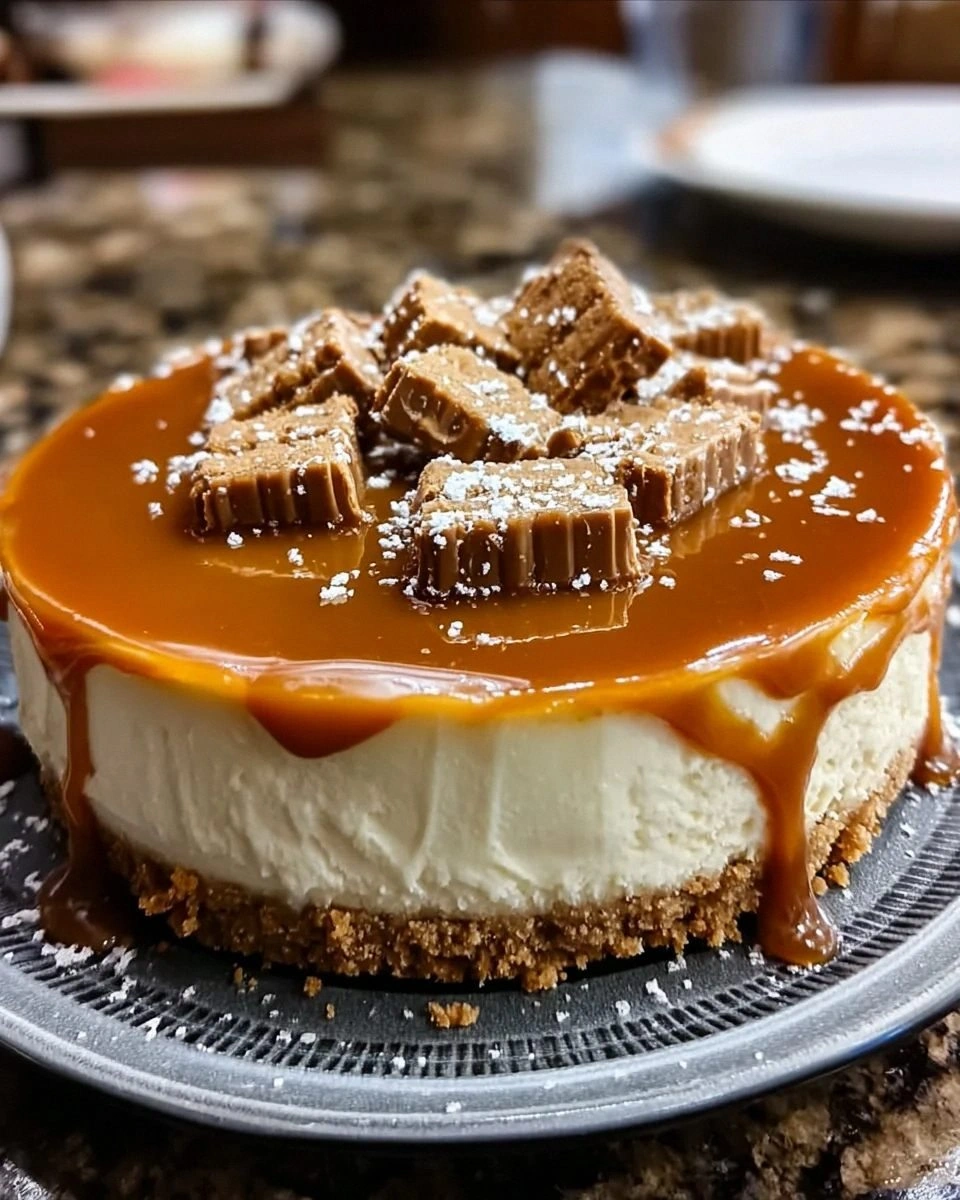
Most cheesecake recipes either drown in a sea of blandness or get lost in a swamp of overly sweet toppings. This version, however, is the love child of a classic New York cheesecake and a Biscoff‑infused dream, with a salted caramel drizzle that sings a sweet‑and‑salty duet. The secret? A crust made entirely from crushed Biscoff cookies, a buttery binder that holds everything together, and a filling that sneaks in a spoonful of Biscoff spread for that extra depth of flavor. The result is a cheesecake that’s creamy, crunchy, and just the right amount of caramel‑laden—hand‑crafted, yet deceptively simple.
And here’s the kicker: I’m about to reveal a technique that most recipes completely skip—the “water‑bath steam lock.” This method keeps the cheesecake from cracking, ensures an ultra‑smooth texture, and gives the top a subtle sheen that looks restaurant‑ready. I dare you to taste this and not go back for seconds. Okay, ready for the game‑changer? Let me walk you through every single step — by the end, you’ll wonder how you ever made it any other way.
What Makes This Version Stand Out
- Flavor Fusion: The sweet, spiced notes of Biscoff cookies mingle with the buttery richness of the crust, while the salted caramel topping adds a sophisticated contrast that elevates the entire bite.
- Texture Symphony: You get a crunchy, buttery base, a luxuriously smooth filling, and a glossy caramel drizzle that creates a mouthfeel you’ll want to replay over and over.
- Simplicity Meets Elegance: Only nine ingredients, yet each one is used to its fullest potential, meaning you spend less time hunting pantry items and more time admiring the final masterpiece.
- Unique Ingredient Star: Biscoff spread in the filling is optional but transforms the cheesecake from good to unforgettable, adding a caramel‑like depth that ordinary cream cheese can’t achieve.
- Crowd‑Pleaser Factor: Whether it’s a family dinner, a holiday gathering, or a casual brunch, this cheesecake consistently earns rave reviews and empty plates.
- Make‑Ahead Magic: The water‑bath method lets you bake it ahead of time, refrigerate, and still achieve a perfect texture when you finally serve it.
- Ingredient Quality Pays Off: Using genuine Biscoff cookies and a high‑quality salted caramel sauce makes every bite feel premium without breaking the bank.
- Season‑Proof: This dessert shines year‑round, but its warm spices make it especially comforting in cooler months.
Inside the Ingredient List
The Flavor Base
Biscoff Cookies: These sweet, spiced cookies form the crust, adding a delightful crunch and unique flavor. Their caramel‑like notes lay the foundation, and the subtle hints of cinnamon and ginger keep the palate intrigued. Skipping them means losing that signature aroma that makes this cheesecake instantly recognizable. If you can’t find Biscoff, try speculoos or a ginger snap alternative, but know you’ll miss the authentic depth.
The Texture Crew
Cream Cheese: The star of the filling! It brings that rich, velvety texture, making each slice creamy and smooth. Using full‑fat cream cheese is non‑negotiable; low‑fat versions turn the filling gummy. Make sure it’s softened to room temperature—cold cheese will clump and ruin the silky consistency.
Granulated Sugar: A touch of sweetness balances the flavors and helps in achieving that perfect cheesecake texture. It also assists in the emulsification of the cream cheese and eggs. If you prefer a less sweet profile, you can reduce by up to ¼ cup without compromising structure.
Eggs: These bind everything together and add a fluffy lift when combined with the other ingredients. Over‑beating can incorporate too much air, leading to cracks; under‑mixing leaves a grainy texture. Beat just until the mixture looks homogenous and glossy.
Heavy Cream: This richness elevates the filling, providing an indulgent mouthfeel that you’ll crave. It also helps prevent the cheesecake from becoming overly dense. For a lighter version, substitute half with whole milk, but expect a slightly less luxurious texture.
Vanilla Extract: Just a splash of this enhances the overall flavor and adds warmth to the cheesecake. Opt for pure vanilla; imitation can introduce a harsh aftertaste that clashes with the Biscoff notes.
The Unexpected Star
Biscoff Spread (optional): If you want to amplify the flavor, adding this spread to the filling is a delicious boost! It deepens the caramel undertones and adds a subtle buttery finish. Even a half‑cup can make a noticeable difference; skip it only if you’re watching sugar intake.
The Final Flourish
Salted Caramel Sauce: A glorious topping that brings a sweet and salty contrast, making each bite a taste sensation! Drizzle it liberally over the chilled cheesecake, and watch it pool into the cracks, creating a glossy river of decadence. If you’re feeling adventurous, swirl it into the filling before baking for a marbled effect.
Melted Butter: This helps bind the Biscoff crumbs together for a sturdy crust, ensuring it holds up under the creamy layer. Use unsalted butter so you can control the salt level in the caramel topping.
Everything's prepped? Good. Let's get into the real action…
The Method — Step by Step
Preheat your oven to 325°F (163°C). While the oven warms, line the bottom of a 9‑inch springform pan with parchment paper. This prevents the crust from sticking and makes removal painless. I like to set a timer for 10 minutes so the oven reaches a steady temperature before the crust goes in.
Crush 2 cups of Biscoff cookies into fine crumbs—think sand, not paste. Toss the crumbs with 5 tablespoons of melted butter until every speck glistens. Press the mixture firmly into the pan, creating an even layer about ¼ inch thick. Power transition: this is the foundation; don’t rush it.
Kitchen Hack: Use the bottom of a measuring cup to press the crust evenly; it gives you a perfectly flat surface without a spatula.Place the crust in the oven for 8‑10 minutes, just until it sets and starts to turn a light golden hue. You’ll hear a faint sizzle—“that’s the sound of a solid base,” as I like to call it. Remove and let it cool while you whip the filling.
In a large mixing bowl, beat 24 oz (about 3 packages) of softened cream cheese until smooth—no lumps, no bumps. Add 1 cup granulated sugar and continue beating until the mixture is light and fluffy, resembling a cloud that’s just about to rain flavor.
Crack in 3 large eggs, one at a time, beating gently after each addition. This slow incorporation prevents air pockets that could cause cracks later. Then pour in ½ cup heavy cream and 2 teaspoons vanilla extract; mix just until combined. If you’re using the optional Biscoff spread, fold in ½ cup now, letting it melt into the batter like a sweet secret.
Watch Out: Over‑mixing at this stage can incorporate too much air, leading to a cracked top. Stop mixing as soon as the batter looks glossy.Pour the silky filling over the pre‑baked crust, smoothing the top with a spatula. Tap the pan lightly on the counter three times to release any trapped bubbles. This is the moment of truth—if you hear a gentle “pop,” you’ve done it right.
Wrap the springform pan tightly in aluminum foil—this is the water‑bath “steam lock.” Place the pan inside a larger roasting pan, then pour hot water until it reaches halfway up the side of the springform. Slide the whole assembly into the oven and bake for 45‑50 minutes. The edges should look set while the center still has a slight wobble, like gelatin that’s just about to set.
Kitchen Hack: Use a kitchen torch to lightly brown the top after baking for an extra caramelized layer—optional but impressive.Turn off the oven, crack the door open a crack, and let the cheesecake sit for 1 hour. This gradual cooling prevents sudden temperature changes that cause cracks. After the hour, remove the foil, let the pan cool to room temperature, then refrigerate for at least 4 hours—or overnight for best results.
When you’re ready to serve, drizzle a generous amount of salted caramel sauce over the chilled cheesecake, allowing it to cascade down the sides. For an extra touch, sprinkle a pinch of flaky sea salt on top. Slice with a hot knife (dip it in hot water, wipe dry) to get clean, picture‑perfect wedges.
That's it — you did it. But hold on, I've got a few more tricks that'll take this to another level…
Insider Tricks for Flawless Results
The Temperature Rule Nobody Follows
Never bake a cheesecake straight from the fridge. Let all dairy components sit at room temperature for at least 30 minutes. This ensures a uniform batter that won’t seize up mid‑bake. I once tried to skip this step; the result was a lumpy, uneven texture that tasted like a cheese factory mishap.
Why Your Nose Knows Best
During the water‑bath bake, trust your sense of smell. When you detect a faint caramel aroma and the edges start to pull away from the pan, you’re at the perfect point of doneness. Relying solely on timers can lead to over‑baking, which creates that dreaded crack.
The 5‑Minute Rest That Changes Everything
After removing the cheesecake from the oven, let it rest in the turned‑off oven with the door ajar for exactly 5 minutes. This short “rest” lets the residual heat finish setting the center without shocking the structure. It’s a tiny step that yields a dramatically smoother slice.
Water‑Bath Seal Secrets
Make sure the foil wrap is airtight. Any steam escaping will cause the water level to drop, exposing the cheesecake to direct oven heat and risking cracks. I once used a loosely wrapped pan and ended up with a cracked top that looked like a broken mirror.
Caramel Swirl Magic
If you want a marbled effect, gently swirl half of the salted caramel sauce into the filling just before baking. Use a thin skewer to create elegant ribbons. This not only looks stunning but also distributes the salty sweetness throughout every bite.
Creative Twists and Variations
This recipe is a playground. Here are some of my favorite ways to switch things up:
Chocolate‑Covered Biscoff
Stir ¼ cup melted dark chocolate into the crust mixture for a mocha‑kissed base. Top with a drizzle of chocolate ganache alongside the salted caramel for a double‑decadent finish. Chocolate lovers will swear it’s a match made in dessert heaven.
Espresso Infusion
Add 1 tablespoon of instant espresso powder to the filling. The coffee notes amplify the caramel’s bitterness, creating a sophisticated flavor profile reminiscent of a tiramisu‑cheesecake hybrid.
Nutty Crunch
Fold in ½ cup toasted chopped hazelnuts or pecans into the crust before baking. The nuts add a buttery crunch that contrasts beautifully with the smooth filling, and they bring an extra layer of aroma.
Fruit‑Forward
Top the chilled cheesecake with a thin layer of raspberry coulis and a few fresh berries. The tartness cuts through the richness, making each bite feel lighter while still indulgent.
Vegan Adaptation
Swap cream cheese for a vegan cream cheese alternative, use coconut cream instead of heavy cream, and replace the butter with coconut oil. The Biscoff cookies remain the star, and the result is a plant‑based version that still dazzles.
Spiced Autumn
Mix ½ teaspoon pumpkin spice into the filling and drizzle a pumpkin‑infused caramel sauce on top. Perfect for Thanksgiving or any fall gathering, this variation adds warm, earthy notes that echo the season.
Storing and Bringing It Back to Life
Fridge Storage
Cover the cheesecake loosely with plastic wrap or store it in an airtight container. It will stay fresh for up to 5 days. Keep the caramel sauce separate if you plan to add more topping later; this prevents the crust from becoming soggy.
Freezer Friendly
Wrap the entire springform pan in a double layer of freezer‑grade foil, then place it inside a freezer bag. The cheesecake freezes beautifully for up to 2 months. When you’re ready to enjoy it, transfer to the fridge to thaw overnight.
Best Reheating Method
Before serving a frozen slice, let it sit at room temperature for 15 minutes, then microwave for 10‑15 seconds. Add a tiny splash of water (about a teaspoon) to the microwave dish; the steam revives the creamy texture and prevents it from drying out.