I was standing in my kitchen, eyes darting between a half‑roasted pear and a stubbornly sticky honey jar, when disaster struck. The honey had thickened into a syrupy glaze that refused to coat the fruit evenly, leaving me with a sticky mess and a craving for something sweet. I tossed the pears into the oven anyway, hoping the heat would coax the honey into a golden drizzle. The result was a mess of caramelized pears with a crusty, buttery topping that made my taste buds tingle. That night, I vowed to perfect this humble combination into a crisp that would make any dessert table shine.
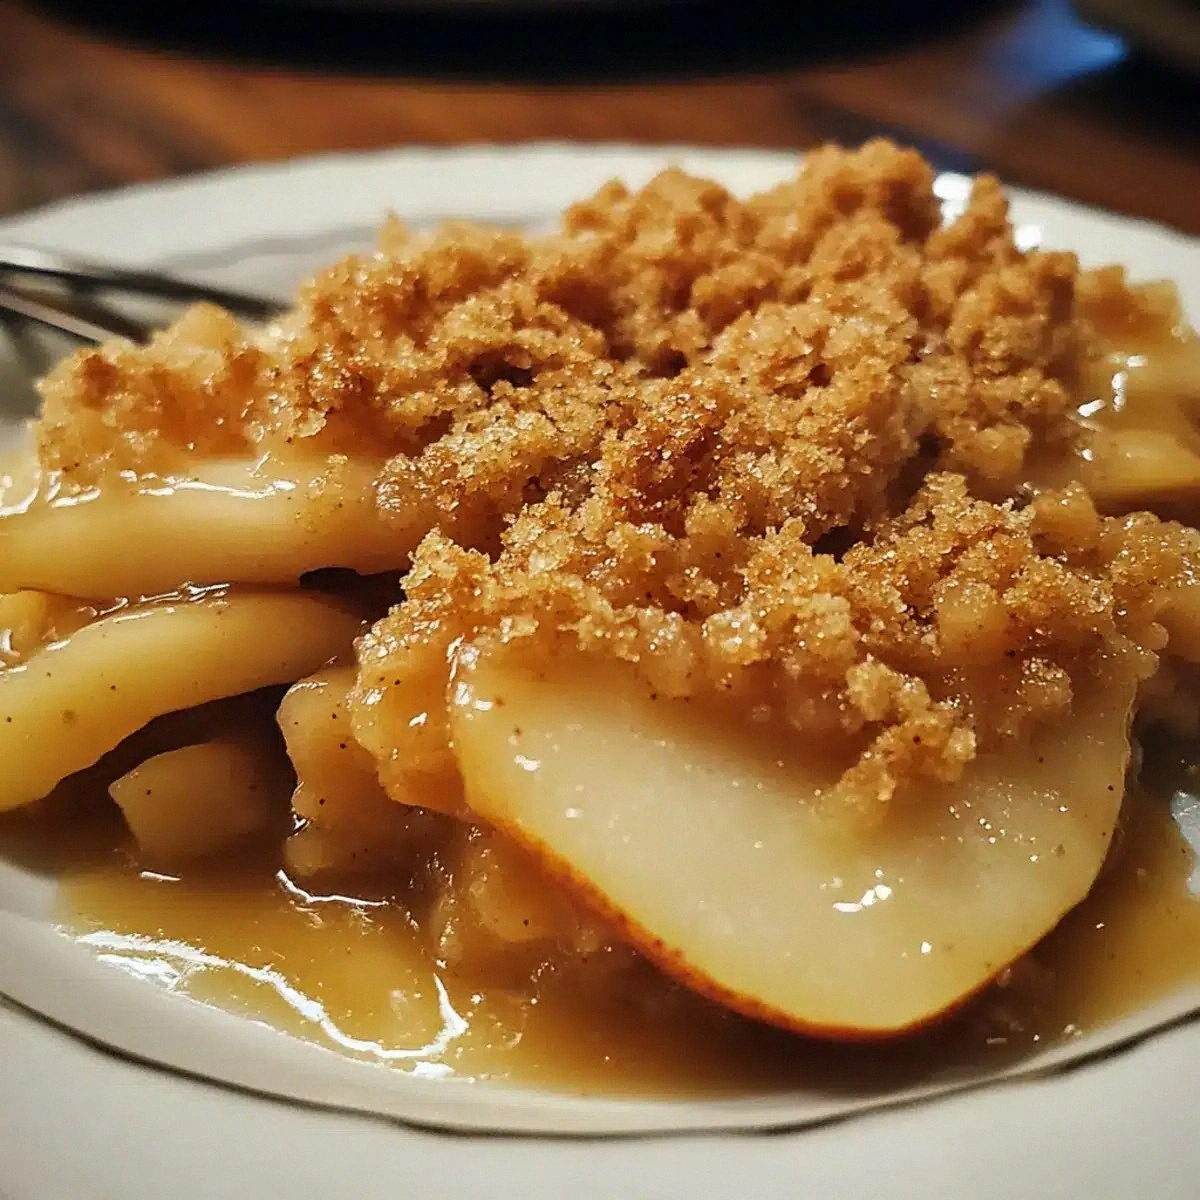
Picture the moment when the oven timer beeps and you pull out a dish that smells like sunshine on a summer afternoon. The pears are perfectly soft, their skins shimmering with a faint sheen of honey that glistens like liquid gold. Beneath the fruit, a golden oat crust crackles with each bite, offering a satisfying crunch that shatters like thin ice. I dare you to taste this and not go back for seconds because the combination of sweet, buttery, and warm spices is irresistible. That first bite is a revelation, a harmonious dance of flavors that lingers on the palate like a sweet memory.
What makes this version stand out is not just the ingredients, but the method that turns simple pears into a showstopper. I’ve experimented with countless crisp recipes, and this one consistently wins because it balances sweetness with a subtle spice kick. The honey isn’t just a sweetener; it’s a glaze that caramelizes in the oven, creating a glossy finish that draws the eye. Ground cinnamon and nutmeg work together to add depth, while the cornstarch thickens the honey to a silky sauce that coats the fruit. If you’ve ever struggled to get the right texture in a fruit crisp, you’re not alone — and I’ve got the fix.
I’ll be honest — I ate half the batch before anyone else got to try it, and the rest were devoured in minutes. Most recipes get this completely wrong by over‑baking the topping or under‑simmering the honey, resulting in a dry, bland dessert. Here’s what actually works: a low‑heat bake, a quick stir of the honey glaze, and a final burst of butter to set the crust. Picture yourself pulling this out of the oven, the whole kitchen smelling incredible, and guests lining up for a second helping. Let me walk you through every single step — by the end, you’ll wonder how you ever made it any other way.
What Makes This Version Stand Out
- Taste: The honey glaze caramelizes in the oven, turning the pears into a silky, golden treat. The subtle sweetness is balanced by a hint of lemon that cuts through the richness.
- Texture: The oat topping crisps to a golden crust that snaps like a thin ice sheet. The pears inside stay juicy, creating a delightful contrast with every bite.
- Simplicity: With only ten ingredients, this recipe fits into any pantry. The entire process takes less than an hour, so you can whip it up on a busy weekday.
- Uniqueness: The cornstarch‑honey blend thickens the glaze so it clings to the fruit instead of pooling. This technique keeps the topping crisp and prevents it from becoming soggy.
- Crowd Reaction: Friends who taste this say it’s the best honey crisp they’ve ever had. They keep asking for a second plate, even when it’s the last slice.
- Ingredient Quality: Using ripe pears and real honey elevates the flavor profile beyond store‑bought mixes. Freshness is the secret ingredient that makes all the difference.
Inside the Ingredient List
The Flavor Base
Fresh pears are the heart of this dessert. Their natural sweetness and tender flesh provide the perfect canvas for the honey glaze. Choosing ripe pears ensures they’ll soften beautifully in the oven without turning mushy. The aroma of pears baking is a promise of comfort and delight that lingers long after the last bite.
Honey is the star sweetener that brings a golden sheen to the pears. It’s not just a sugar; it’s a complex syrup with floral notes that deepen as it caramelizes. The honey’s viscosity allows it to coat the fruit evenly, creating a silky, glossy finish that’s impossible to resist. When it meets heat, it releases a subtle nutty undertone that elevates the entire dish.
Lemon juice adds a bright, acidic counterpoint that balances the honey’s richness. A splash of citrus prevents the fruit from becoming overly sweet and adds a fresh lift. The acidity also helps the honey set into a smooth glaze rather than forming a syrupy pool. It’s a simple trick that keeps the crisp bright and lively.
Ripe pears are essential; under‑ripe pears will stay firm and under‑cooked, while over‑ripe pears will disintegrate. Look for pears that give slightly to gentle pressure and have a fragrant, sweet scent. They should be free of bruises and blemishes. Selecting the right pears is the first step toward a flawless crisp.
The Texture Crew
Rolled oats provide a hearty, chewy base that contrasts with the tender fruit. Their natural starches bind together, creating a firm crust that crisps beautifully in the oven. Oats also add a subtle nutty flavor that complements the honey glaze. The texture of the topping is as important as its taste.
All‑purpose flour serves as a binder, helping the oats and butter stick together. It gives the crisp a slightly doughy consistency that melts in the mouth. The flour also helps absorb excess moisture from the pears, keeping the topping crisp. A light dusting of flour is all you need to achieve the perfect crunch.
Cornstarch is the secret agent that thickens the honey glaze. It prevents the honey from becoming runny and ensures it coats each pear slice. Cornstarch also helps the glaze set into a silky coating that doesn’t drip. This small ingredient makes a huge difference in the final texture.
Unsalted butter adds richness and helps create a golden, flaky crust. When melted, it mingles with the oats and flour, forming a buttery base that crisps to a beautiful color. Butter also contributes a savory depth that balances the sweetness. A small amount of butter can transform a simple topping into a gourmet experience.
The Unexpected Star
Ground cinnamon brings warmth and a hint of spice that pairs beautifully with honey. Its sweet, woody flavor deepens the overall taste profile and adds a comforting aroma. Cinnamon also has a natural ability to enhance sweetness, allowing you to use less honey if desired.
Ground nutmeg offers a subtle, slightly sweet spice that complements the honey and pears. Its warm, nutty undertones add complexity to the crisp, making each bite more intriguing. Nutmeg also helps balance the citrusy brightness from the lemon.
Using both spices creates a layered flavor experience that feels both familiar and adventurous. The combination of cinnamon and nutmeg is a classic pairing that elevates simple desserts into something memorable. When you sprinkle them together, you’re creating a flavor symphony that sings.
These spices also have a visual appeal; they add a golden dusting on top of the crisp, making it look like a golden sunrise. They’re easy to measure and add a professional touch to the finished dish. The spices are a small but mighty addition that turns this crisp into a culinary masterpiece.
The Final Flourish
Brown sugar adds a caramelized sweetness that deepens the honey’s flavor. Its molasses content gives the topping a rich, slightly bitter note that balances the overall sweetness. Brown sugar also contributes to a darker, more appetizing color.
When combined, all these ingredients create a harmonious balance of sweet, spicy, and buttery. Each element plays a specific role, ensuring the crisp is both flavorful and texturally pleasing. The result is a dessert that’s simple to make but difficult to resist.
Even though the recipe is straightforward, the final result is complex and sophisticated. The careful layering of flavors and textures showcases the power of simple pantry staples. It’s a testament to how a few well‑chosen ingredients can create something extraordinary.
Everything’s prepped? Good. Let’s get into the real action and bring this crisp to life.
The Method — Step by Step
- Preheat your oven to 350°F (175°C) and line a 9‑inch square baking dish with parchment paper. While the oven warms, slice the pears lengthwise into thin wedges, removing the core and seeds. Arrange the pear slices in a single layer, slightly overlapping for maximum contact. This step ensures even cooking and a uniform caramelized surface.
- In a small saucepan, combine the honey, lemon juice, ground cinnamon, and cornstarch. Whisk constantly over medium heat until the mixture thickens into a glossy glaze, about 3–4 minutes. The cornstarch will give the glaze a silky texture that clings to the fruit. Keep a close eye; you don’t want it to burn.
- Drizzle the warm honey glaze over the pears, making sure each slice is coated. The glaze will bubble and caramelize as it hits the fruit, creating a golden sheen. Allow the glaze to settle for a minute so the pears absorb the sweetness. This is the moment of truth where flavor starts to mingle.
- In a separate bowl, combine rolled oats, all‑purpose flour, brown sugar, and ground nutmeg. Stir until the mixture is evenly mixed and the oats are coated. The nutmeg adds a subtle warmth that enhances the overall flavor. This dry mix will form the crisp's golden crust.
- Melt the butter in a small saucepan until it turns a light golden color, then pour it over the oat mixture. Stir until the oats are fully coated and the mixture resembles wet sand. The melted butter creates a flaky, buttery texture that crisps beautifully. The golden color signals readiness for the baking stage.
- Sprinkle the oat mixture evenly over the glazed pears, pressing gently to ensure it settles into the spaces. The oats should cover the fruit like a blanket, creating a cohesive structure. This step locks in the flavors and gives the crisp its signature crunch.
- Place the baking dish in the preheated oven and bake for 25–30 minutes, or until the topping is golden brown and the pears are tender. The aroma will fill your kitchen, signaling that the crisp is nearing perfection. Use a toothpick to check for tenderness; it should slide in easily.
- Remove the crisp from the oven and let it cool for 10 minutes before serving. The cooling period allows the glaze to set into a silky coating that’s easier to scoop. A gentle drizzle of extra honey can add a final touch of sweetness if desired.
That’s it — you did it. But hold on, I've got a few more tricks that'll take this to another level. These insider tips will help you perfect every bite and ensure that your crisp is always a crowd‑pleaser.
Insider Tricks for Flawless Results
The Temperature Rule Nobody Follows
Many bakers think a higher temperature is always better, but for this crisp, a gentle 350°F is key. A lower temperature ensures the pears cook through without burning the topping. It also allows the honey glaze to caramelize slowly, creating that silky coating. Remember, patience is the secret ingredient to a flawless crisp.
Why Your Nose Knows Best
Before you even taste the crisp, give it a good sniff. The aroma of caramelized honey and warm spices is a reliable indicator of readiness. If you smell a hint of burnt sugar, it’s time to pull the dish out. Your nose will save you from a dry, over‑baked dessert.
The 5‑Minute Rest That Changes Everything
After removing the crisp from the oven, let it rest for exactly five minutes. This rest period allows the glaze to set, preventing it from running off when you plate the dish. It also lets the flavors meld, giving you a more cohesive taste experience. Trust me, this small pause makes a world of difference.
Keep It Moist, Not Dry
When slicing the pears, don’t cut them too thick. Thin slices absorb the glaze more effectively and stay juicy. If the pears are too thick, they can become gummy. The right thickness ensures a tender, flavorful bite every time.
Use a Silicone Mat
Placing a silicone mat on your baking sheet prevents the crisp from sticking. This makes cleanup a breeze and keeps the crust intact. It also ensures even heat distribution, so the topping browns uniformly. A small investment that pays off in every bake.
Creative Twists and Variations
Maple‑Spiced Pear Crisp
Swap honey for pure maple syrup and add a pinch of ground ginger for a subtle kick. The maple’s earthy sweetness pairs beautifully with the pears, while ginger adds a warm, spicy note. This variation is perfect for a cozy autumn gathering.
Almond‑Glazed Pear Crisp
Replace the butter with almond butter for a nutty depth. The almond butter also adds a creamy texture that contrasts nicely with the crisp topping. This version is great for those who love a nutty, rich flavor profile.
Chocolate‑Covered Pear Crisp
Drizzle melted dark chocolate over the finished crisp for a decadent twist. The chocolate’s bitterness balances the honey’s sweetness, creating a complex flavor profile. Serve with a scoop of vanilla ice cream for a dessert that feels indulgent.
Berry‑Infused Pear Crisp
Add a handful of fresh blueberries or raspberries to the pear layer. The berries introduce a tart contrast that brightens the dish. The combination of berries and honey creates a vibrant, colorful dessert.
Spiced Coconut Pear Crisp
Sprinkle shredded coconut on top of the oat mixture before baking. The coconut adds a tropical flavor and a chewy texture. Pair this with a splash of coconut milk in the glaze for an extra tropical experience.
These variations turn the basic recipe into a playground of flavors. Experiment with different spices, sweeteners, or toppings to keep the crisp fresh and exciting. Your guests will never know what delightful surprise awaits them.
Storing and Bringing It Back to Life
Fridge Storage
Store the crisp in an airtight container for up to three days in the refrigerator. The moist environment helps preserve the buttery topping. When you’re ready to serve, let it sit at room temperature for ten minutes to soften the glaze.
Freezer Friendly
Wrap the crisp tightly in plastic wrap and place it in a freezer bag. It can be frozen for up to two weeks. Thaw overnight in the refrigerator, then reheat in a 350°F oven for ten minutes to restore crispness.
Best Reheating Method
Reheat the crisp in a preheated oven at 300°F for 8–10 minutes. Add a splash of water to the bottom of the dish to create steam, which keeps the topping from drying out. The result is a warm, freshly baked crisp that tastes just like new.
With these storage tips, you can enjoy this honey pear crisp anytime, whether it’s a spontaneous dessert or a planned treat.